6 Issues That Cause Skipped Stitches
Maura Kang
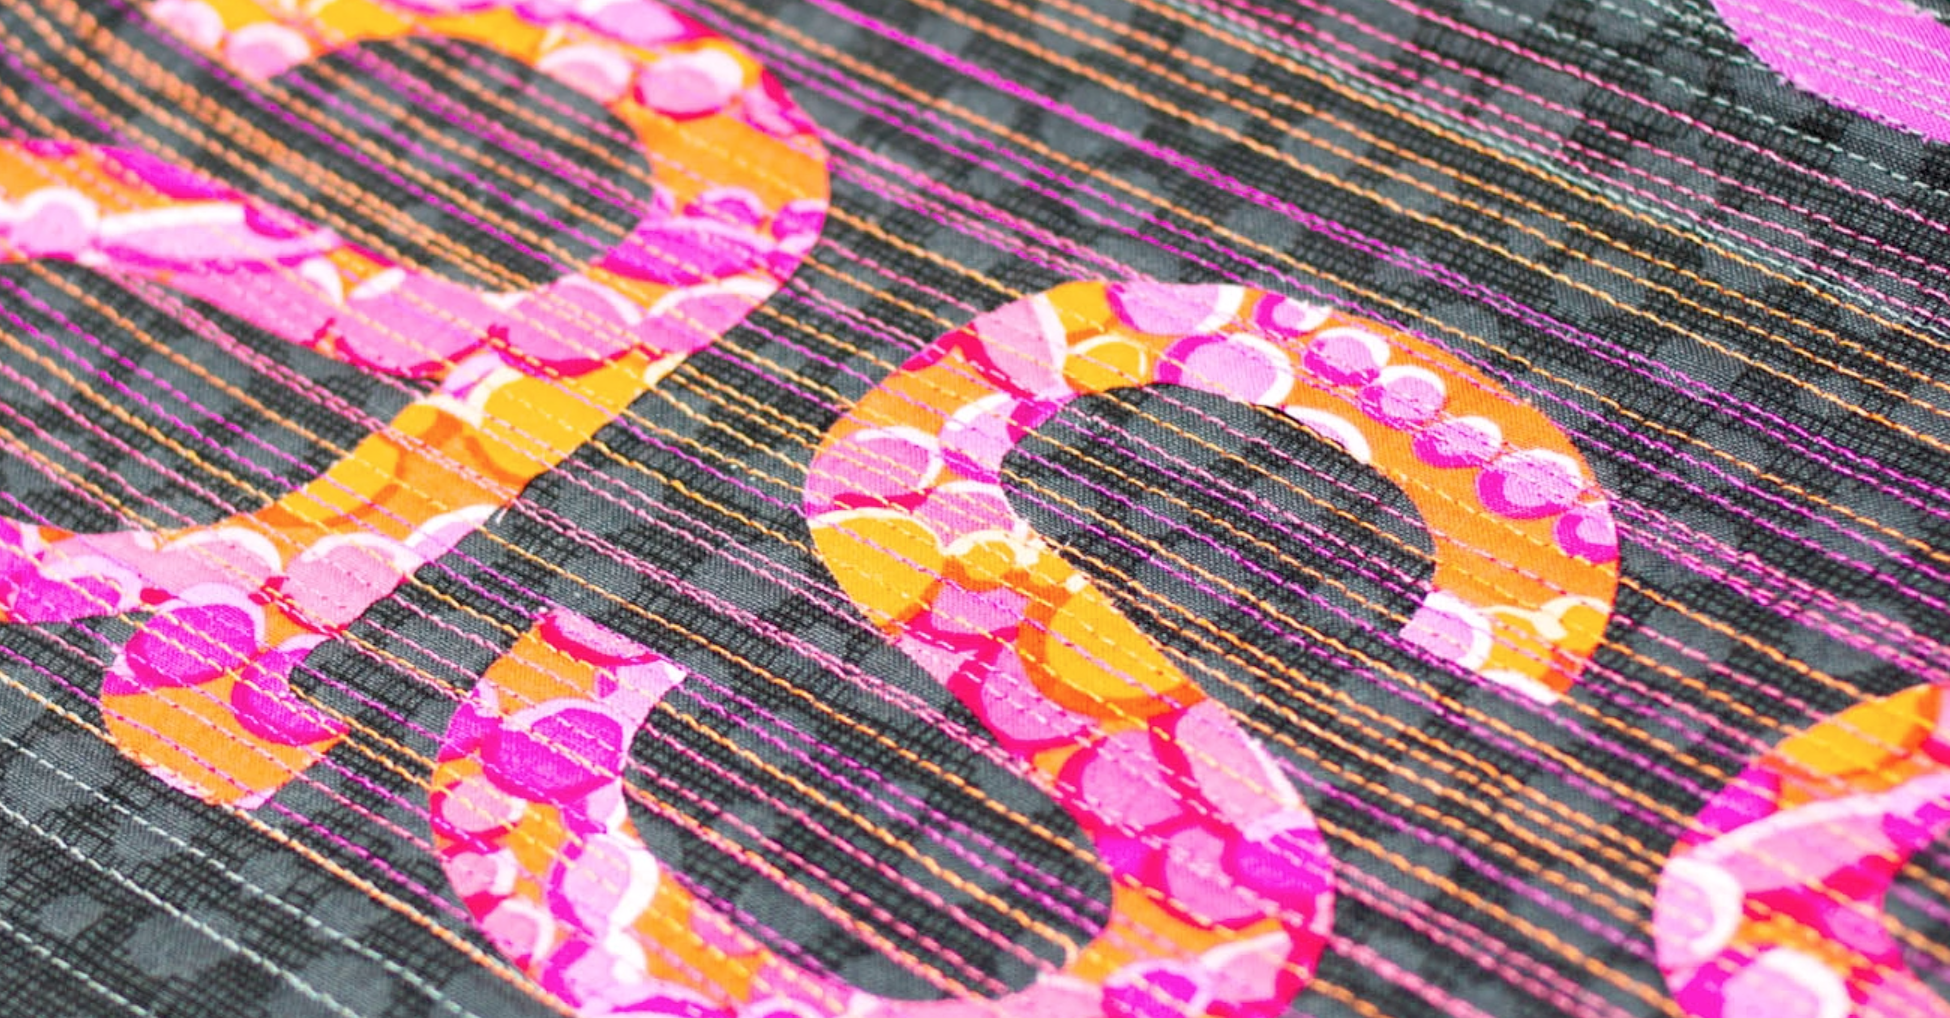
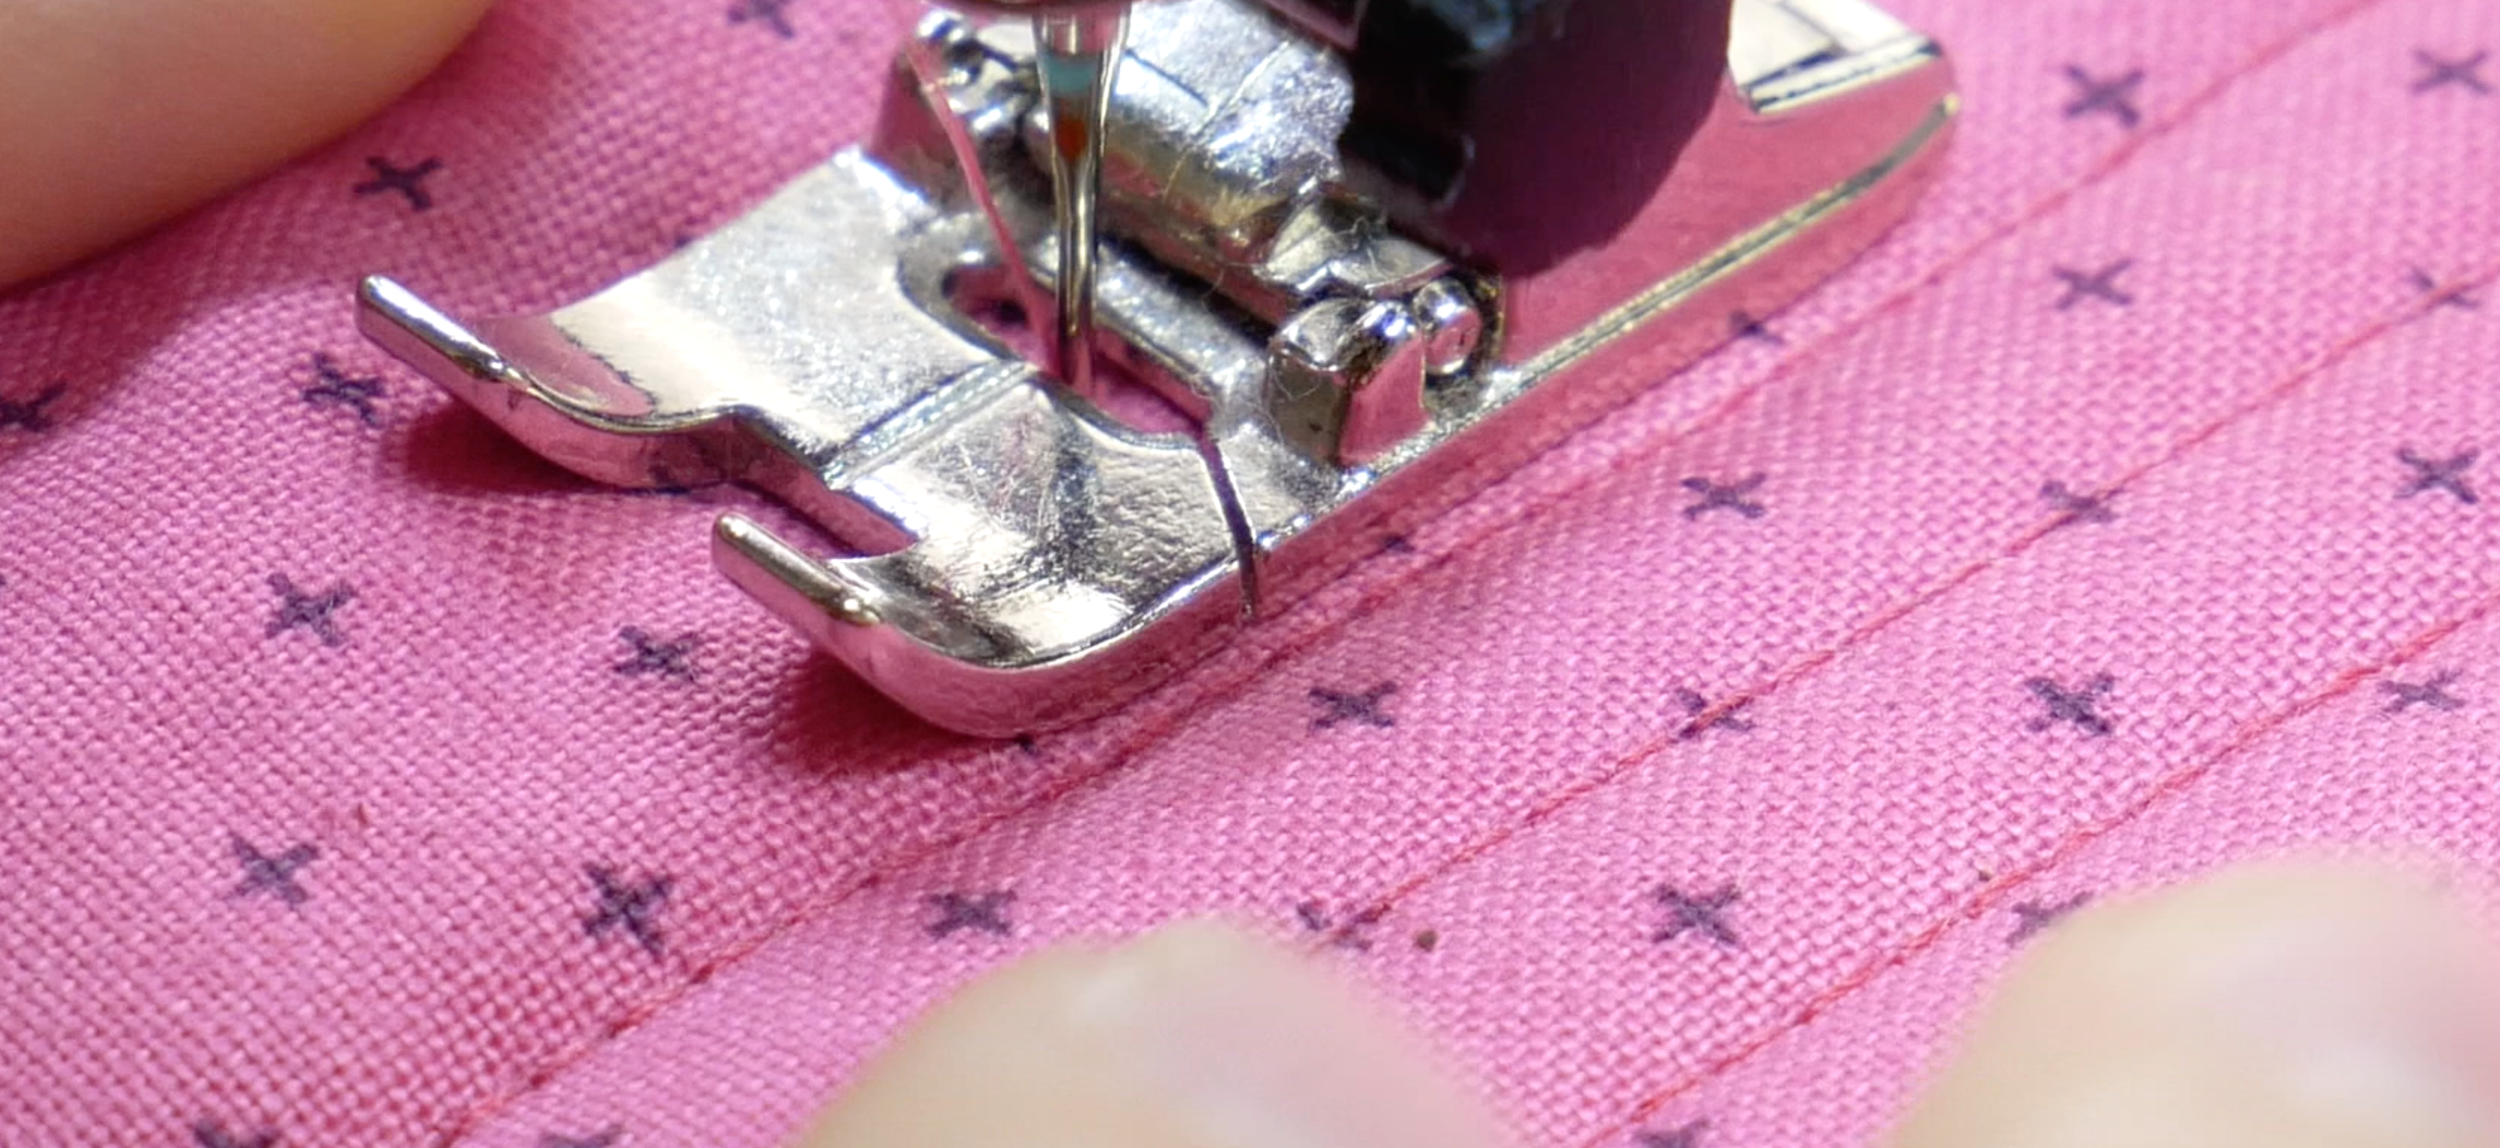
Skipped stitches can be difficult to diagnose, so we'll take you through all of the things that may cause them, and show you how to fix them!
Read MoreUse the form on the right to contact us.
You can edit the text in this area, and change where the contact form on the right submits to, by entering edit mode using the modes on the bottom right.
WonderFil brings you the latest news, events, upcoming thread lines and special tips and advice. Follow WonderFil Specialty Threads on our social media: Facebook, Instagram, Twitter, Pinterest, and Youtube.
Skipped stitches can be difficult to diagnose, so we'll take you through all of the things that may cause them, and show you how to fix them!
Read MoreIf you've ever wondered if cotton or polyester threads would be better for your quilt, we break down the key differences to help you decide!
Read MoreSo you want to make a mask, but you're new to sewing. In this blog we go through everything you need to know to make a great mask!
Read MoreGood things come in small packages, including the beautiful Eleganza #8 Perle Cotton threads! Dive in to see this collection by Alison Glass
Read MoreWhen doing hand embroidery, you can add a huge variety of textures and materials. Here are our suggestions for the best results.
Read MoreFreestanding lace is a wonderful technique that lends itself to a wide variety of applications. Today we’ll be showing you how to embroider freestanding lace as well as a few of our favourite threads for the job!
Read MoreThere’s a lot of different kinds of longarm threads out there, so how do you know which one to choose? We’ll go through the best threads for both your machine, and your quilting projects.
Read MoreThe Wonder Guard is useful for storing thread neatly, and for getting a nice even feed whenever you’re using a spool that requires a vertical feed.
Read MoreFor a thread that’s truly out of this world, Starry Night Dazzle is perfect for adding a totally unique texture and colour to your projects. Designed by Kim Rado of Starry Night Hollow, Starry Night Dazzle is a collection of 35 colours from the Dazzle thread line and know how to stand out.
Read MoreWonderFil’s very own Andrew Ngai appeared on the Quilt Show to talk about a few essential threads that every quilter needs in their tool kit, and we’d like to share this episode with you!
Read MoreToday we're going to talk about the Thread Tamer. It's a multipurpose thread stand and is the perfect tool for your sewing room.
Read MoreWhen you’re looking to begin your collection with a new thread line, it’s often worthwhile to shop for packs to get a good assortment of starter colors and a great deal. Whether you’re starting a collection for machine embroidery, hand embellishing, piecing, or quilting, we’ll show you our favorite affordable thread packs that are perfect for picking up all the colors you need to get started with these techniques and more.
Read MoreThere’s a lot of different quilting threads out there and it isn’t always as simple as “cotton or polyester”. Both material and thread weight make a huge difference in the appearance of your quilting, so we’re going to take a closer look at what threads you should consider depending on the look and style of the quilting you want to achieve.
1. Invisible Quilting, Stitch in The Ditch, Trapunto, & Micro Quilting
You’ll want to choose a specialty thread when you don’t want your quilting to show. Many quilters will reach for a monofilament thread, you know, the thread that resembles fishing wire and comes in clear and smoke. However, these threads still show up under bright lights and can cause your quilts to feel stiff and inflexible, especially with dense stitching.
Quilting done with monopoly thread.
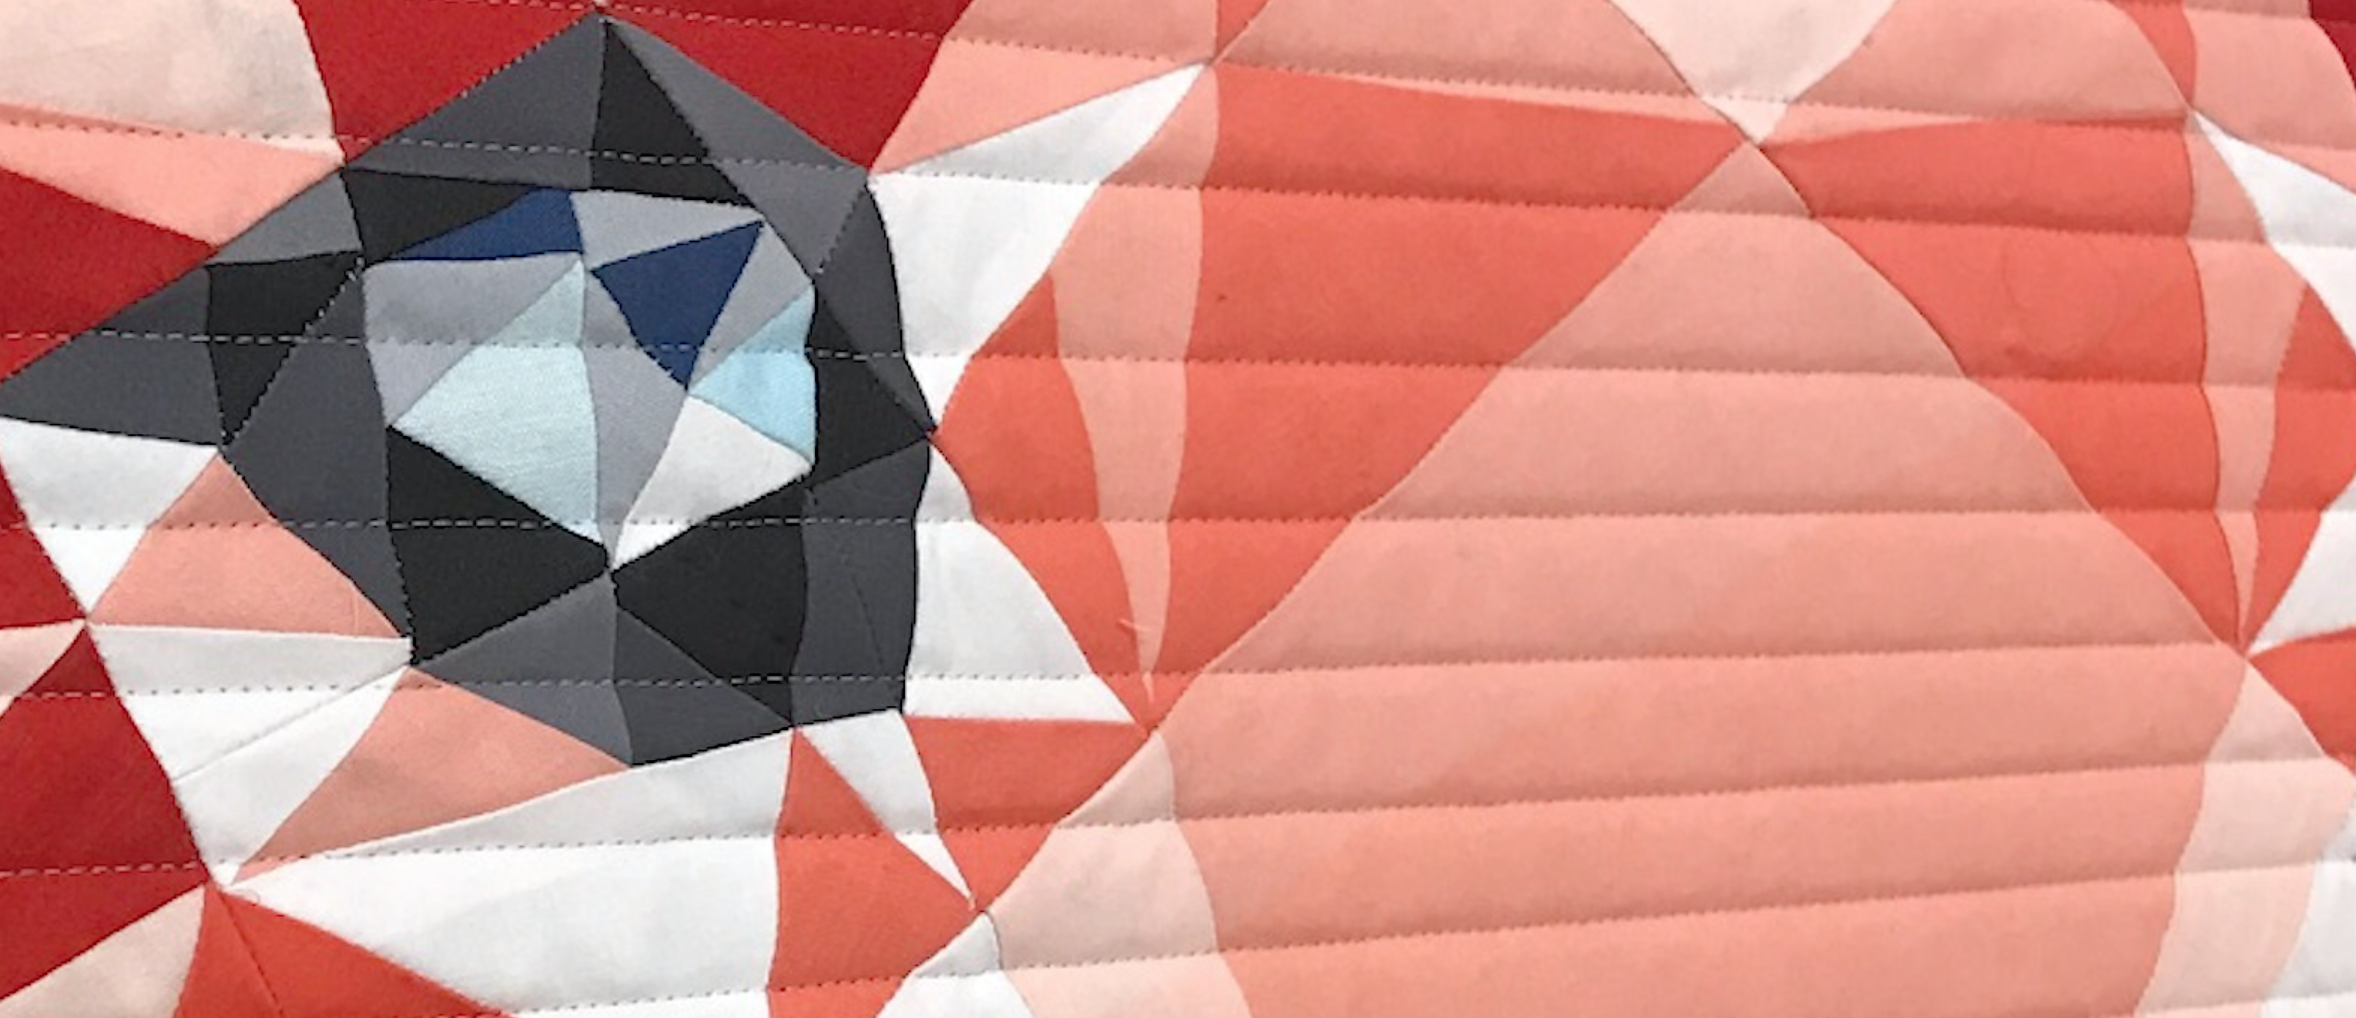
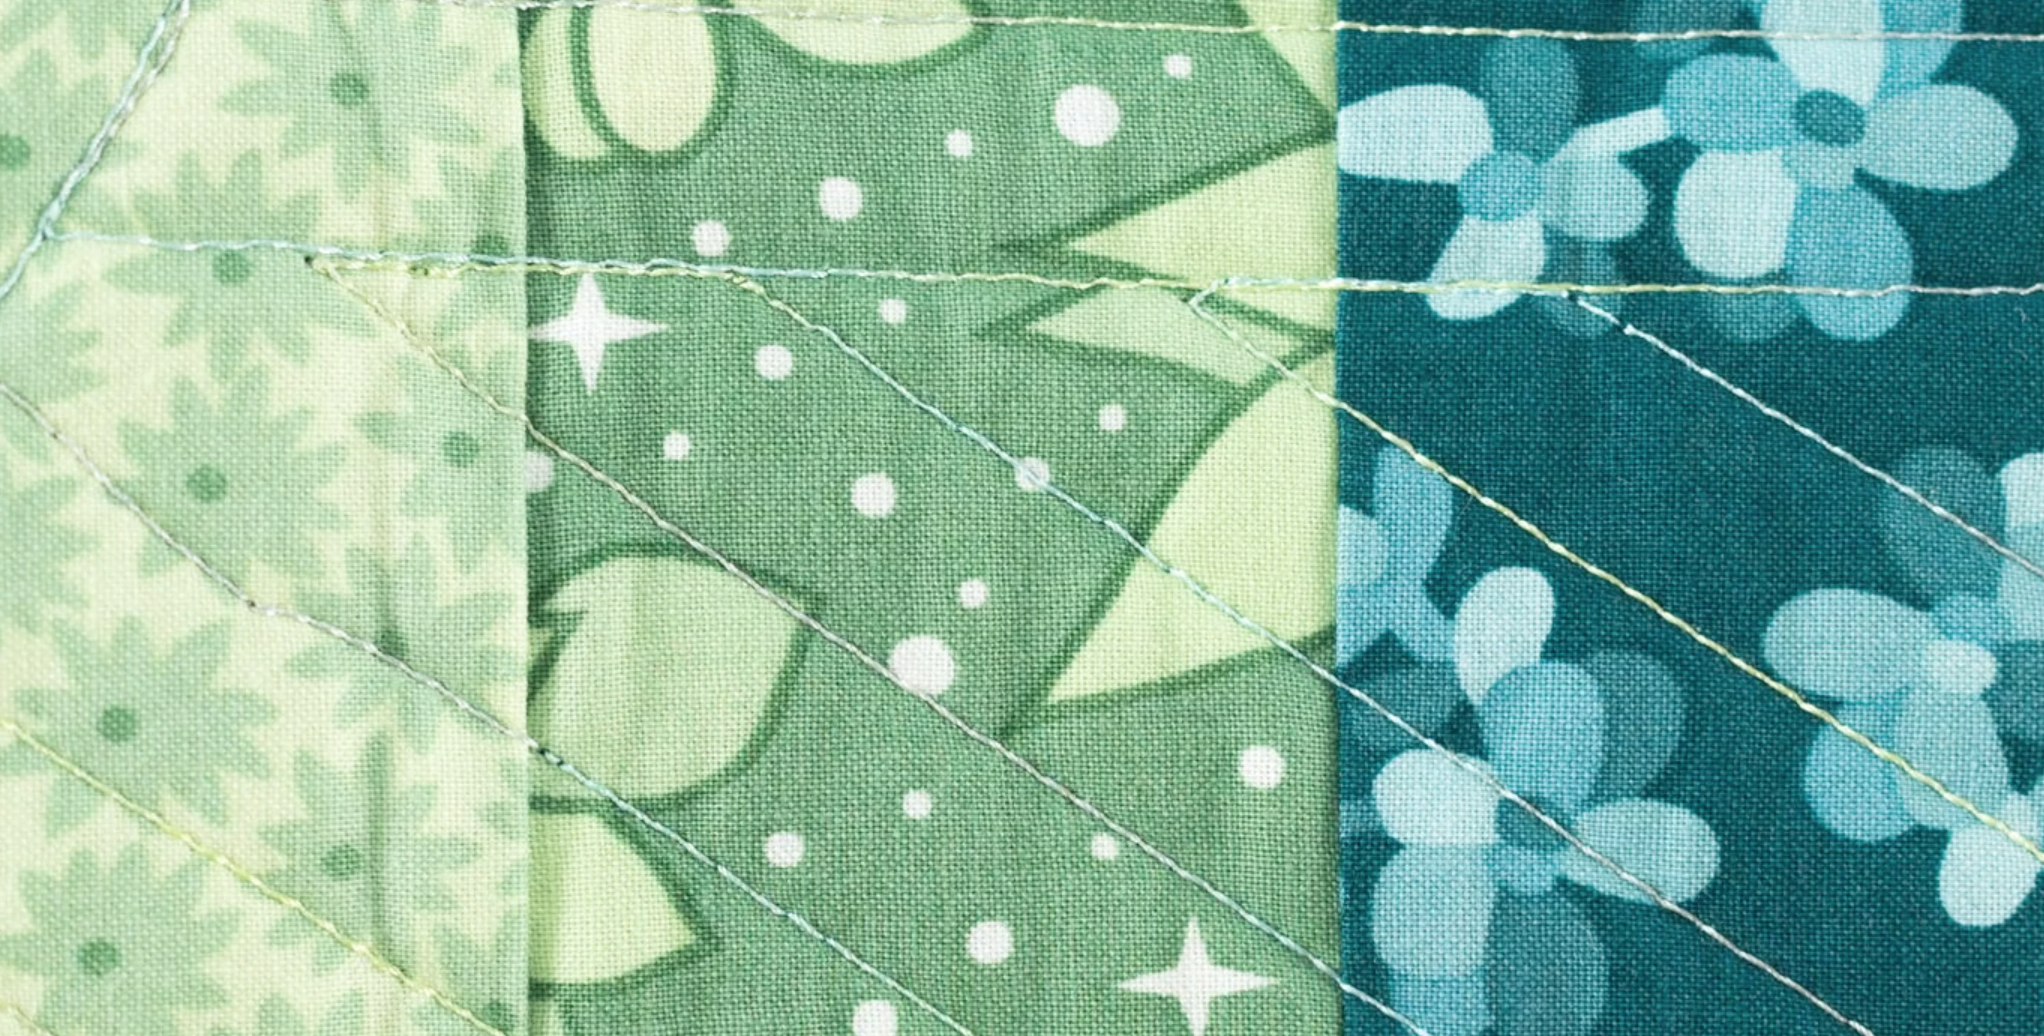
Instead, we suggest this 100wt cottonized polyester thread called InvisaFil. This super-fine thread blends incredibly well in the fabric simply by choosing a basic neutral color. You don’t even need to match the color very closely. We used a light grey shade of InvisaFil on this quilt, and ask you can see, it blends across every color.
Longarm quilting with InvisaFil thread.
Because the thread is so small, it doesn’t take up a lot of extra space in the fabric. That means you can get away with doing a lot of dense quilting or micro quilting and your fabric will still stay soft and flexible. Even quilting this densely with a regular medium 40 or 50wt thread would make your fabric stiff as a board, so choosing a finer thread like InvisaFil will greatly improve the look and feel of your quilts. It also means that when doing a technique like stitch in the ditch, you only need to worry about “stitching in the neighbourhood”. Afterall, even if you fall out of the ditch, the thread won’t even show up anyway.
Stitch in the ditch using InvisaFil thread.
2. Hand Quilting & Big Stitch Hand Quilting
Quilting by hand takes a whole lot of time and patience, so you want to choose the best thread for the job so as not to make the task more difficult than it needs to be. A cotton thread has a good amount of friction to it that your stitching won’t easily slide out. We love Konfetti and Tutti 50wt long staple Egyptian cotton for this reason. As a bonus, these threads have been double gassed, a process that removes 80% of the lint from the surface of the thread. This process is repeated a second time, resulting in an incredibly low lint thread that not only looks clean and professional, but glides through the fabric with ease.
If you’re doing big stitch hand quilting, you’ll want to choose a larger thread that shows up a lot more. One of the options you can go with are these 12wt long staple Egyptian cotton threads called Spagetti and Fruitti. These are thicker threads that will stand out boldly against the fabric, and like Konfetti and Tutti, have also been double gassed to achieve a super low lint finish.
If 12wt isn’t bold enough for your quilt, you can reach for an 8wt thread. Eleganza is a double gassed perle cotton thread that is even thicker than Spagetti and Fruitti. Many stitchers use this thread for hand embroidery, however it’s also the perfect choice for big stitch hand quilting. But if you’re really going for a thread that likes to show off, you don’t need to settle for anything less than Dazzle. This gorgeous 8wt thread is a glossy rayon wound with 1 single strand of metallic, giving it a hint of sparkle. This reflective thread is perfecting for adding a glitz to your big stitch hand quilting without compromise!
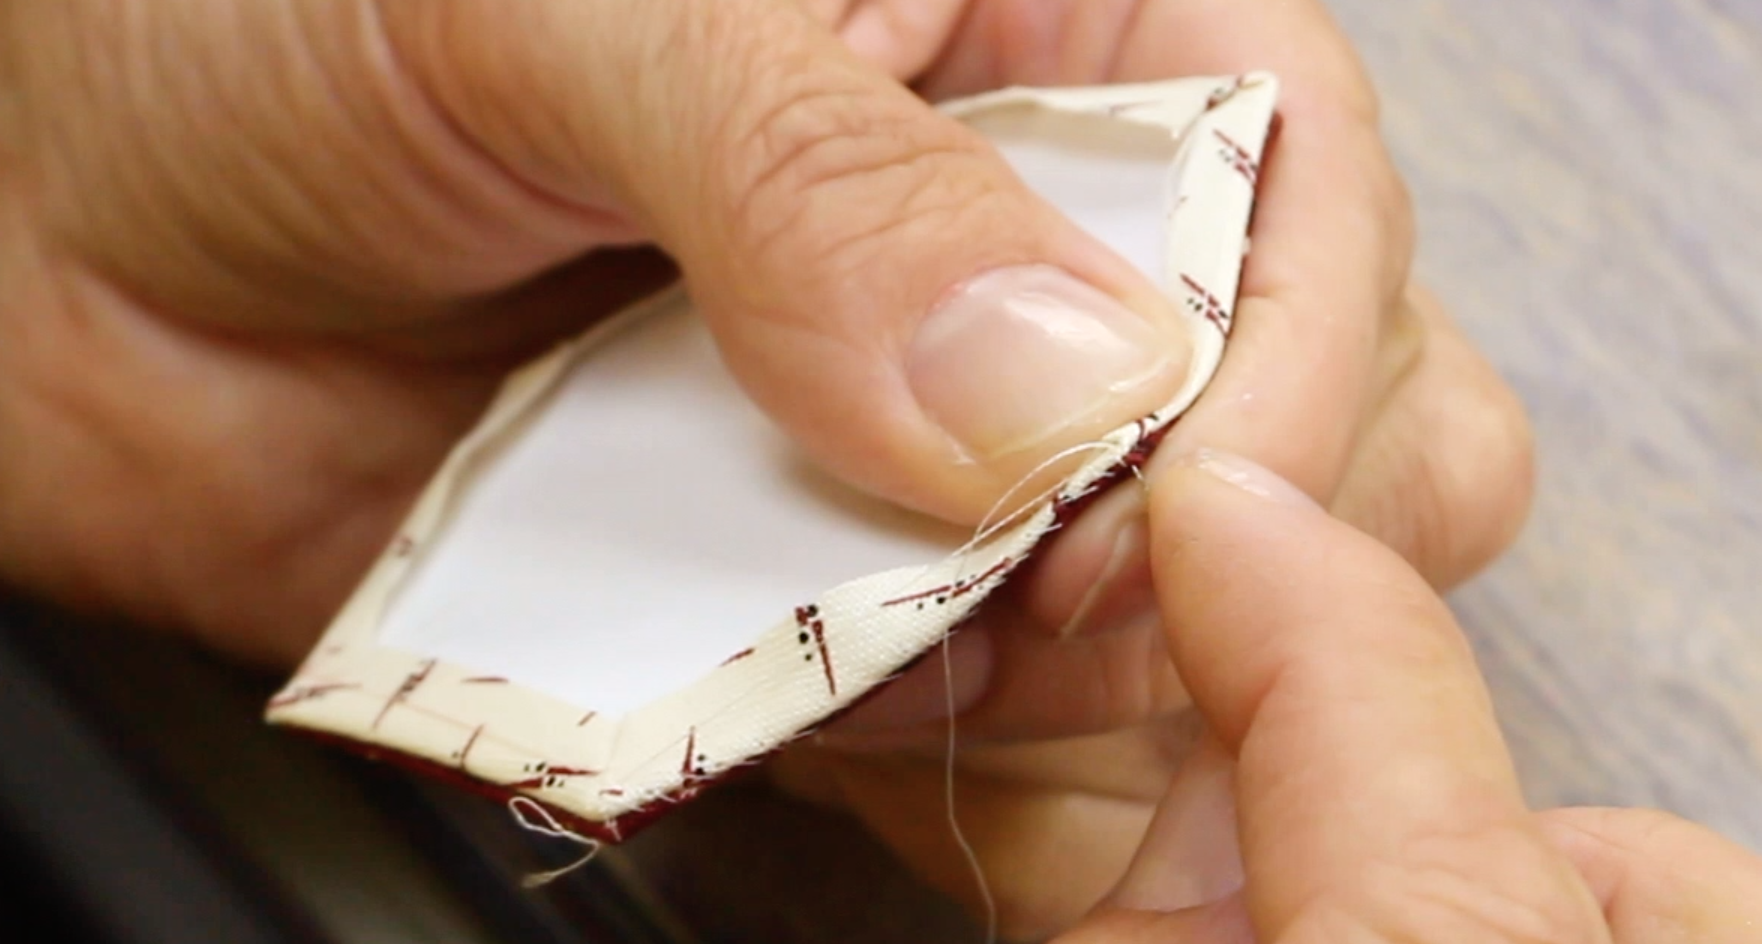
3. English Paper Piecing & Turned Appliqué
English paper piecing is a time consuming, but extremely worthwhile technique that is sure to add a lot of intricate beauty to your finished quilt pattern. Because this technique requires small stitches by hand, you’ll want to choose a small thread that blends into your fabric so it doesn’t show. InvisaFil 100wt thread is once again the best choice. Because this super fine thread takes up so little space in the fabric, your EPP pieces will sit tighter together, and the thread will basically vanish in the fabric where it won’t be seen.
If you tend to pull a lot on your thread, or if you have arthritis in your hands or struggle with small, slippery threads, then you can also use DecoBob 80wt as an alternative choice. This thread is only slightly thicker than InvisaFil but still does a great job hiding in the fabric and is a little easier to hand stitch with.
Both of these threads are also fantastic choices for turned appliqué for the same reasons. Your appliqué pieces will sit flatter and the thread will hide significantly better than if done with a regular medium weight thread. Simply choosing these specialty threads for these techniques will make a huge difference in the look of your turned appliqué.
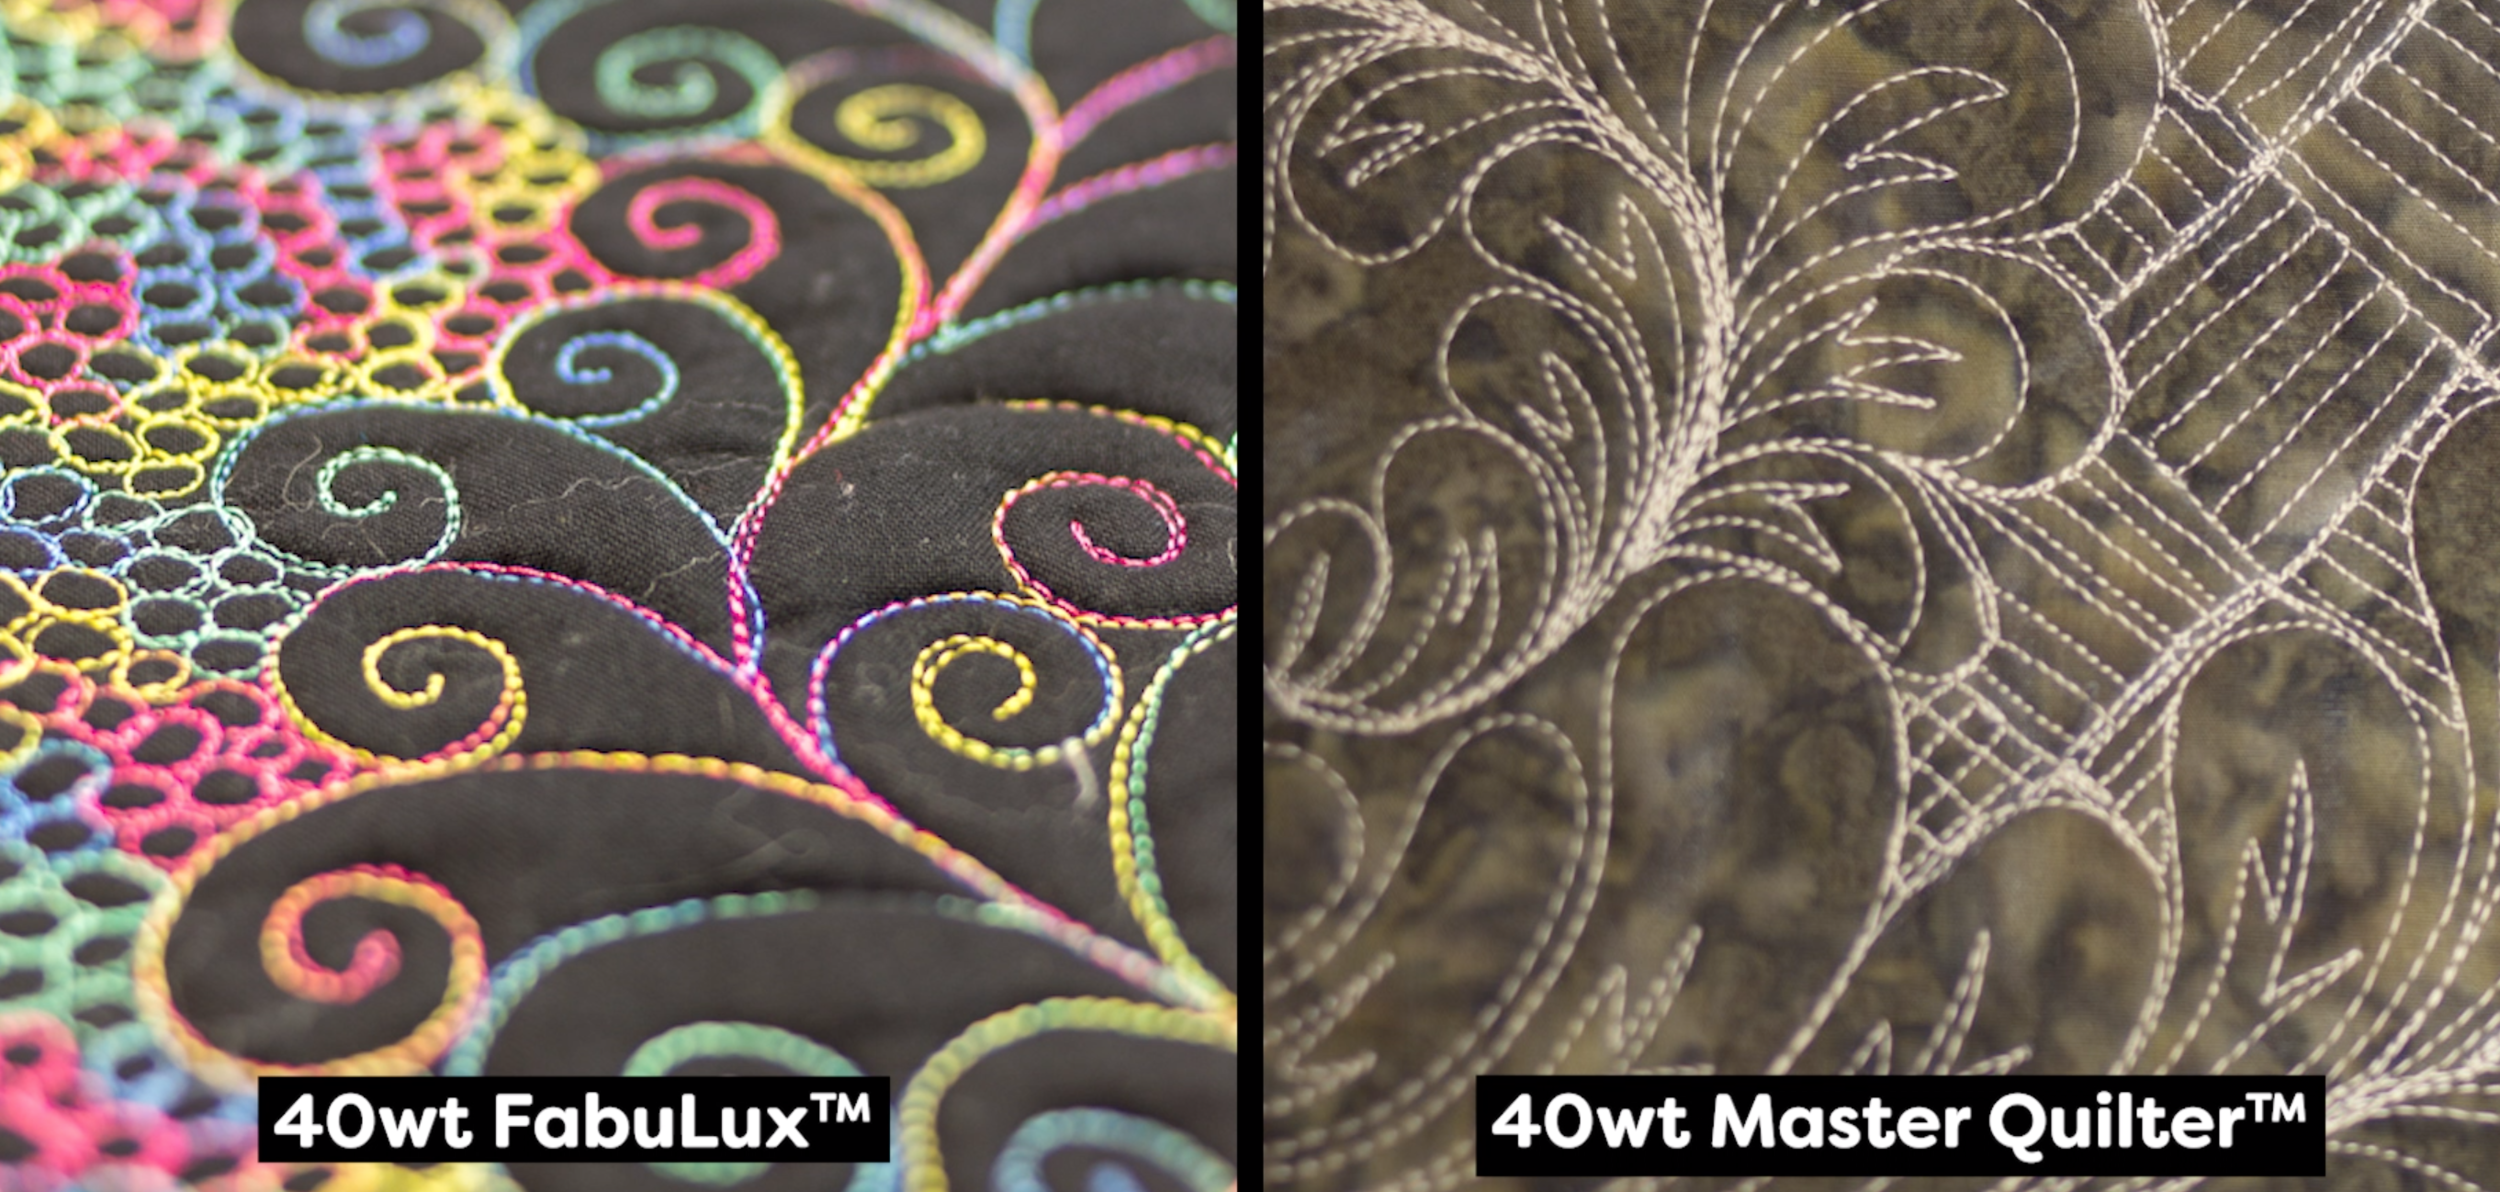
4. Decorative Machine Quilting
Do you want your quilting to stand out? Sometimes a regular quilting thread simply won’t cut it. Let’s take a look at FabuLux, a gorgeous 40wt trilobal polyester thread that has a soft and shiny finish. Most threads you’ll come across are round in shape, however a trilobal polyester thread is actually triangular in shape. The flat sides of this thread help to reflect light from its surface, giving it a glossy look that helps it to stand out on your quilt. This thread comes in 5 bold neon colors and 35 variegated colors. If you want a high contrast look to your quilting, you can choose one of the bolder colors. If you want a more subtle look, then matching the colors to your fabric will give your quilting a simple soft gloss.
But sometimes you just need to go bolder. A heavy 12wt thread is actually the thickest thread you can fit through the eye of your sewing machine needle. Spagetti and Fruitti 12wt double gassed Egyptian cotton threads are quality, low lint options that love to stand out from the fabric and add a great texture to your quilting.
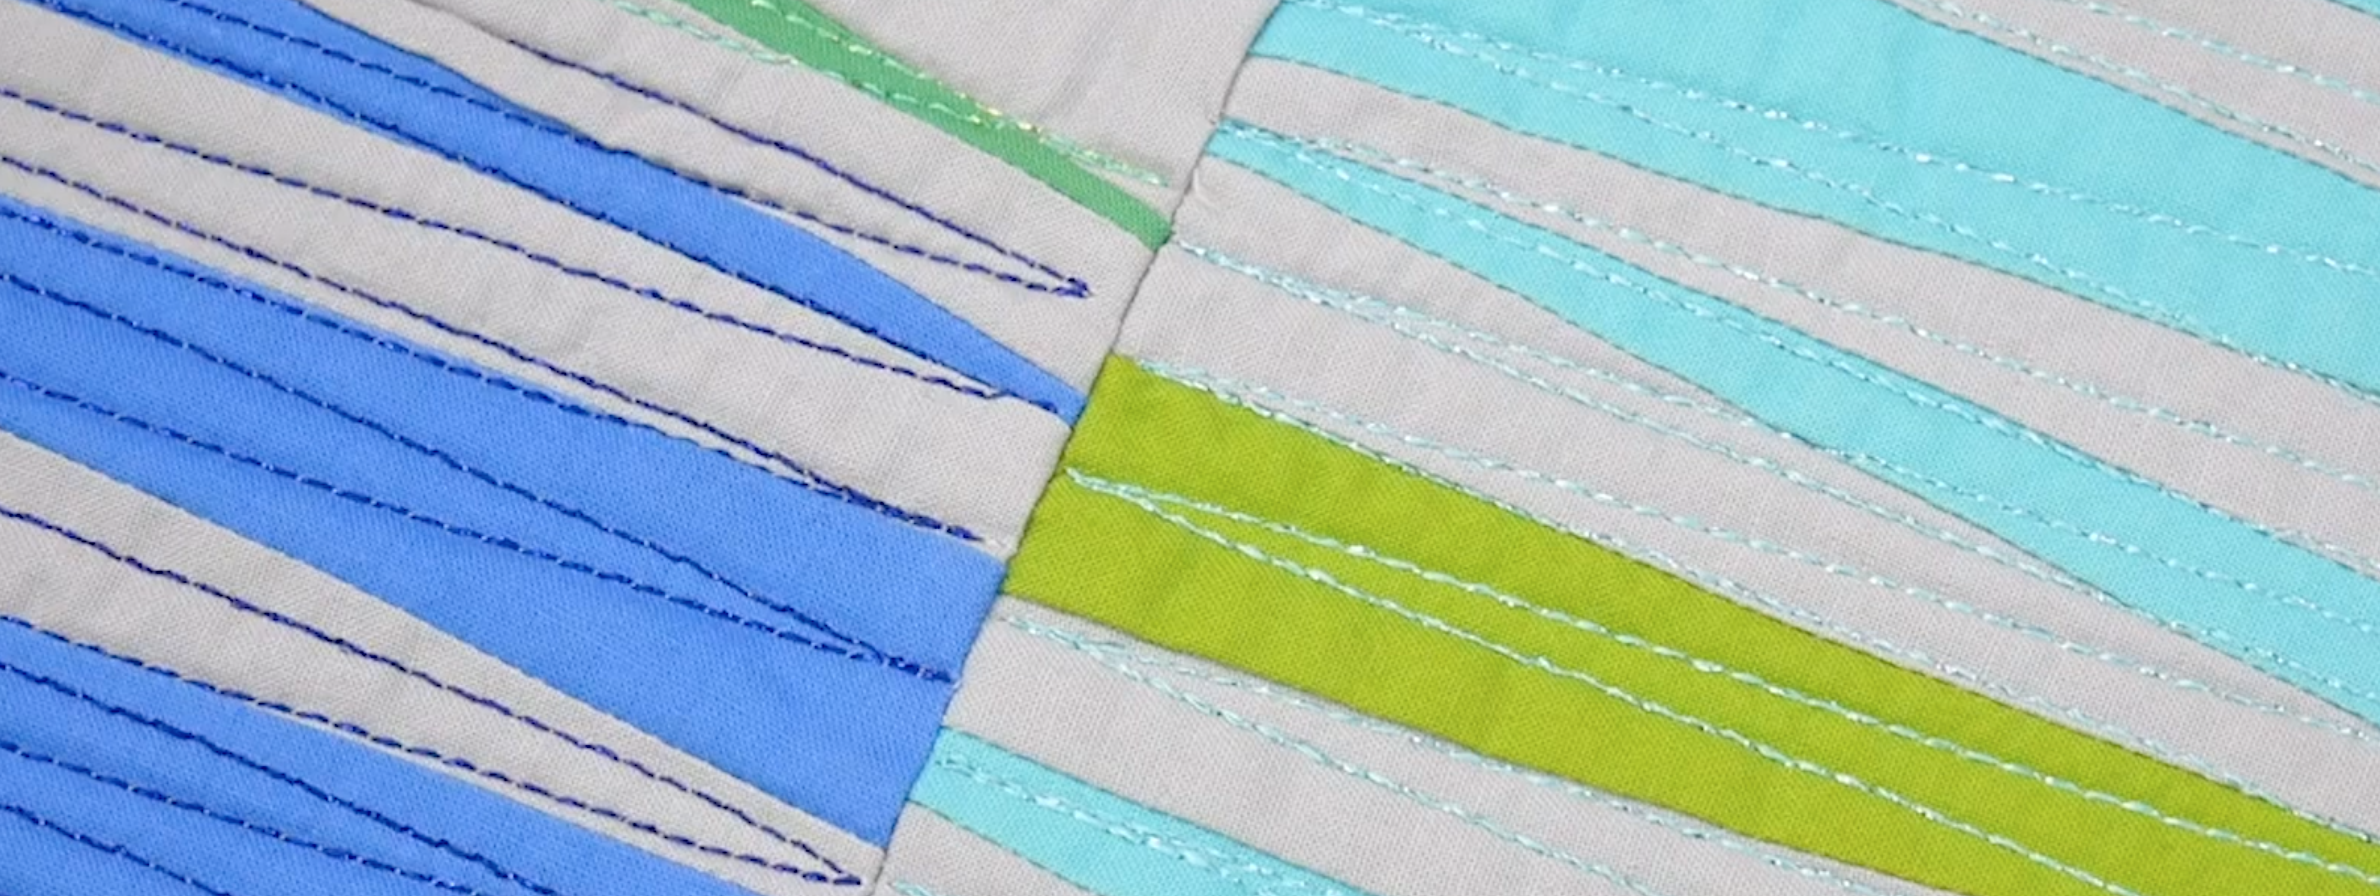
Or you can make your quilting really stand out with Accent, a 12wt 100% rayon thread. Or GlaMore, a 12wt rayon thread woven with a single strand of metallic for that pop of sparkle. While these threads aren’t sturdy enough for edge to edge quilting on quilts that will be used, they are perfect for outlining, doing decorative quilting in smaller patches, or for any kind of quilting, including edge to edge, on art quilts or wall hung quilts.
Longarm quilting with GlaMore thread.
5. Regular Machine & Longarm Quilting
If you need a reliable thread that can be used for regular machine quilting or on the longarm, we always recommend choosing a quality thread that will treat your machine right. Afterall, many people will invest thousands of dollars on a high quality machine, then go on to feed it low quality thread.
Konfetti and Tutti are our recommended medium weight 50wt cotton thread lines as they have been double gassed for a beautifully low lint finish. This will greatly reduce the lint build up in your machine, meaning you won’t need to clean it or take it in for servicing as frequently. The thread is also totally free of glue or residues that are sometimes applied to threads to give the illusion of a lower lint thread, however these residues can gum up your machine and can be even more difficult to clean out than regular lint. A quality cotton thread like Konfetti and Tutti will help keep your machine healthy and running smoothly.
Quilting with Tutti 50wt variegated cotton thread.
If you prefer quilting with polyester thread, then Master Quilter is your reliable workhorse. This 40wt cottonized polyester has been treated so that it has a matte finish with no stretch, making it easy to quilt with. This is the thread line we recommend to anyone new to longarming or anyone looking for an easy, reliable thread line they can count on to get the job done right. This thread is also completely lint free, making it a quality choice for any machine.
Master Quilter on a longarm machine.
And for those who love the way polyester thread stitches on the machine but want the look of a cotton, meet Ultima. This 40wt thread has a polyester core that’s been wrapped with cotton on the outside, giving it the strength and ease of polyester with a cotton look. Ultima is the cleanest wrapped quilting thread on the market and offers reliability at an affordable price point.
Quilting with Ultima thread.
We hoped this helps give you an idea of what quilting threads exist, as well as how these different threads should be chosen depending on the look or technique you’re planning. Were you inspired to sew with WonderFil threads? Find a store in your area that carries WonderFil at http://www.shopwonderfil.ca/shop-local. You can also sign up for our free newsletter to receive more educational sewing tips, tutorials, and free patterns. Register by clicking here! We’ll see you again next time!
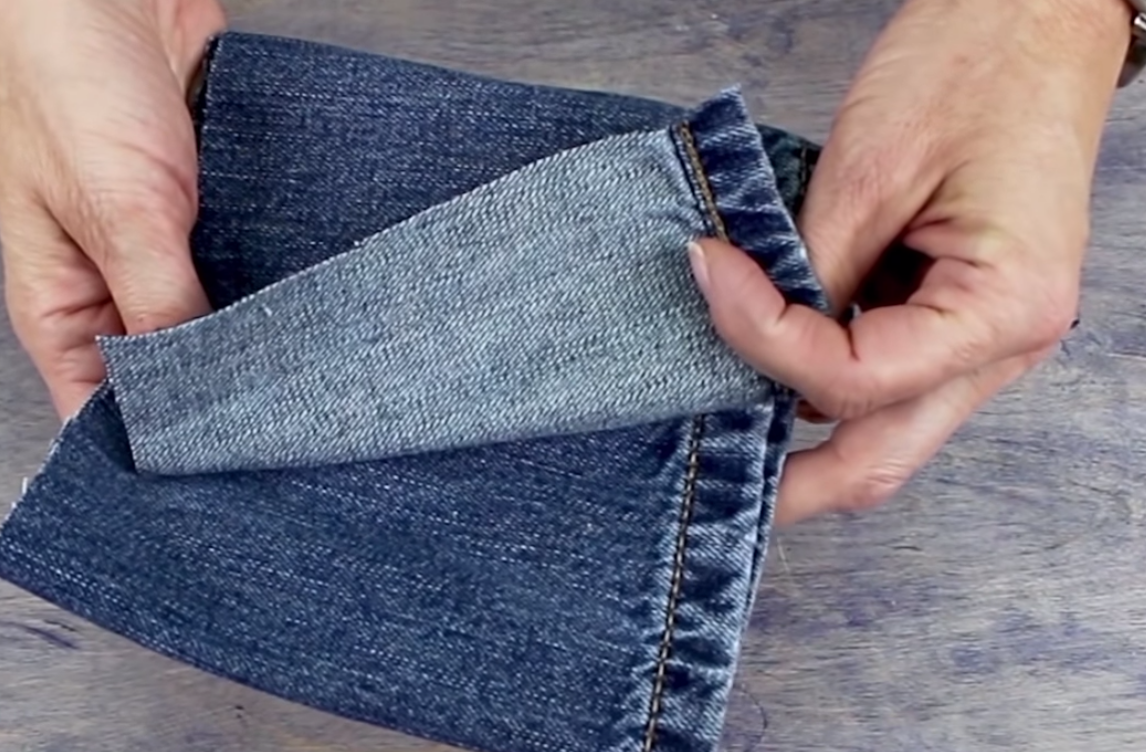
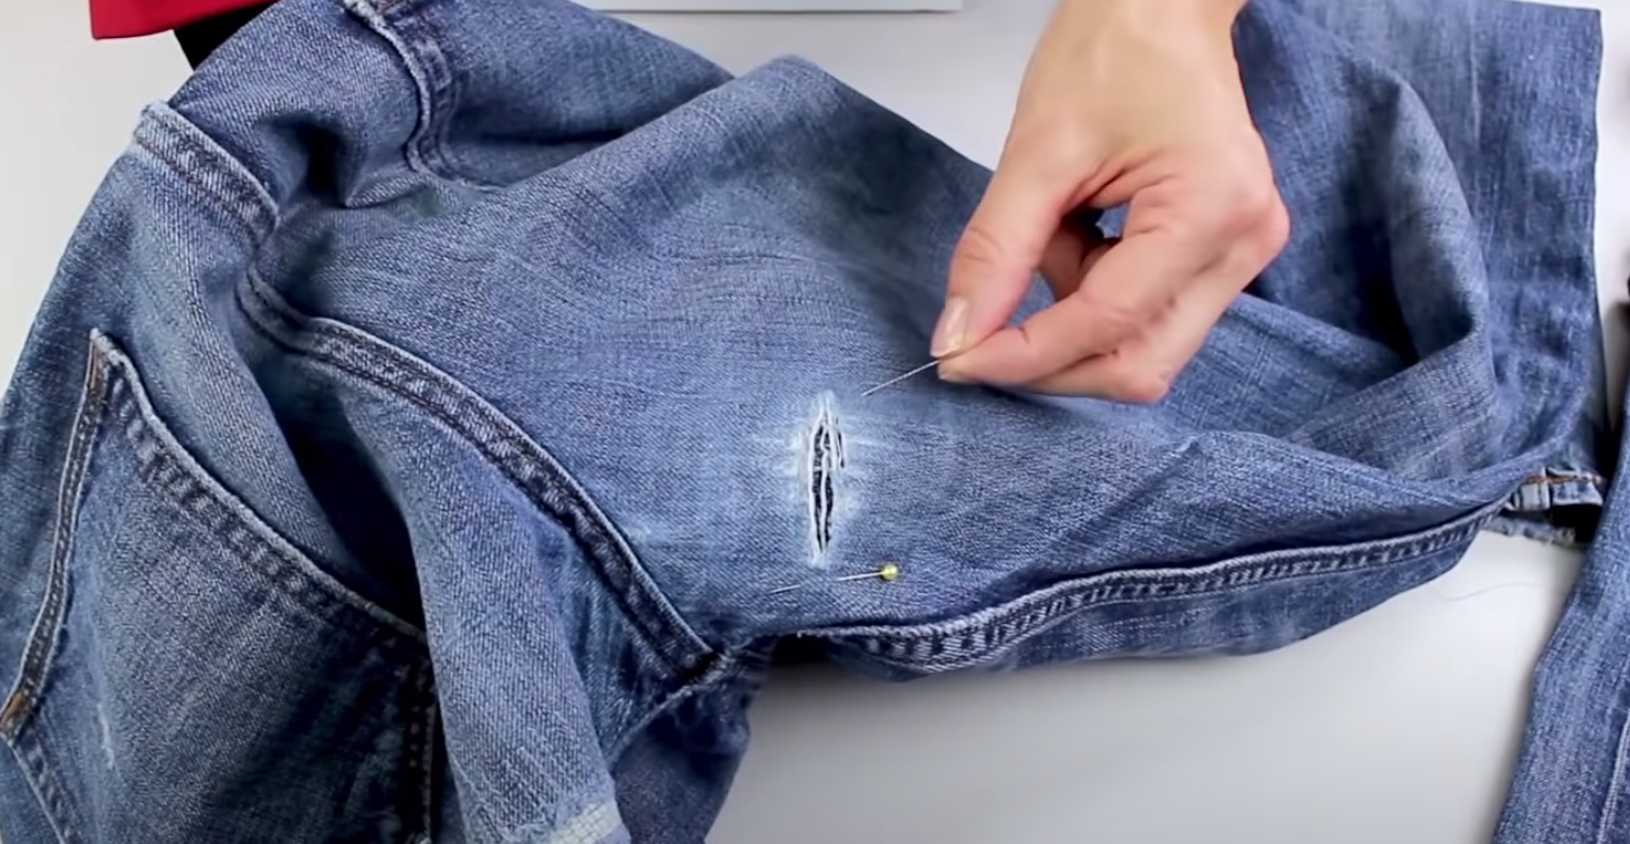
We’re going to demonstrate how to patch a pair of jeans that has a tear on the inner thigh. Anyone who has thighs knows what a pain this problem is, so instead of throwing away an otherwise perfectly good pair of jeans, we’ll show you how to repair them on your sewing machine.
You’ll only need a few basic tools. We’re going to use a soft 40wt polyester thread called Designer, which is great for making repairs on clothing because it’s really strong and flexes with the fabric. Choose a colour that matches your jeans to help it blend in.
We’ll also be using a bobbin prewound with DecoBob, which is a really fine but strong 80wt polyester thread. Since it’s such a fine thread, it will keep the fabric around your patch softer, and since we’ll be going over the area several times, you won’t need to worry about it breaking from wear and tear.
For this project, you’ll need a separate piece of denim or similar thick stretch fabric to patch the hole with. I have a piece cut from another pair of old jeans, and since it will be facing the inside of the hole, it doesn’t matter if the colour doesn’t match. Make sure it’s cut to be about an inch wider than the hole itself. You can always trim it down afterwards.
Finally, we’re just using a basic number 12 universal needle in the machine. Be sure to use a fresh needle so it’s nice and sharp as denim is a thick material to stitch through.
Tuck the patch centered evenly behind the hole and pin it in place so it doesn’t move. It’s a good idea to position your pins further away from the hole so you have room to stitch over the hole without them getting in the way. Make sure the area around it is flat so you don’t have any ripples. If the hole is in a difficult place to work in, like a knee, you may have to open up a side seam so you can lay the area flat under your machine. Then you can simply close the side seam once your repair is complete. Close up the hole with your patch as much as you can without warping the shape of your fabric.
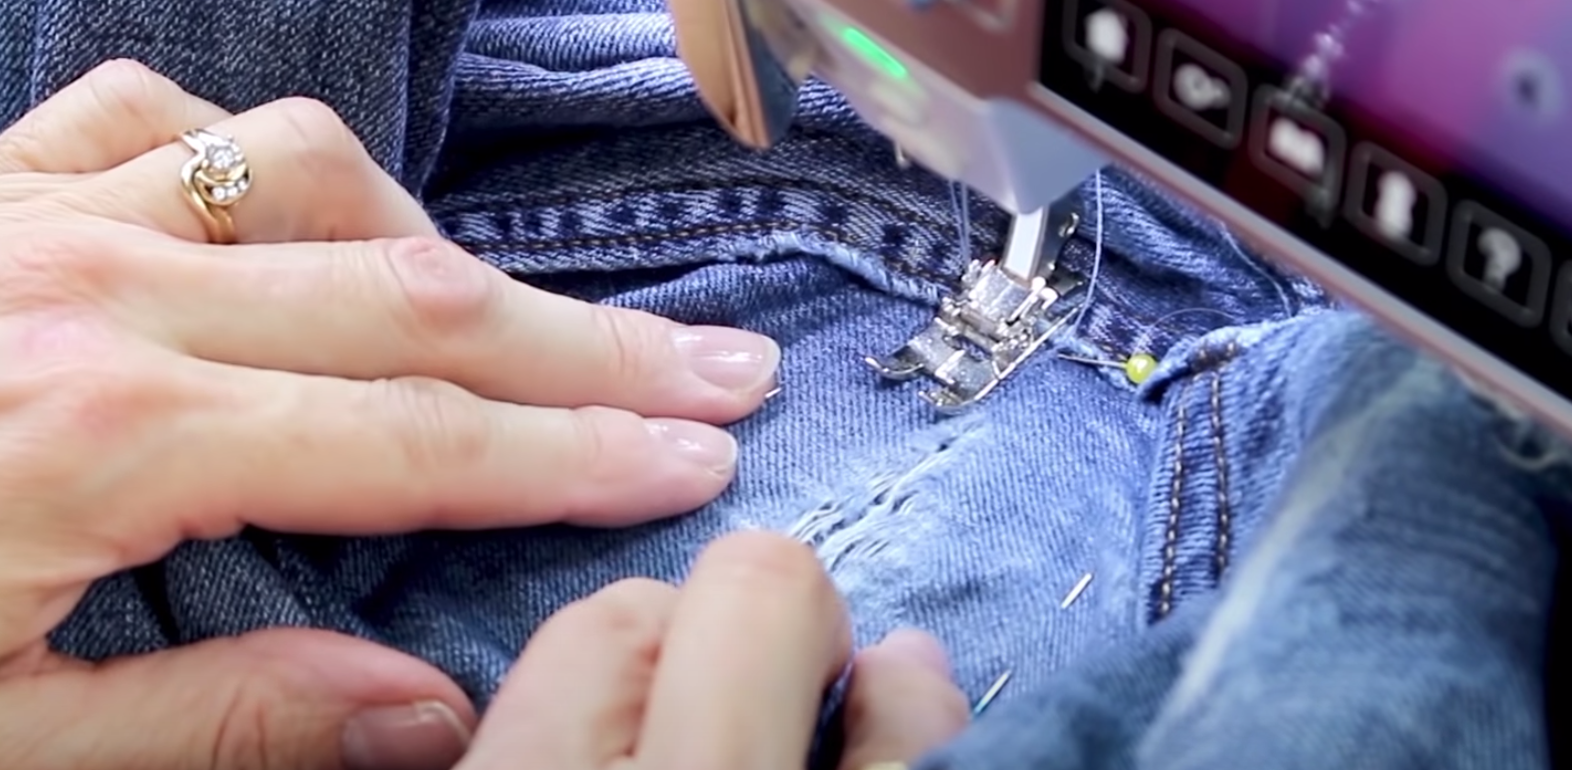
We’re going to use a simple straight stitch on a stitch length of 2.0. If the hole is large, or the area around is very worn and weak, we suggest using a three step zig zag stitch for the repair, as it will better hold down the frayed fabric edges.
To start, we’re going to sew horizontal lines going back and forth over the hole, using the backstitch button to sew backwards. Once we’ve done that a few times and the hole is more secure, we’ll go over the areas we missed to make sure everything is fully stitched down. Try to catch all the fraying edges to prevent the fabric from fraying further.
To further secure the patch, do a few vertical lines over all the stitching.
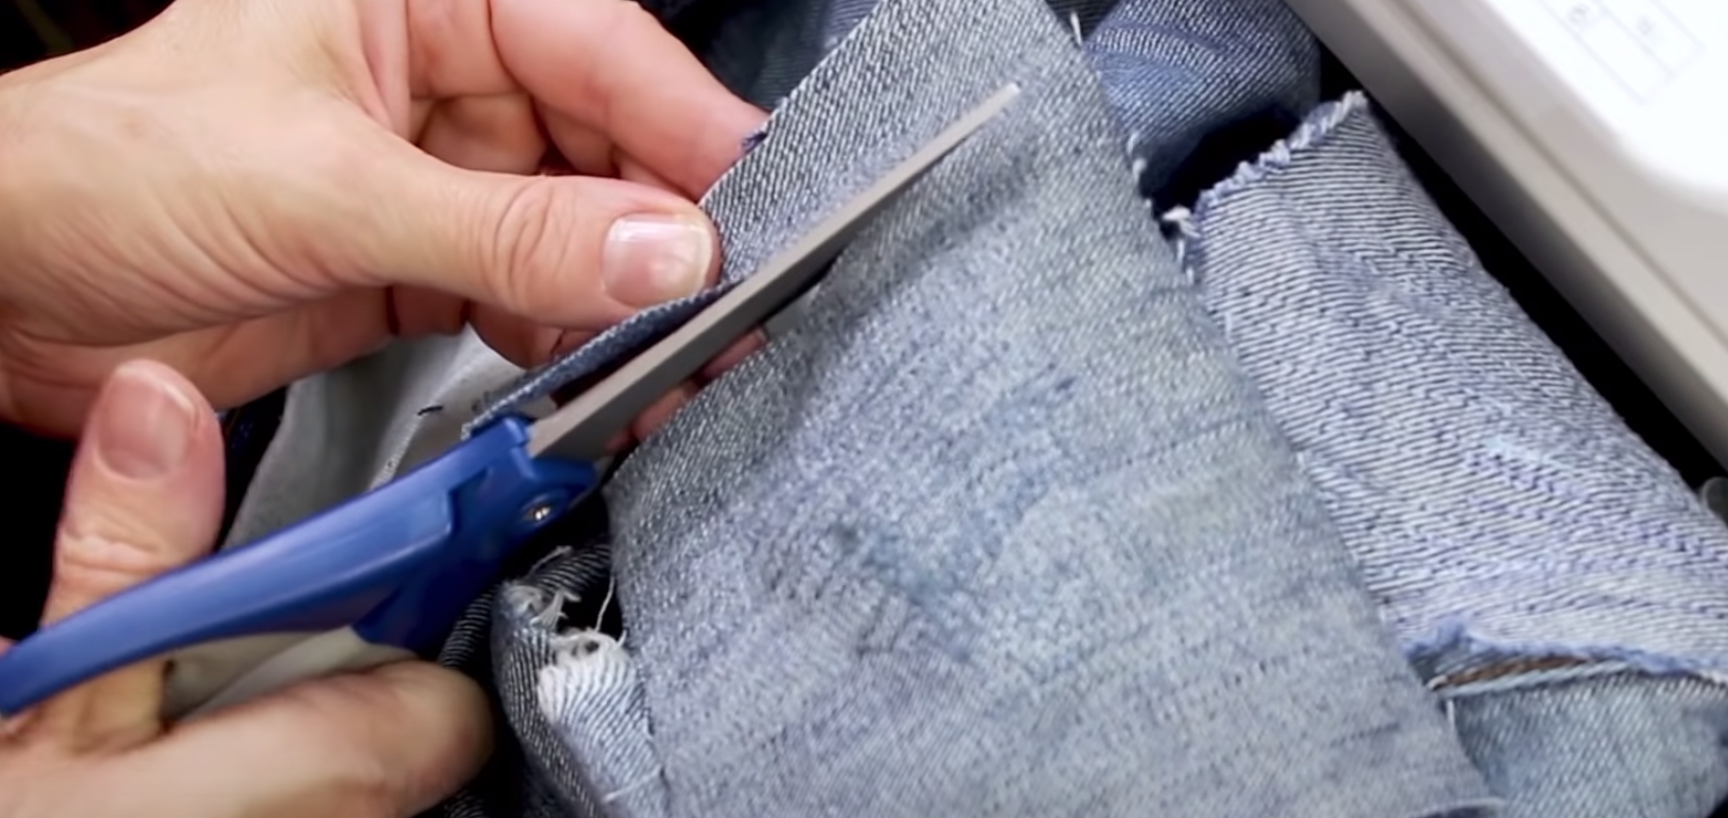
Now that we’ve stitched the hole completely closed, we’ll turn the jeans inside out to see how the underside looks. You can trim any excess fabric at this point so it’s more comfortable to wear. The patched area will be a little stiffer, but will soften up after washing and a few wears.
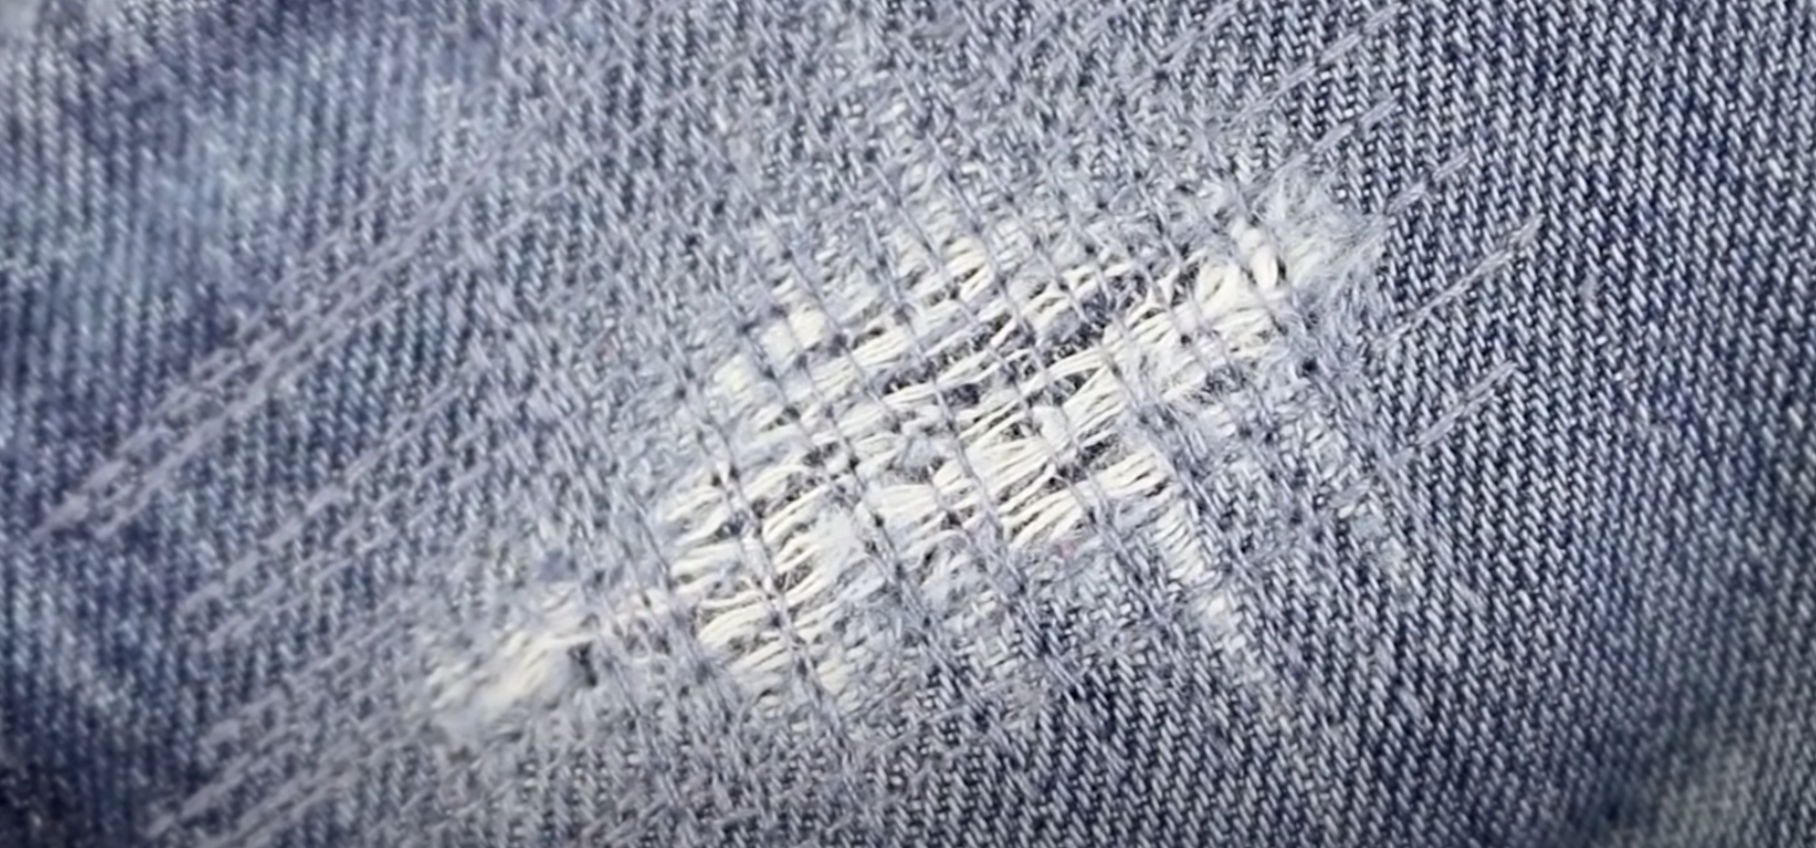
There you have it! When worn, you won’t even be able to see the patch. This super simple technique is a great way to save your jeans and keep your wallet full. If you’re thinking of giving your wardrobe a second life, don’t forget to read about the different ways to re-inspire your old clothing and upcycle them into something fresh!
Inspired to sew with Designer? Find a store in your area that carries WonderFil at http://www.shopwonderfil.ca/shop-local. You can also sign up for our free newsletter to receive more educational sewing tips, tutorials, and free patterns. Register by clicking here! We’ll see you again next time!
French seams are often used on clothing and work best on light weight to medium weight fabrics. In this video, we’ll show you how to make a French seam on both a straight seam and curved seam so you can give your own home sewn clothing a professional look.
To sew the flattest French seams, you’ll need to choose a finer thread. In the top we’ll be using InvisaFil, a 100wt cottonized polyester thread that is incredibly fine. This will ensure the thread doesn’t add any extra bulk in the seams. Choosing a super fine thread like InvisaFil will really help your seams to lay flatter and allow the thread to hide in the fabric so it can’t be seen. This will be especially important when doing French seams with sheer fabric.
InvisaFil 100wt thread.
In the bobbin we’re using DecoBob, an 80wt cottonized polyester thread that is nearly as fine as InvisaFil, but just a little thicker so we can rely on it to hold the seams together well.
Thread your machine and set your stitch length to a shorter 1.8 to accommodate the finer thread.
Sewing Straight French Seams:
To begin, pin your fabric with the wrong sides together. Straight stitch down the length of your seam using a 3/8”, or 1cm, seam allowance. When you’re finished, trim the fabric close to the stitch line to reduce the bulk in your seam.
Now press the seam open to help it lay flatter, then flip it over and press the seam from the other side so you have a nice crisp, flat seam. Fold your fabric so now the right sides are together and push out the seam. Give it another quick press with the iron so it’s lying flat.
We’re now going to sew down the seam at a ¼”, or 5mm, seam allowance. As you can see, the raw edges are tucked away inside this new pocket, and what you have left is a beautiful French seam. You can give it another press with the iron to finish it.
Straight seam on cotton fabric.
Straight seam on sheer fabric.
Sewing Curved French Seams:
To do a curved seam, such as when you would need to insert a sleeve on a shirt, there are a few extra steps. To begin, you’re going to need to help ease in the sleeve cap. You can do this by sewing a line of gathering threads along the sleeve cap.
Change your stitch length to something large like 4. With right sides together, sew along the sleeve cap between the two notches on your pattern with a ½”, or 1.2cm, seam allowance. Don’t backstitch at either end and remember to leave a long tail at both ends.
Pin the sleeve and arm hole together with the wrong sides together, matching the seams and the markings. Then pull the gathering stitches to ease the sleeve cap into the arm hole.
Change your stitch length back to 1.8 and stitch the seam with a 3/8” seam allowance. Check the seam for any tucks and remove them if you find any. Now trim the seam close to the stitch length and press it open so it lays flat.
Fold the fabric so the right sides are facing and sew again at a ¼” or 5mm seam allowance. Once again, check for tucks and remove them if you find any. You can give it a final press so the seam lays nice and crisp, and that’s all there is to it!
Curved seam on cotton fabric.
Curved seam on sheer fabric.
Inspired to sew with InvisaFil and DecoBob? Find a store in your area that carries WonderFil at http://www.shopwonderfil.ca/shop-local. You can also sign up for our free newsletter to receive more educational sewing tips, tutorials, and free patterns. Register by clicking here! We’ll see you again next time!
Check out the Bobbinator on our Canadian online site for a closer look!
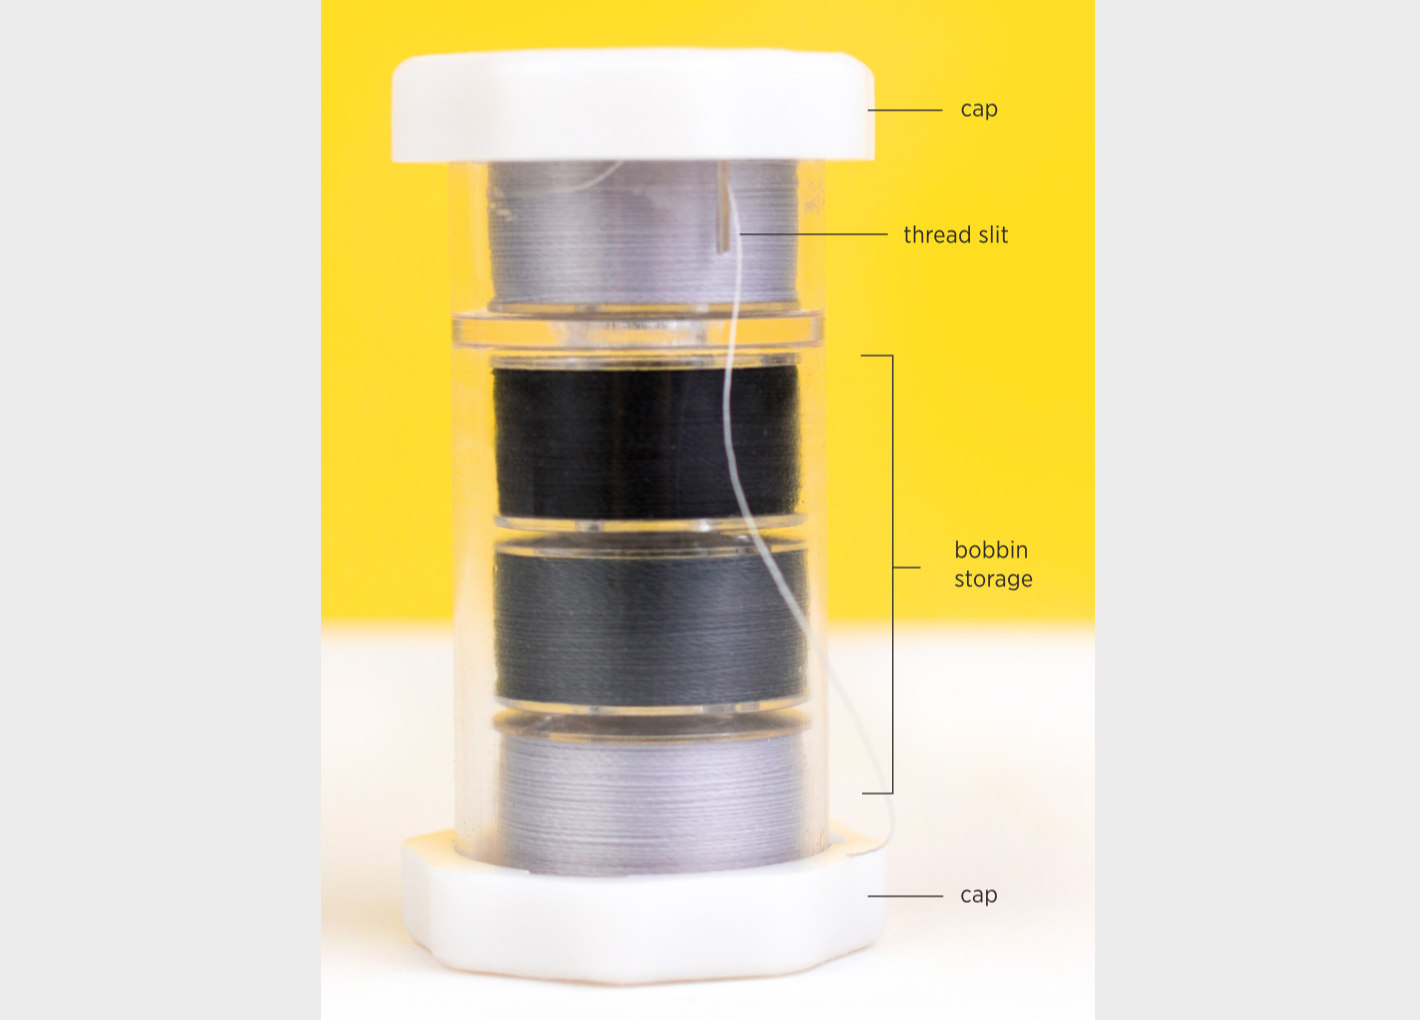
This unique item turns your bobbin into a spool of thread so that there is no need to purchase a separate top thread for small to medium sized projects! The Bobbinator includes a reserve chamber to keep 3 additional bobbins in storage, making it to easily store total of 4 bobbins.
The cap on each end of the device twists off, with one end opening to the storage chamber and the other end opening to the compartment that holds the bobbin you’ll be sewing with as a top thread.
Simply drop a bobbin into the main compartment and draw the thread through the slit. Twist the cap back on and the Bobbinator device and you’re now ready to use the bobbin thread as a top thread on either the horizontal or vertical spool pin. After placing it on your thread pin of choice, simply thread your machine like normal. This handy device lifts the bobbin thread out so that it doesn’t drag against the edge of the bobbin, causing tension changes. This is perfect for bringing a few colours as needed to guild meetings, events, and classes instead of bringing your entire thread box.
But you don’t need to just use it for machine sewing. Each bobbin included with this device is a DecoBob 80wt cottonized poly pre-wound bobbin. This thread makes for an ideal English paper piecing and hand appliqué thread as the super fine thread allows the fabric to sit tighter together and lay flatter, with the thread blending in so it won’t be seen. The Bobbinator makes it easy to keep the thread organized and tidy while you stitch at home or on the go.
DecoBob is also an excellent choice for hand and machine piecing, quilting, machine embroidery and digitized lace designs, button holes, and hidden stitches. Every Bobbinator pack includes 10 DecoBob pre-wound bobbins in your choice of grey or beige colours, as well as 1 Bobbinator device.
It also comes in a special variety made just for Sue Daley exclusively in her signature pink colour and her favourite 10 colours of DecoBob.
Included with every Bobbinator pack are prewound bobbins wound with our super fine 80wt DecoBob™ thread, an excellent bobbin thread that can be paired with any top thread. DecoBob™ is ideal for hand and machine piecing, quilting, machine embroidery and digitized lace designs, button holes, and hidden stitches. Enjoy with your bobbin thread as a top thread!
Want to try a Bobbinator for yourself or as a gift for that special friend? Find a store in your area that carries WonderFil at http://www.shopwonderfil.ca/shop-local. You can also sign up for our free newsletter to receive more educational sewing tips, tutorials, and free patterns. Register by clicking here! We’ll see you again next time!
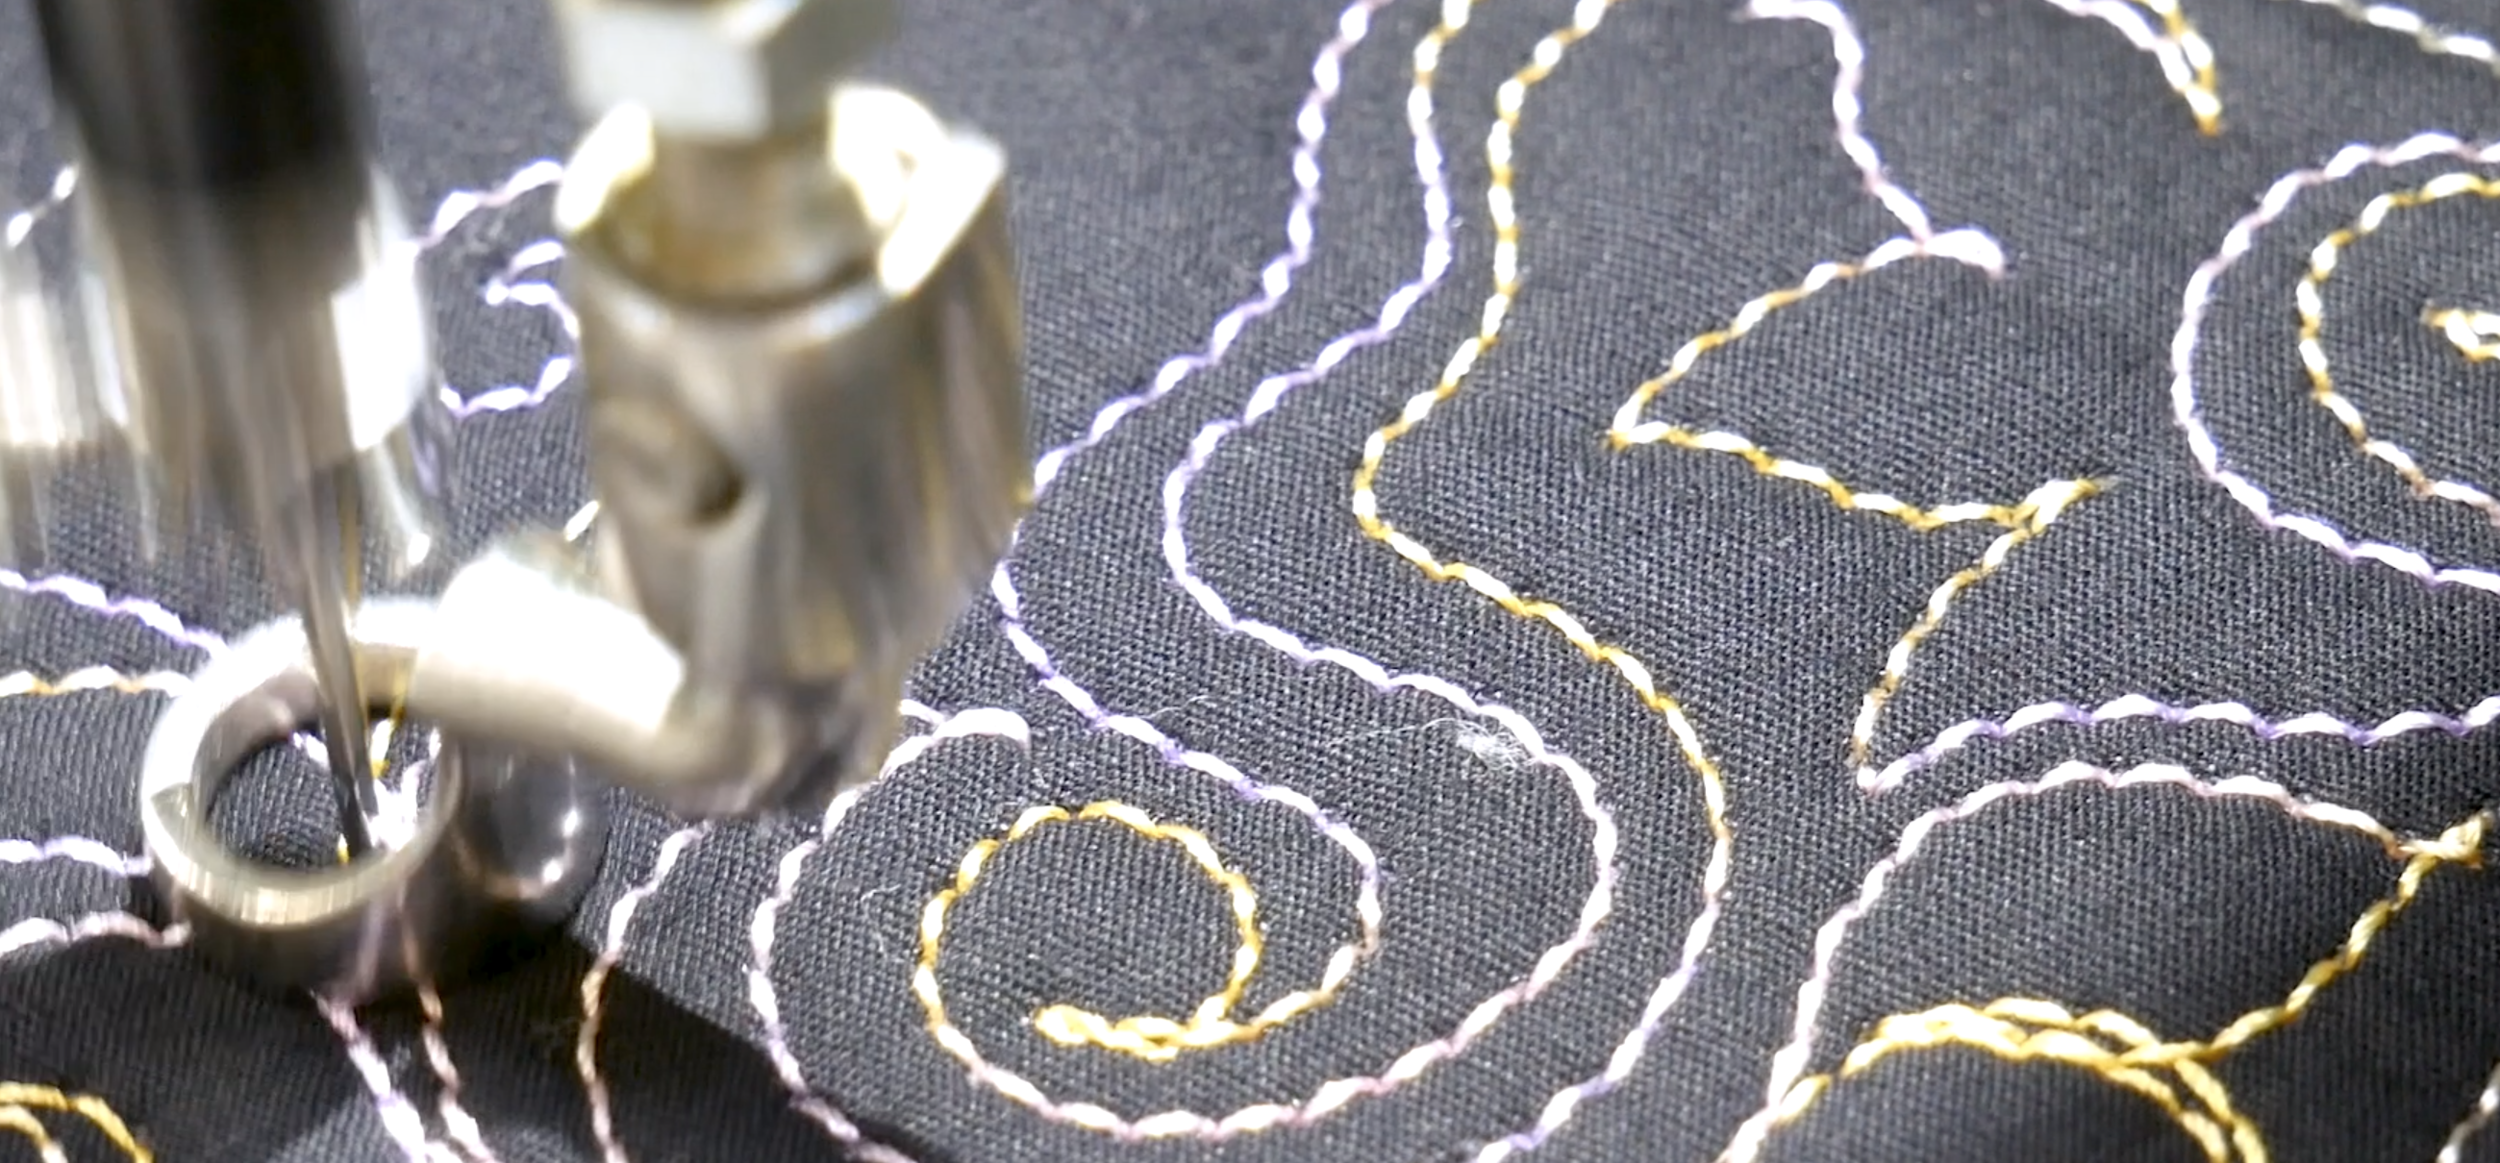
Crochet is a beautiful way to craft or embellish anything from clothing to housewares, however it can also be a time-consuming technique. Here's an incredible way to replicate the look of crochet by using only your sewing machine and your favourite 12wt thread! It’s easy, fast, and beautiful at half the work involved.
Today we’ve got a pretty cool technique to share with you: using your sewing machine to crochet! While it isn’t real crochet, you can replicate the look of it with any sewing machine that has an overcast stitch, and it’s a lot faster and easier to do than crocheting it yourself by hand.
These are the things you’ll need. We’re going to be using a 12wt rayon and metallic thread called GlaMore™ because we like the soft and shiny material with that little pop of sparkle. This is a beautiful thread that is a fantastic choice for this decorative technique. If you prefer a cotton look, you can also use Spagetti™ or Fruitti™ 12wt cotton threads that come in solid and variegated colours.
GlaMore™ 12wt rayon & metallic thread.
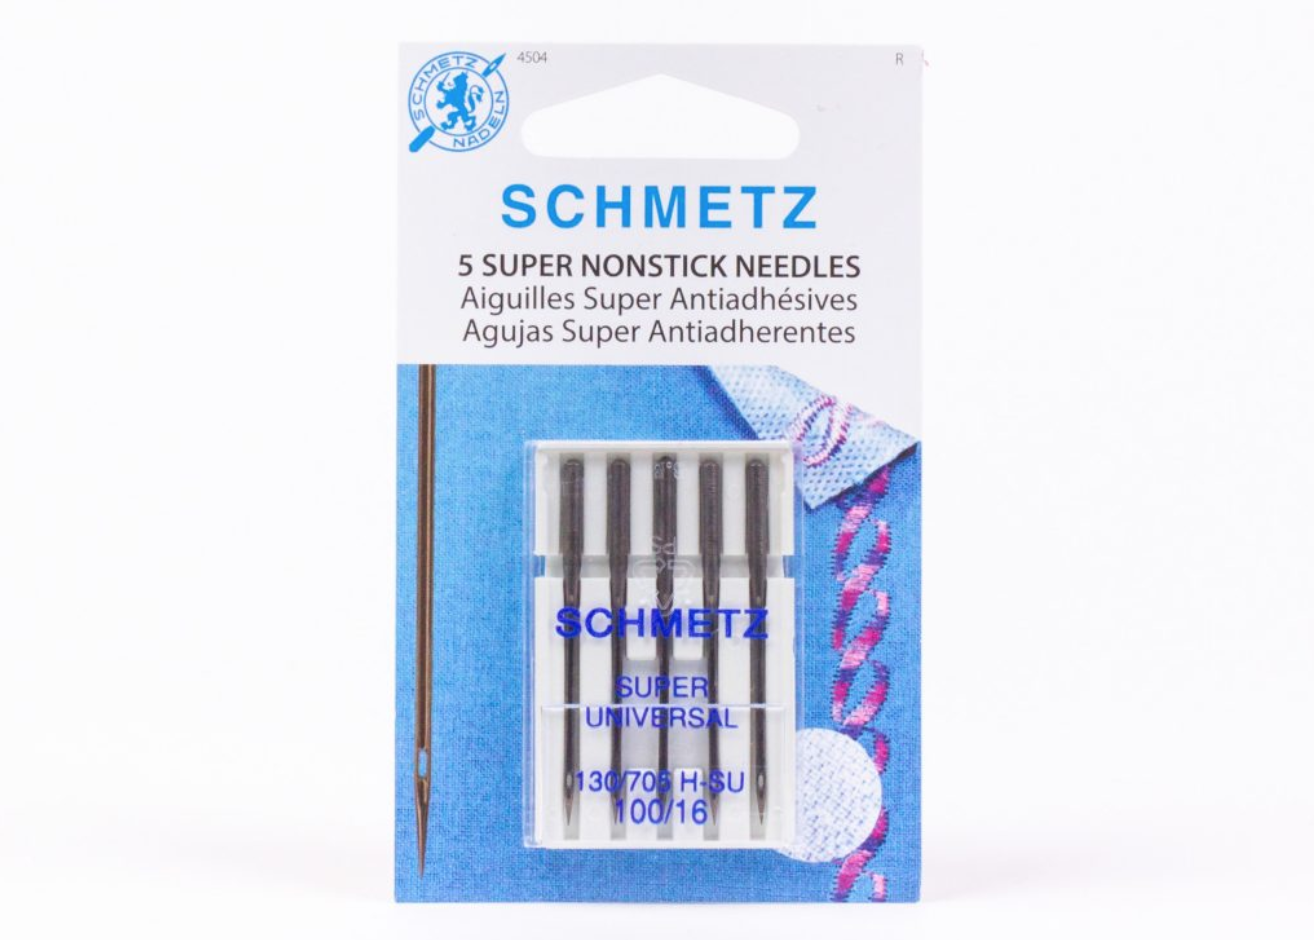
With this thread, we’ll be using a size 100/16 super non-stick universal needle.
You will also need some empty bobbins wound with your thread of choice. How many you’ll need depends on your project, but for reference, if you were machine crocheting all four edges of a standard decorative pillow, you’ll need about 2-3 bobbins if your machine uses Class 15 size bobbins, or 5-6 if your machine uses L size bobbins. But you can always wind more part way through your project if you run out.
We’ll be using a bi-level presser foot which has a raised bottom, making it easier for you to stitch over the heavy thread. An open toe appliqué foot is a good alternative as it will allow you to see very easily where you are stitching.
You may need to loosen your bobbin tension before stitching as you’ll be putting a heavier thread in the bobbin. We always recommend purchasing a second bobbin case for techniques where you will need to adjust the bobbin case tension so as not to accidentally mess up your original factory set casing. For a tutorial on how to do this, check out our other video on how to adjust your bobbin case:
Pin two or three layers of water soluble stabilizer to the edge of the fabric you plan on crocheting. The stabilizer will be the surface you will be stitching over to create your crochet.
Choose an overcast stitch on your machine, preferably one that isn’t too dense.
Choose any side to begin your crochet. If you are stitching all the way around your project, we recommend starting in the middle rather than the corner of your fabric as this will make it easier to line up your crochet when you come back around. Before starting, line up the fabric so that the right side of the needle catches the raw edge of the fabric. Stitch all the way down to the corner and pivot to the next edge.
When you finish stitching around your fabric and return to the beginning, select the zigzag stitch on your machine and shorten the stitch length so that the stitches sit close together (satin stitch). Work your way around your fabric again using the new stitch. This will help hold your crochet together. Make sure to line up your stitch to ensure it fully catches your previous line of stitching.
When you have worked your way around the fabric with the satin stitch and return to the beginning, you can now select the stitch you wish to use to create the crochet design. You can choose any decorative stitch on your machine, however it is better to choose one that doesn't stick out too much on the bottom. Depending on which stitch you choose, the crochet will look different in the end.
Before beginning, ensure the left swing of your needle is on the left side of your satin stitch or you will end up with holes in your crochet. Using the decorative stitch you have chosen, stitch all the way around your fabric once again.
When you have made your way around to the beginning, repeat, using the satin stitch to finish the bottom edge of your stitching, once again working your way around the fabric to the beginning. Repeat these steps of alternating decorative stitch and satin stitch to create several more layers of decorative stitching. The more layers you stitch, the larger the crochet piece you will create. In total, we stitched 4 layers, however you can do more if you want a longer fringe.
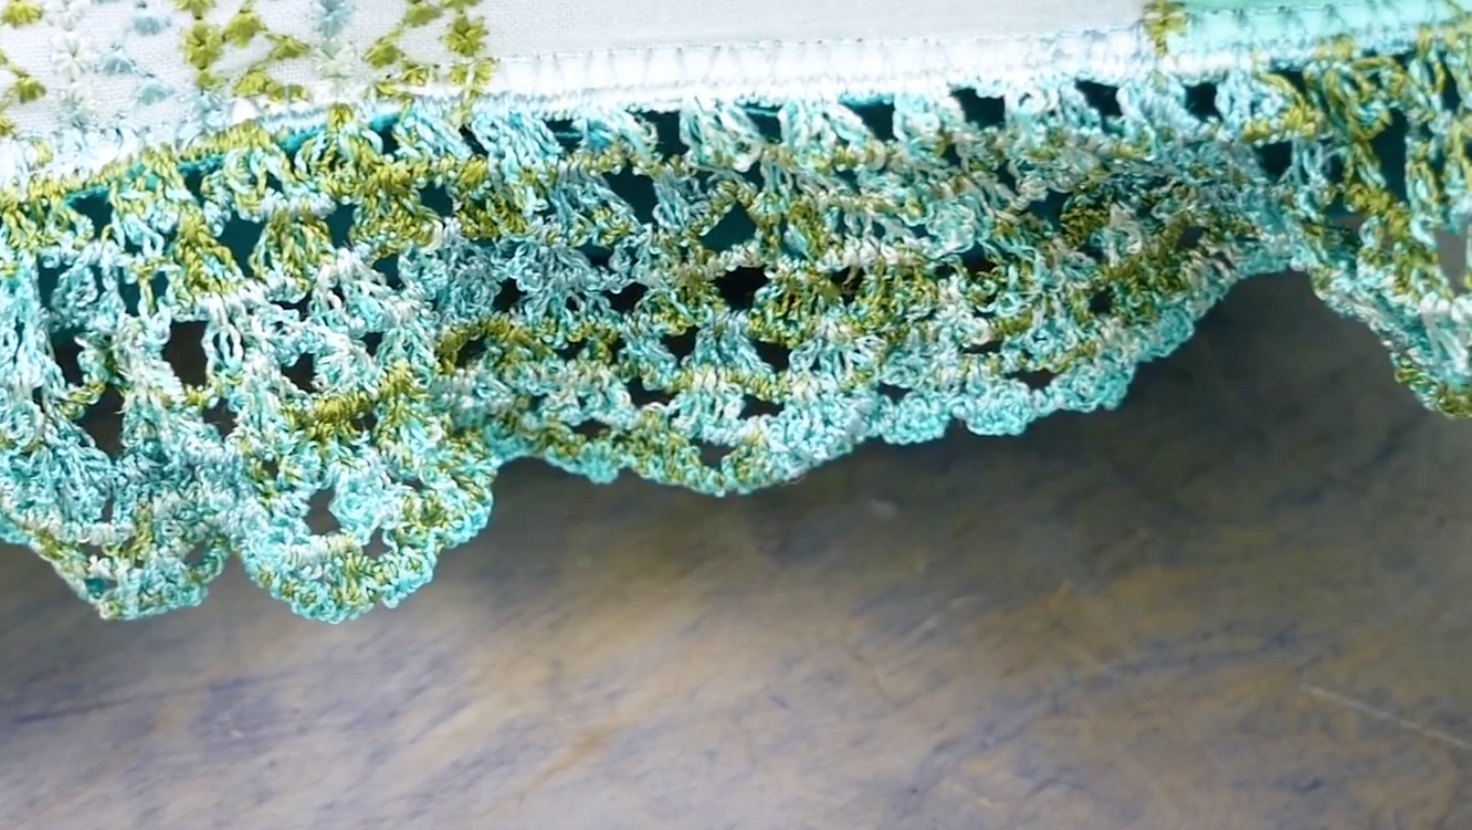
When you have finished stitching your crochet layers, wash your project to remove the stabilizer. Your finished project will have a beautiful crochet edge! This is perfect for adding a beautiful fringe to the bottom of collars, cuffs, or dress. Get creative and show us how you would use this technique in your own projects!
Inspired to sew with WonderFil threads? Find a store in your area that carries WonderFil at www.shopwonderfil.ca/shop-local. You can also sign up for our free newsletter to receive more educational sewing tips, tutorials, and free patterns. Register by clicking here! We’ll see you again next time!
We want to show you a fabulous way of binding your quilts using just the backing fabric. It’s fast, easy, and still looks just as good as if you did it with binding strips. This is a wonderful way of simplifying your binding without sacrificing a professionally finished look!
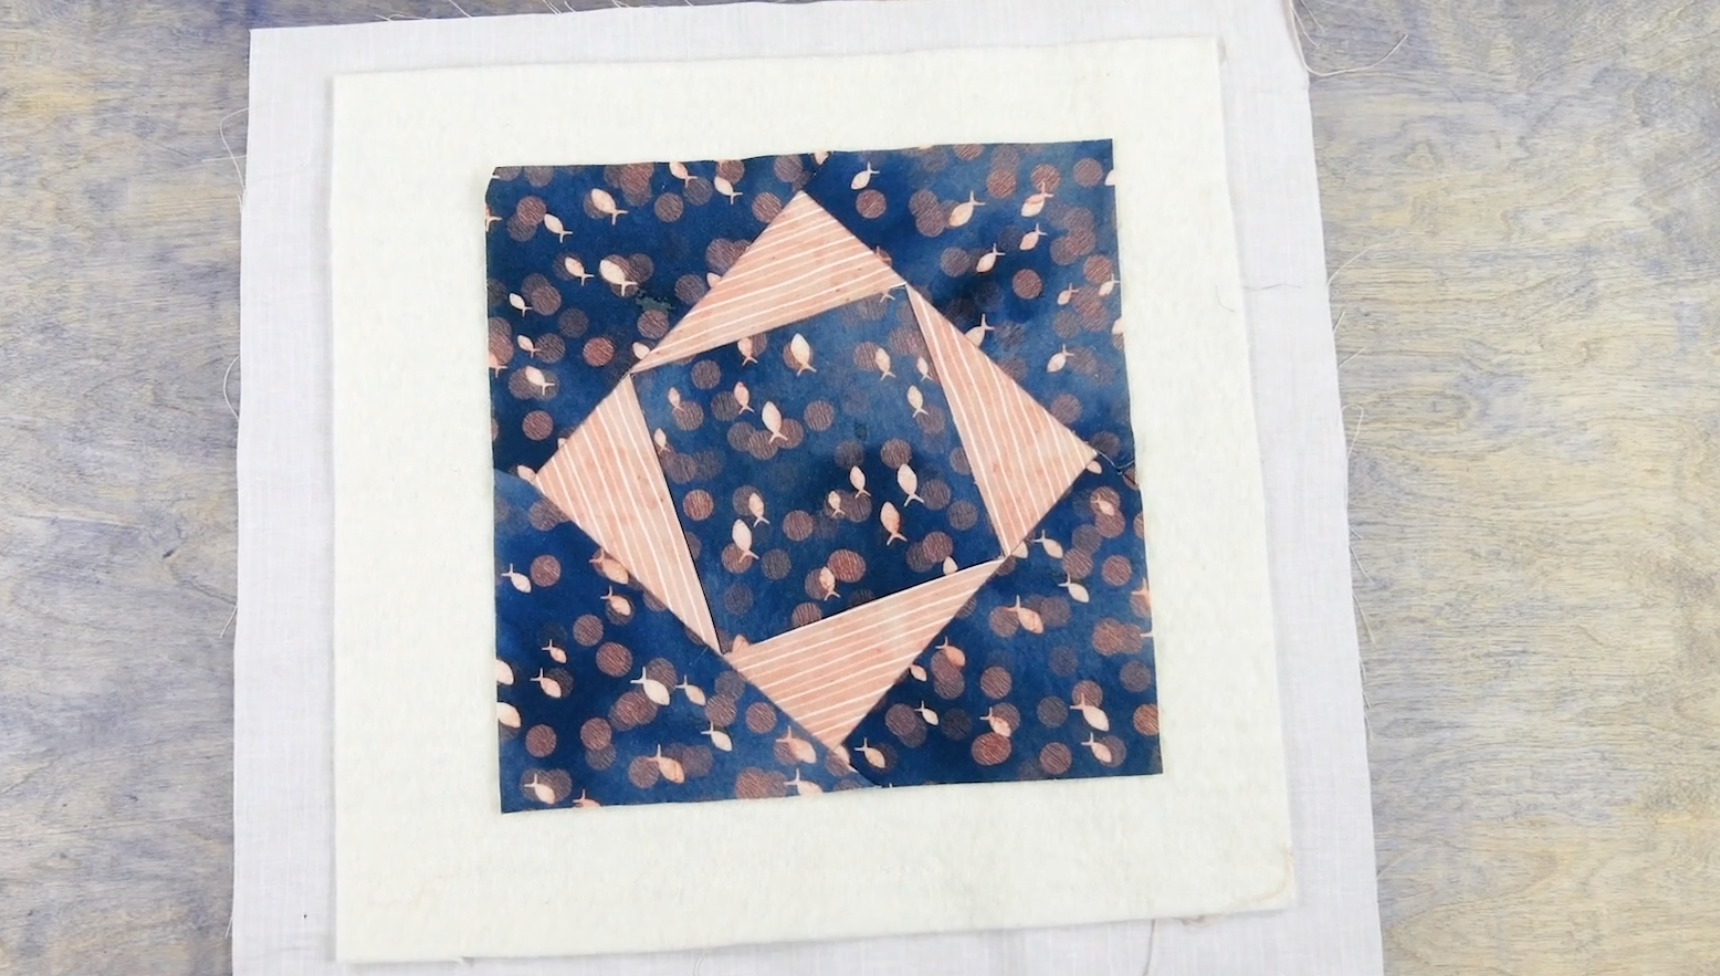
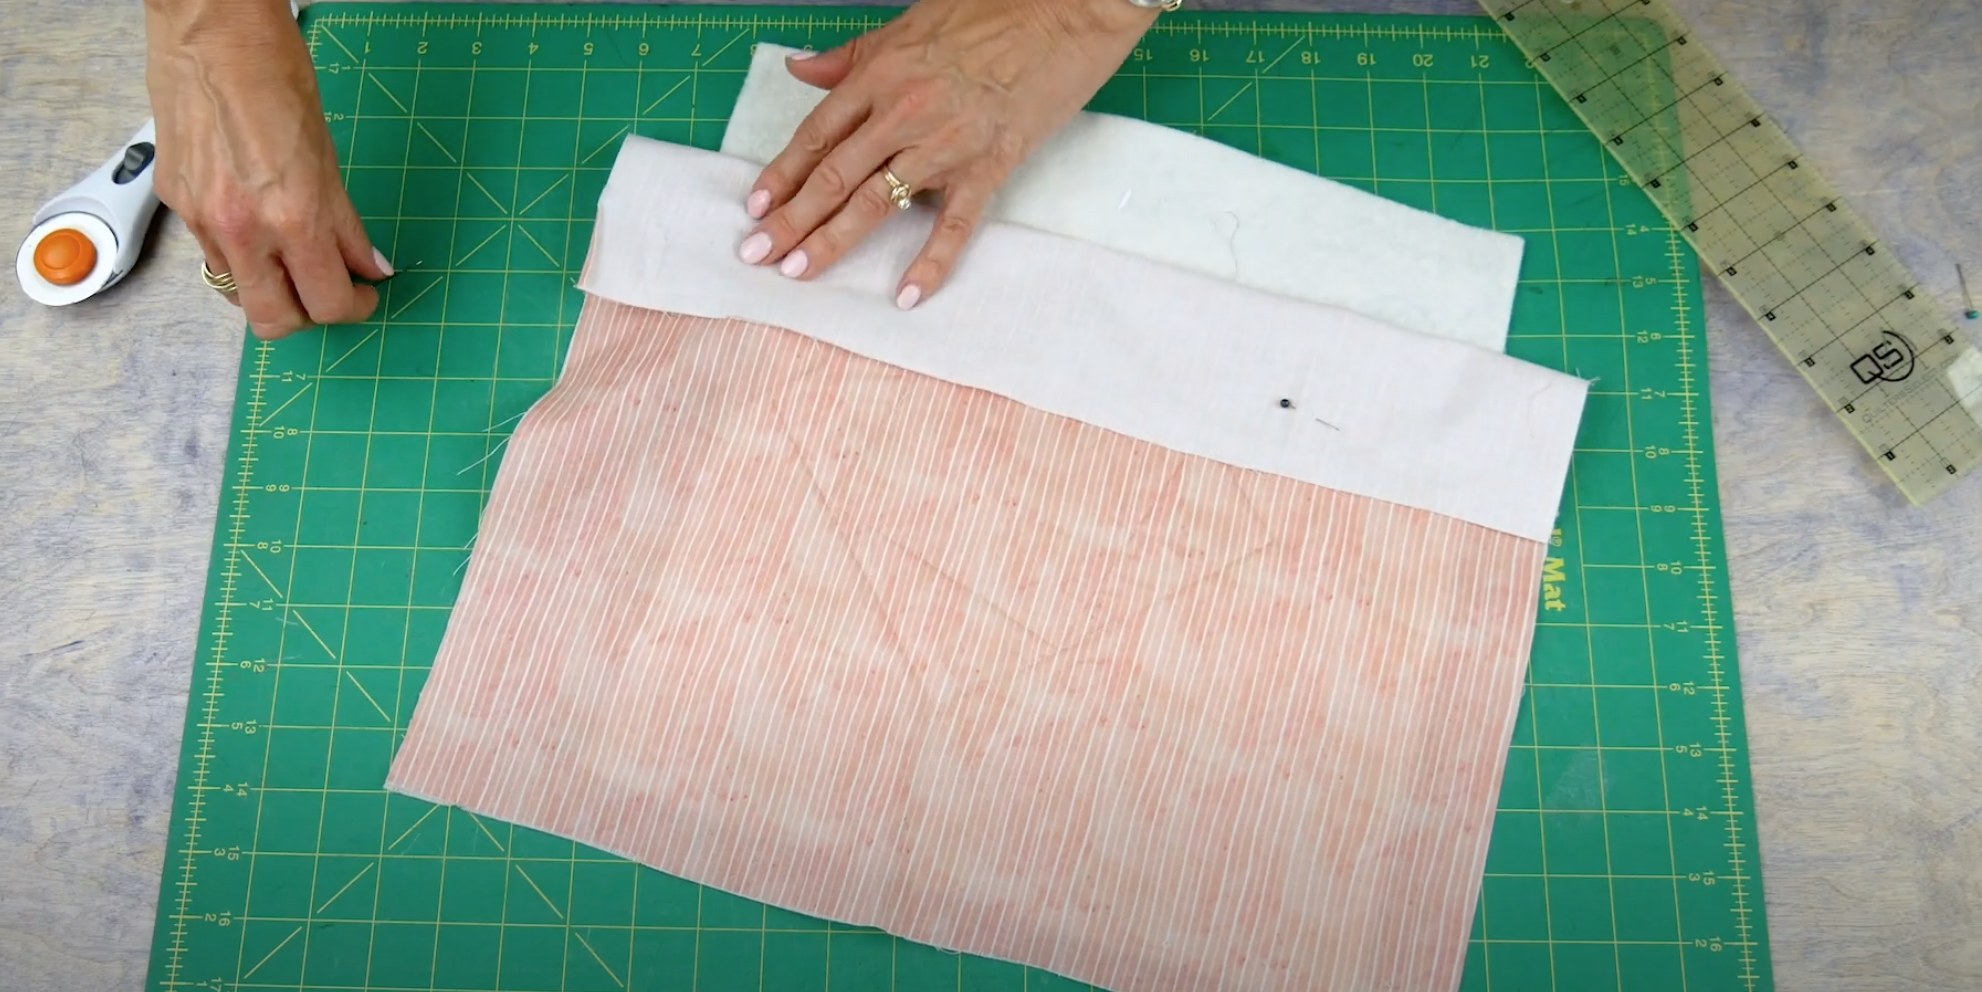
We’re using this quilt block as an example of how to set up your own quilt to bind it with the backing fabric. This method will of course still work on a larger sized quilt, but we’ll just be demonstrating the technique on this block.
After your quilt has been quilted, you’ll have some leftover batting and backing fabric along the edges. If you plan on binding it with the backing fabric, you’ll need to leave an excess of about 2 or 3 inches of backing fabric.
Before you can begin binding, you’ll need to square up your quilt. Tuck your backing out of the way and trim the other layers with your rotary cutter. Be careful not to cut through any of your backing fabric. If you can’t get your backing out of the way enough that you won’t cut into it, you can also carefully trim your layers with a pair of scissors as long as you can get it all squared up evenly.
(Pinning the backing fabric out of the way)
(Trimming the batting to square up the quilt)
When your quilt is trimmed and squared up evenly, you can now trim your back fabric. You will need an inch of back fabric from the edge of your quilt, so take out your quilt ruler and trim it so that you have an even 1 inch of back fabric all the way around.
(Trimming the backing fabric to 1”/2.5cm
Fold your back fabric in half so that the edge of the fabric is just touching the edge of the quilt top. You don’t need it to overlap the quilt top, just have it lined up against the edge of it. Press with an iron to hold the fold in place.
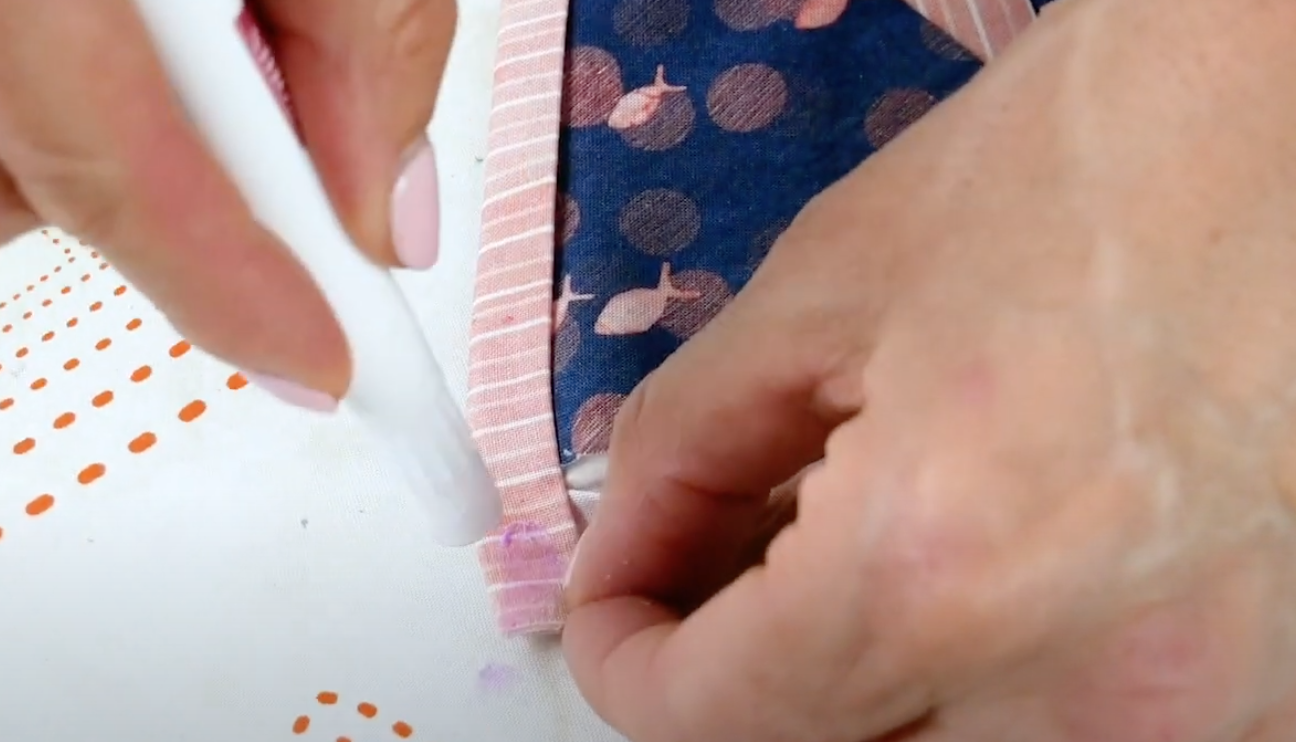
Now you’re going to fold the binding over one more time. Take a glue stick and run it across your binding, then when you fold it down again it will help hold it in place. Press again with the iron to keep it stuck down snugly.
Now that you have your first folded edge, we’re going to fold the corner into a triangle making a 90 degree angle. Add another dab of glue and press it down with the iron to keep it in place.
Like before, fold the backing of the next edge down and press it in place with the iron. Take your glue stick and glue the entire edge including the folded triangle. Fold it over again and iron it down as you fold. The corner should have a perfectly mitered edge if your quilt is squared up correctly and the backing is folded evenly.
Continue these steps for the other two edges. When you come around to the last side, fold the corners on both ends of the backing into a 90 degree angle. Then fold and iron the binding down like before. Dab your glue across the entire fold including both corners and fold again, ironing it down as you go.
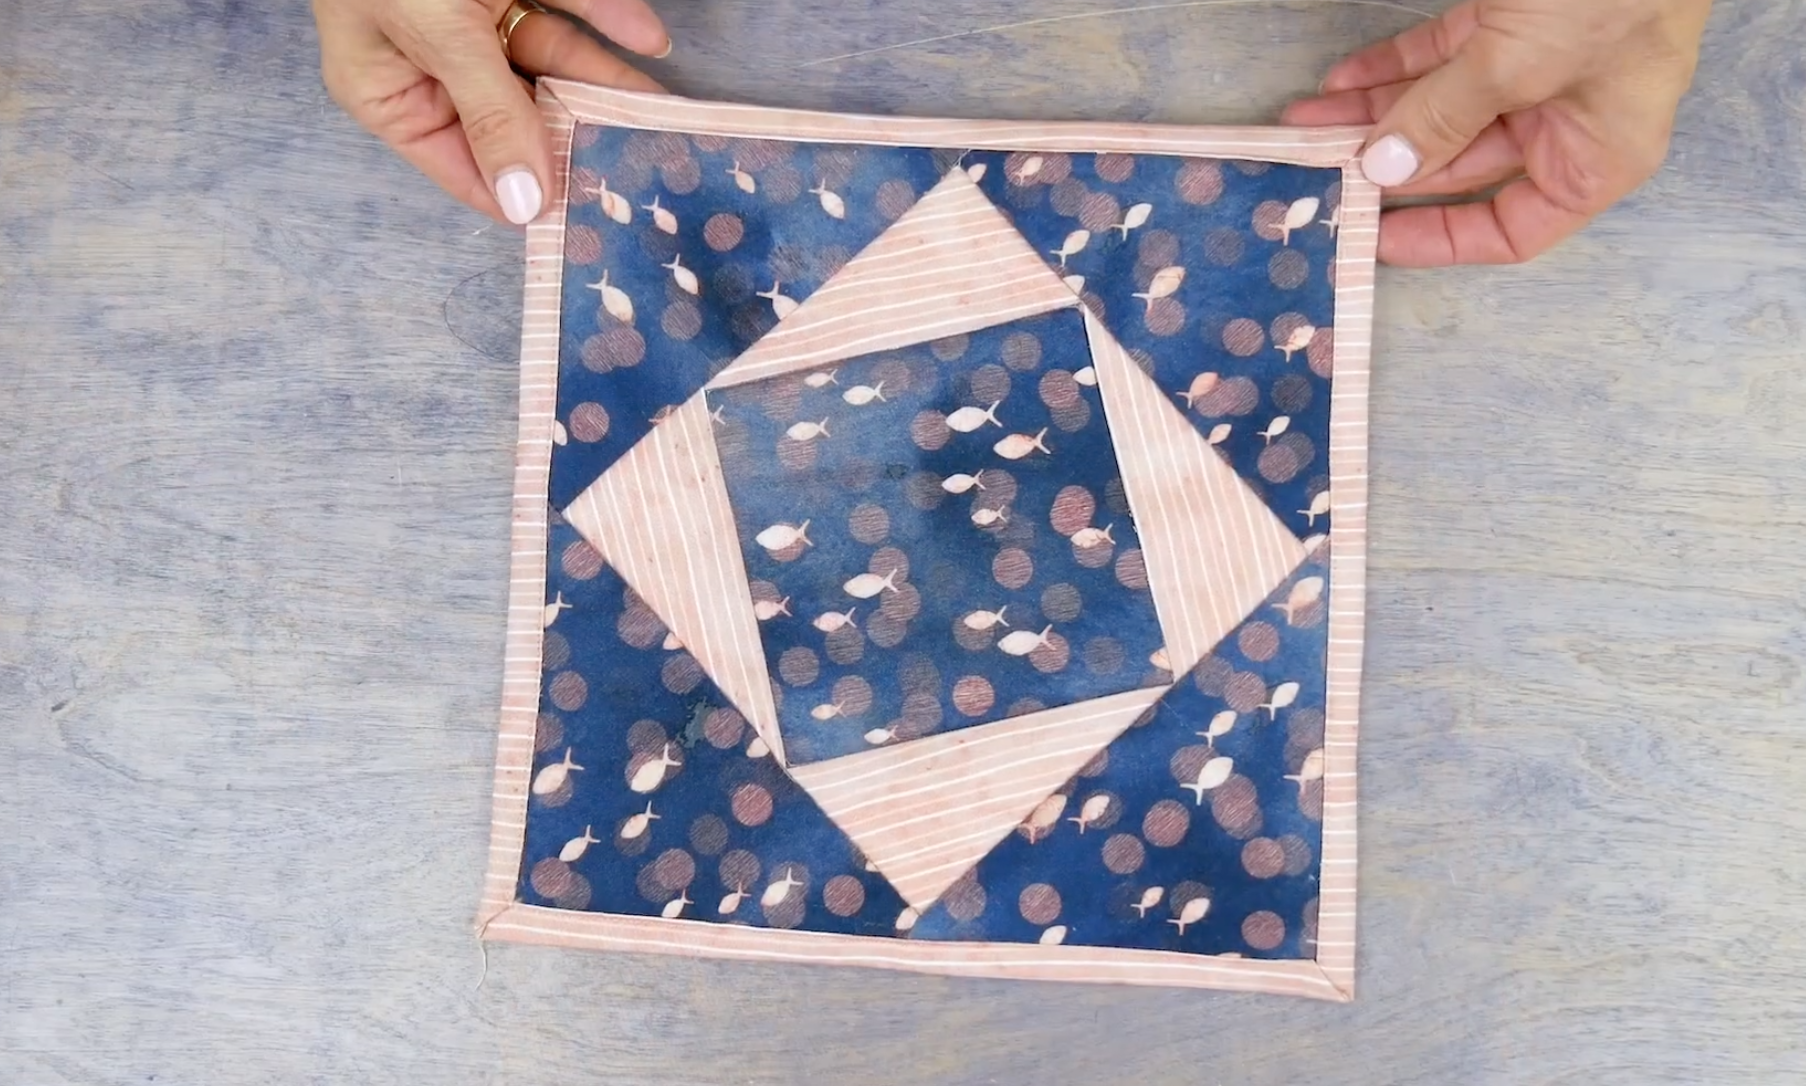
When you’ve finished, your quilt should have perfectly mitered corners and a binding that transitions evenly from back to front without an extra seam like you would with strip binding.
At this point you can choose to hand stitch your binding down like it’s traditionally done, or you can machine sew it which will go quicker. No matter which method you choose, we highly recommend using a finer thread in the top and bobbin. The thread we’ll be using is called DecoBob, which is an 80wt cottonized polyester thread. Because it’s so fine, it will really help to hide in the fabric so your stitches will be less visible. This is especially important if you choose to machine stitch your binding down. We recommend this thread because it’s strong enough to reliably hold your binding down without being too visible or worrying about the thread breaking.
To sew the binding down with your machine, you want to stitch as close as you can to the edge as you can. Because we tacked everything down with the glue earlier, the fabric is much less likely to shift as we sew. However, you can hold the edges down with some wonder clips if you need to. Sew all the way around your binding and don’t forget to back tack at the beginning and end.
There will be a gap at the mitered corners. These can be hand stitched close if you want to, or they can be left open if the quilt isn’t going to experience too much wear and tear. When you’re done, you have a beautifully bound quilt that smoothly transitions from back to front, and perfectly mitered corners. If you machine stitched it down with the 80wt DecoBob thread, you’ll also find that your stitches aren’t too visible either.
Inspired to sew with WonderFil threads? Find a store in your area that carries WonderFil at www.shopwonderfil.com/shop-local. You can also sign up for our free newsletter to receive more educational sewing tips, tutorials, and free patterns. Register by clicking here! We’ll see you again next time!
Some sewers might be stumped on what to use 12wt thread for, afterall it isn’t your traditional medium sized thread. What a lot of people don’t realize is how beautiful, bold, and versatile this thicker thread can be, and what kind of effects you can create with it. We’ll also take a closer look at the different types of 12wt thread you can find and when you might want to choose one over the other.
1. Thread Painting
12wt threads are a fantastic choice for thread painting for a few reasons. Because the thread is thicker, you can actually cover more area with less thread, making it a lot more efficient to thread paint with a 12wt thread. In addition, you’ll also find that the thread sits a little higher from the fabric. This gives a bolder textural effect to your project than using a medium weight thread would.
2. Cross Stitch
These threads are thick enough for cross stitching projects, especially when you want to use a fabric or fibre with a finer weave. In this project, we used Spagetti™ and Fruitti™ 12wt cotton threads, which pull smoothly through the fabric due to their ultra low lint finish.
3. Machine Embroidery
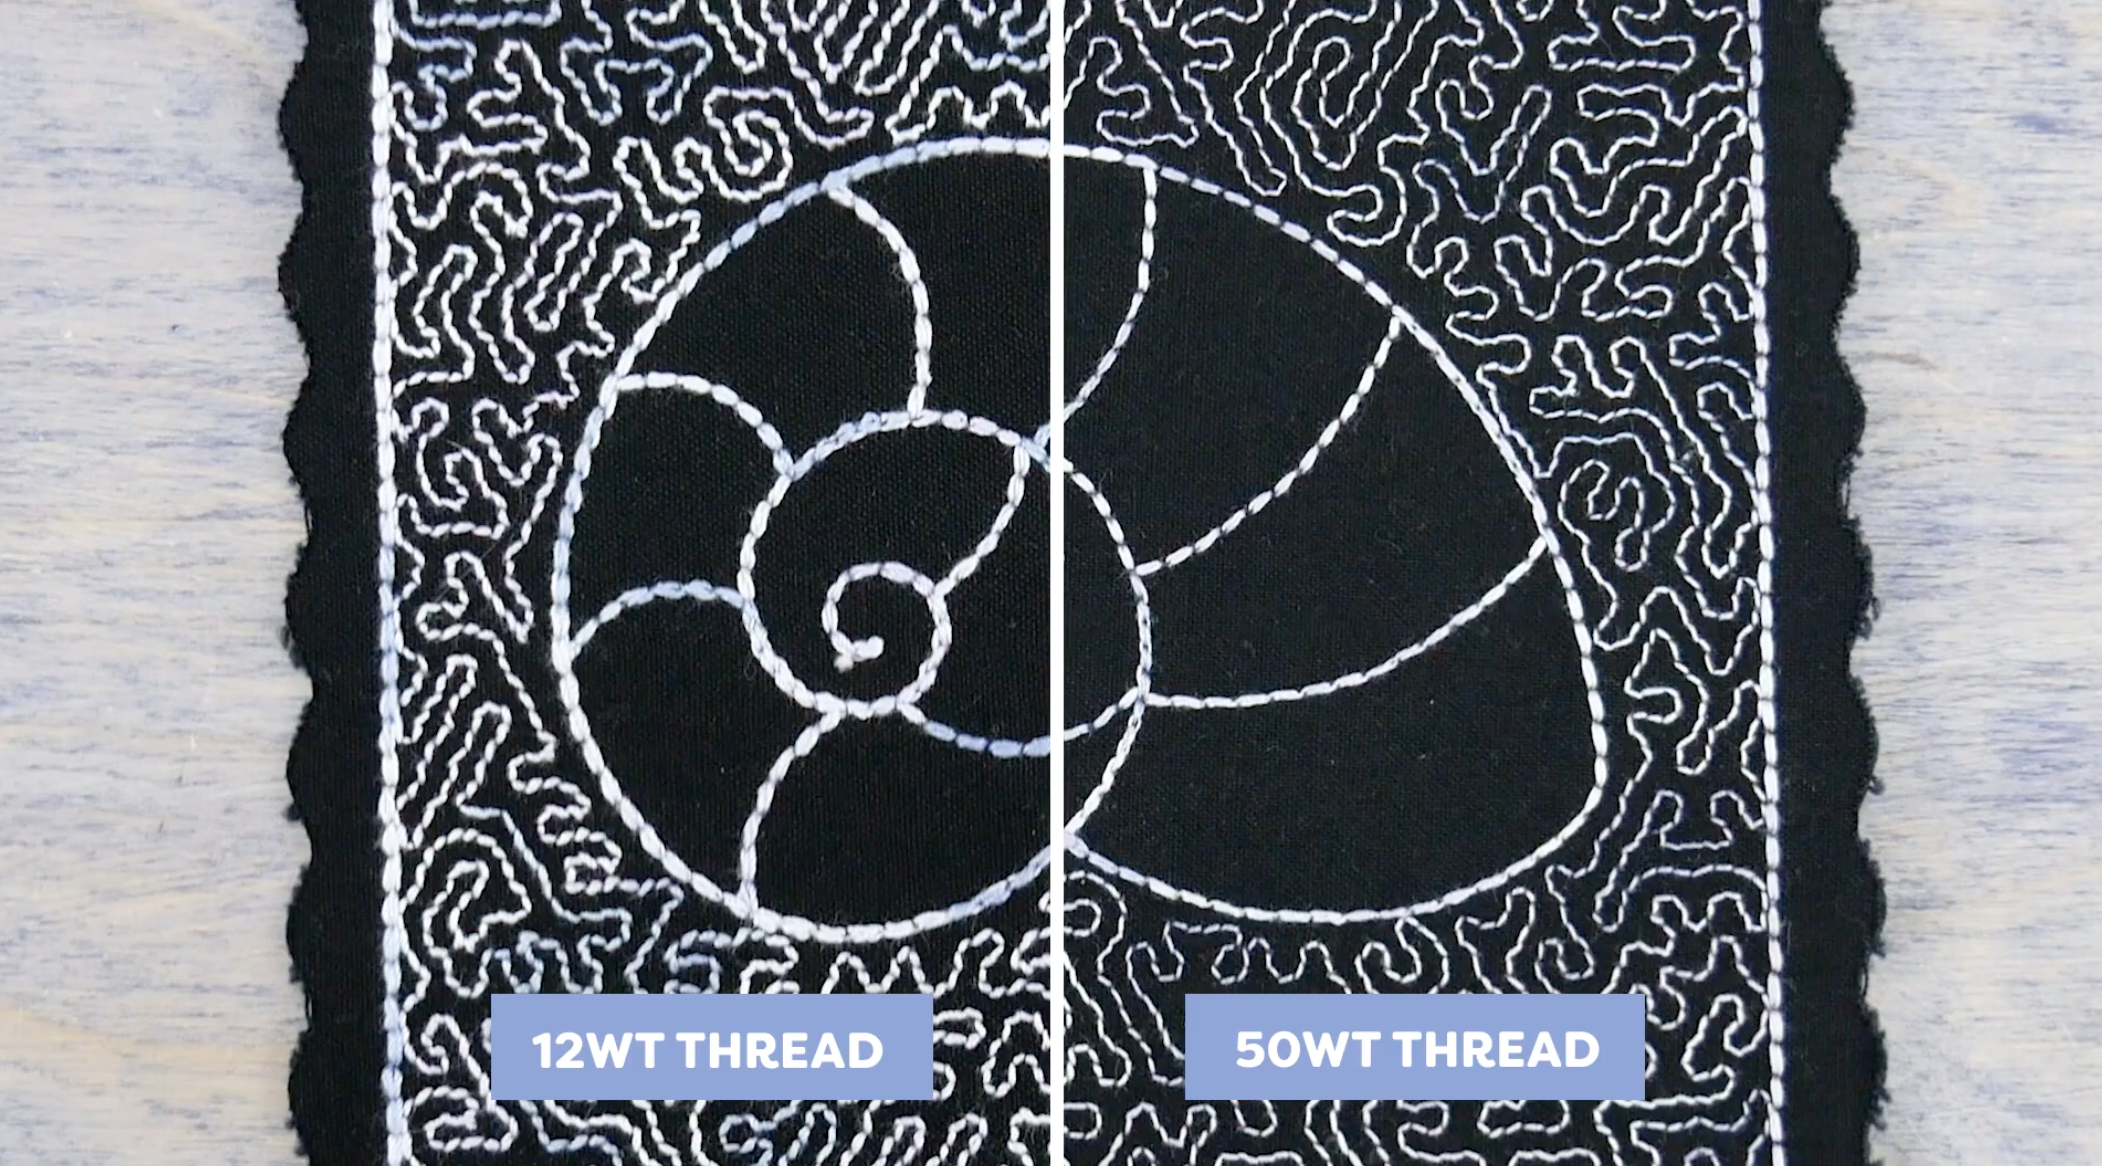
40wt threads are the standard when it comes to machine embroidery, but you can create a new look by using 12wt thread in your embroidery machine. If you have a larger design, or a design that isn’t too intricate, a 12wt thread will show the pattern much more boldly without needing to double stitch the same lines. Your pattern will also show off better due to the thicker thread.
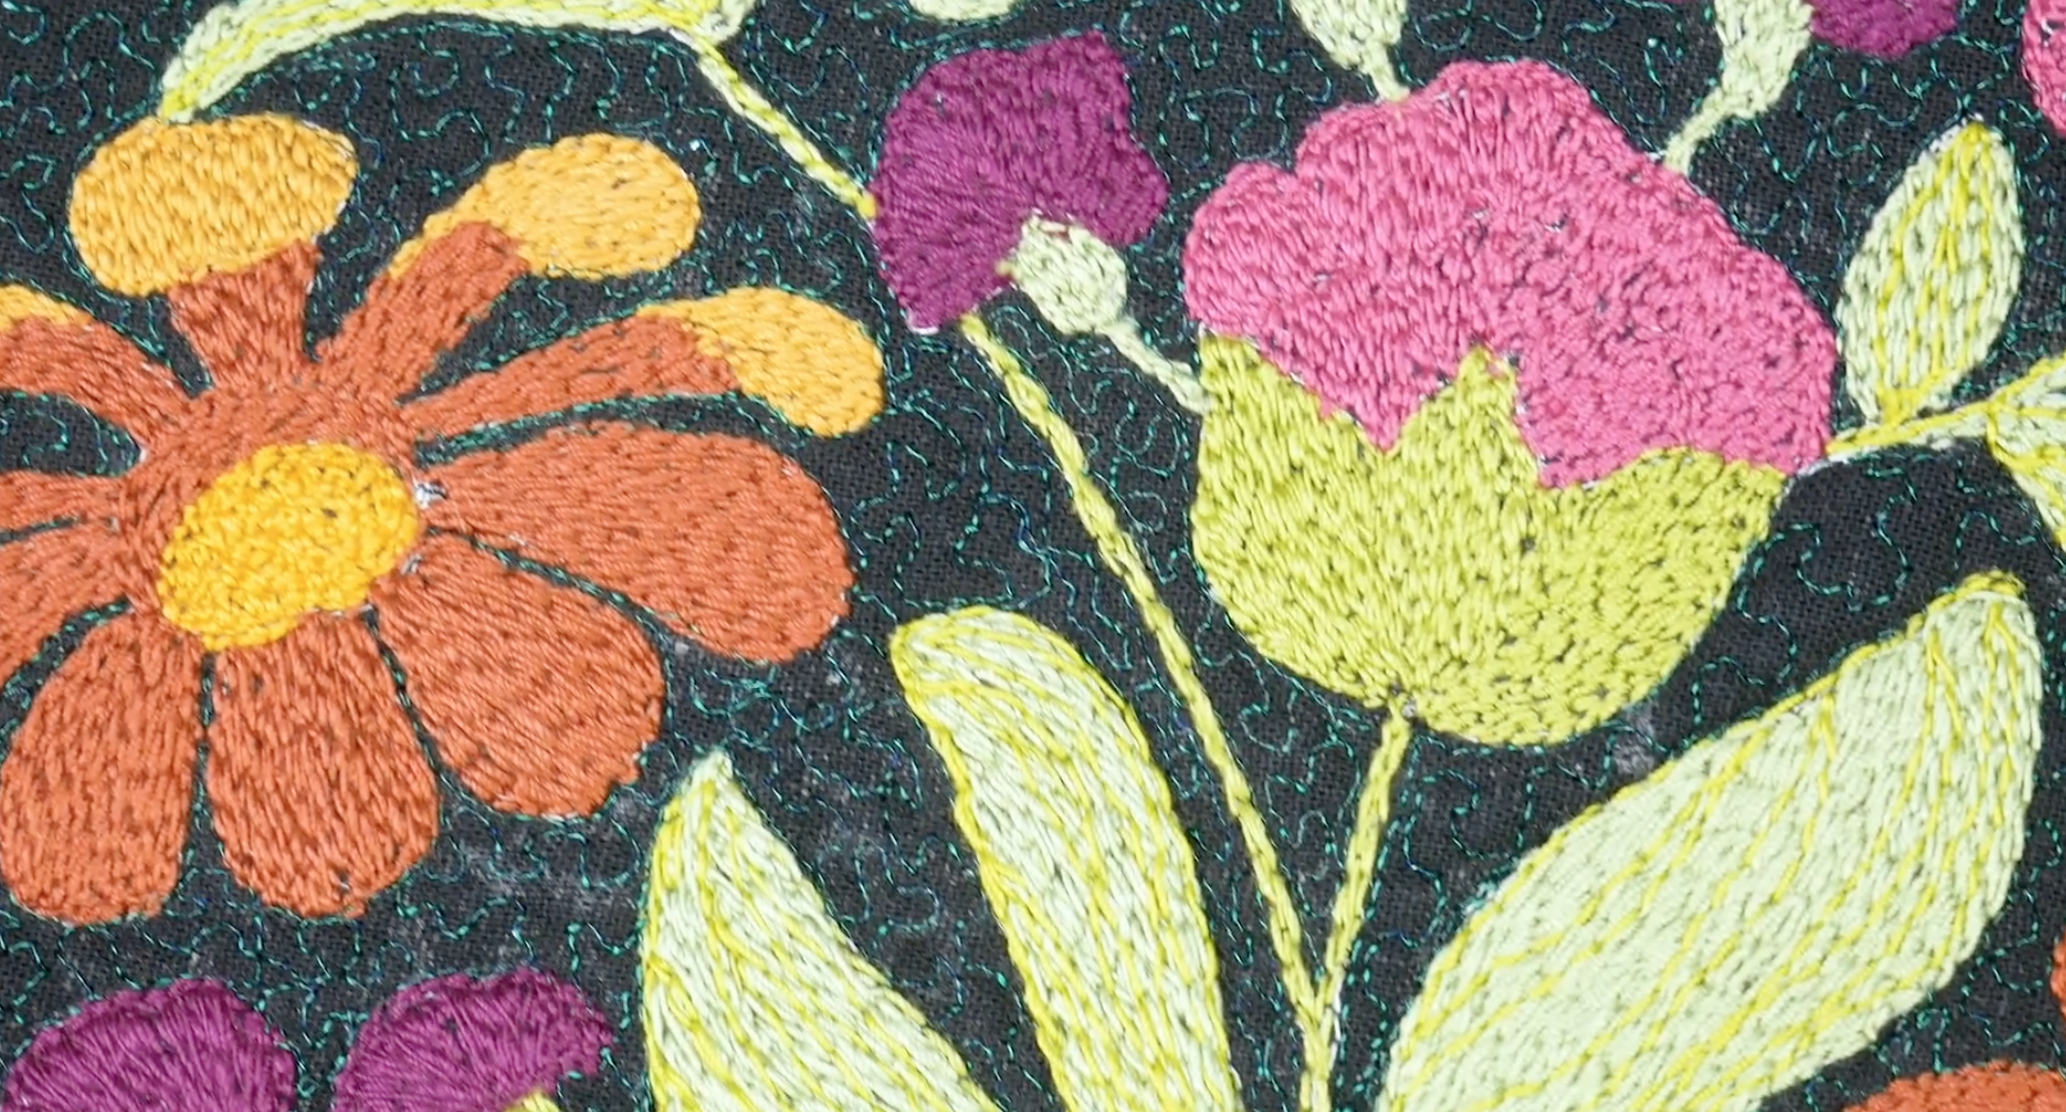
4. Hand Embroidery
If you love doing hand embroidery and sometimes split the strands of embroidery thread to make a finer thread, we would caution you against this. Splitting the strands of a thicker thread can weaken the thread while also giving it a lintier look. Instead of doing this, try using a 12wt thread which is comparable in size to an 8wt thread that’s been split in two. This way you won’t damage the thread, and you’ll keep your stitches looking clean and beautiful.
5. Decorative Stitching
The decorative stitches built into most sewing machines are perfect for utilizing 12wt threads for fun, stand-out stitches. They’re perfect for decorating any project, whether it’s a stocking for your family, adding a small decorative line of stitching to a piece of clothing, or embellishing any quilt or table runner. A 12wt thread will give every decorative stitch a little more emphasis than a regular medium weight thread would.
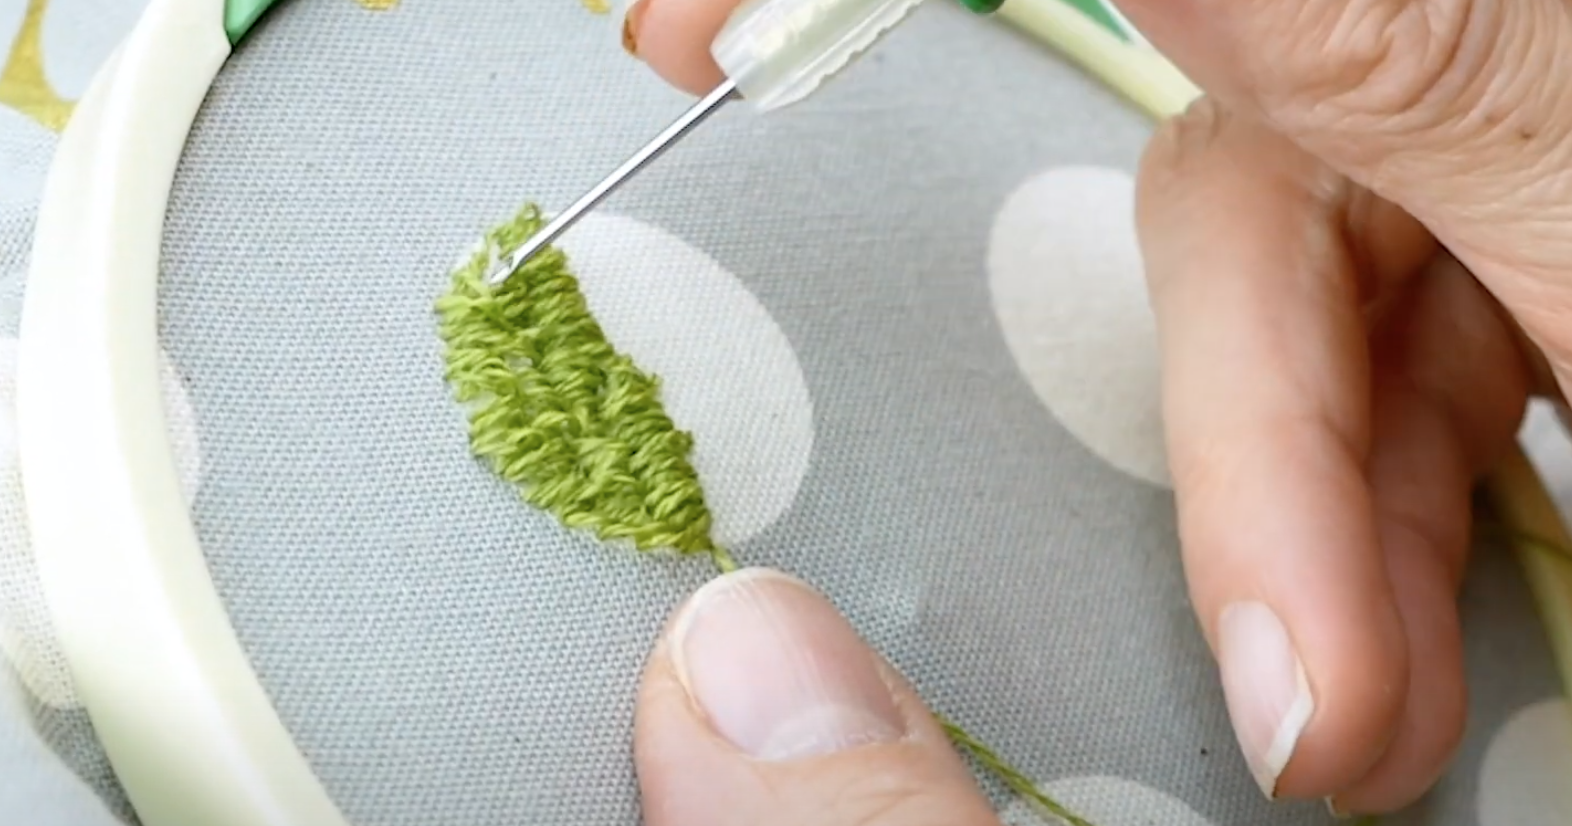
6. Needle Punch
Needle punching is a tool that can be used to create incredible textural effects, and it works best with thicker threads like 12wt. Depending on how you use the tool, you can make either dense loops or weave back and forth to fill in a space. This is a fantastic way to add a unique look to any project.
7. Big Stitch Hand Quilting
12wt is one of the best threads to use for big stitch hand quilting because the thick thread really stands out against the fabric. You’ll also find it easier to handle a 12wt thread versus a medium weight thread as it is less delicate and sits better in a wide running stitch.
8. Machine Quilting & Longarm Quilting
If you’re not afraid of bold stitches that love to show off, a 12wt thread is the perfect choice when used for quilting. 12wt is actually the thickest thread you can put through the eye of a machine needle, so you can guarantee a quilted look where the thread adds another dimension of texture and colour.
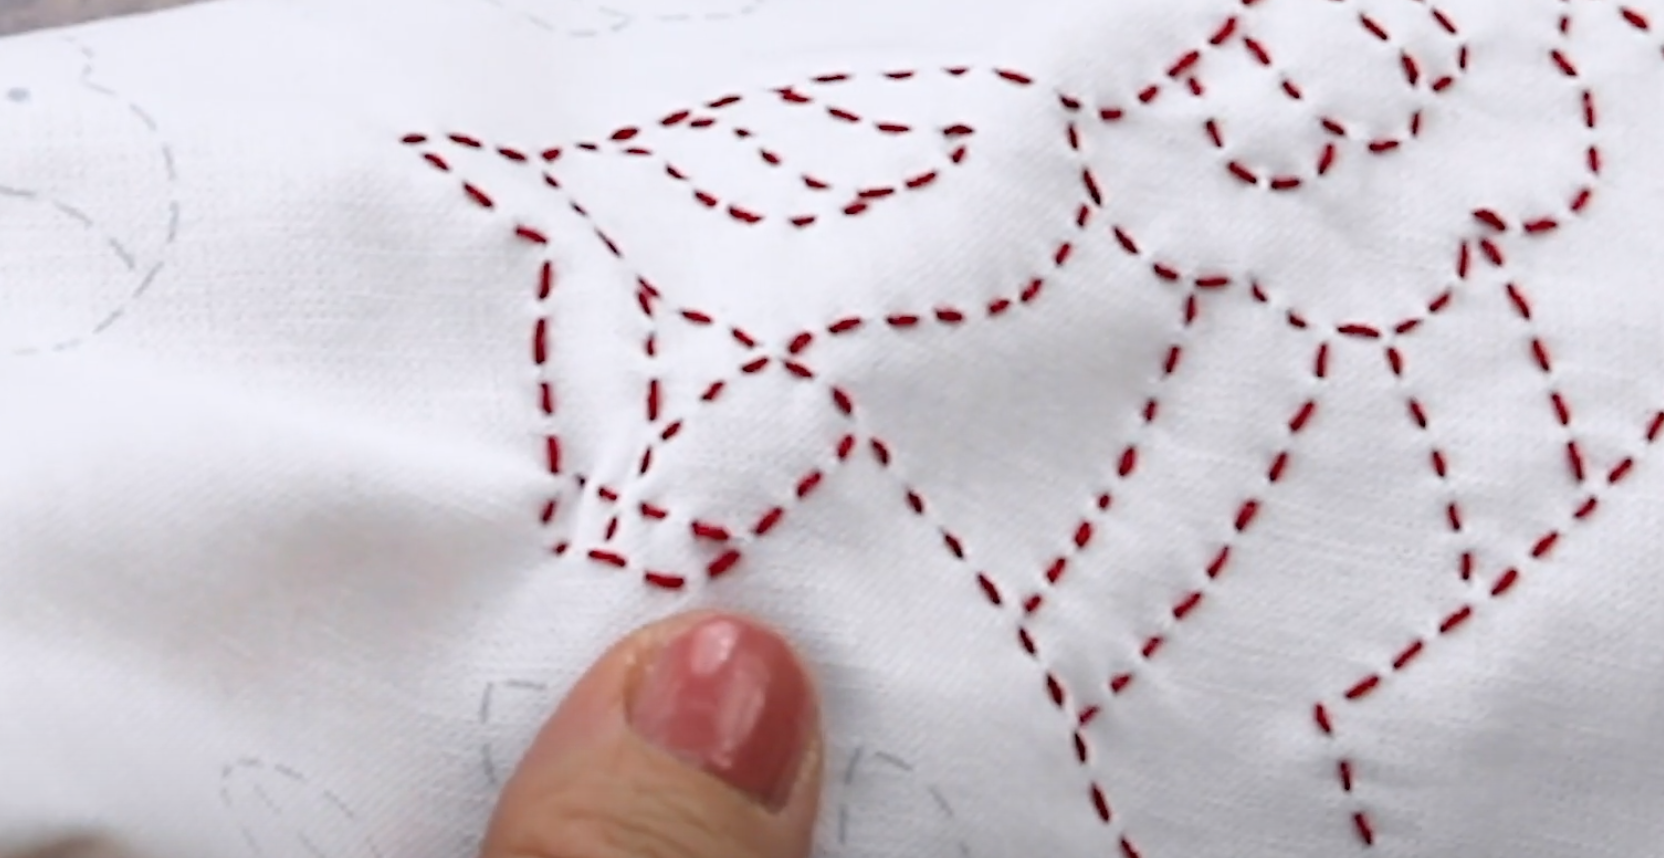
9. Red Work
Red work is a form of American embroidery that traditionally uses red thread and basic stitches to decorate household items. It can be completed with a simple backstitch following a traced pattern to create motifs that can decorate anything from dishcloths to quilts to cushion covers. A 12wt thread stands out beautifully against white fabric, making it ideal for outlining patterns.
10. Sashiko
Sashiko is a Japanese embroidery technique that uses a simple running stitch to create beautiful geometric patterns or imagery. Traditionally they use white thread on an indigo dyed fabric, but these days, you can use any colours you like. Sashiko can be done by hand using a running stitch and a long hand embroidery or sashiko needle. However, you can also purchase a sashiko machine which replicates the look of a hand stitch.
Tell us in the comments where you’ve used 12wt threads, or where you would like to try them in a project! You can find a list of stores that carry WonderFil threads on www.shopwonderfil.com/shop-local/. You can also sign up to receive weekly sewing tips, free patterns, and tutorials in our newsletter. Register by clicking here! You can unsubscribe at any time by clicking the unsubscribe button on the footer of every email you receive.
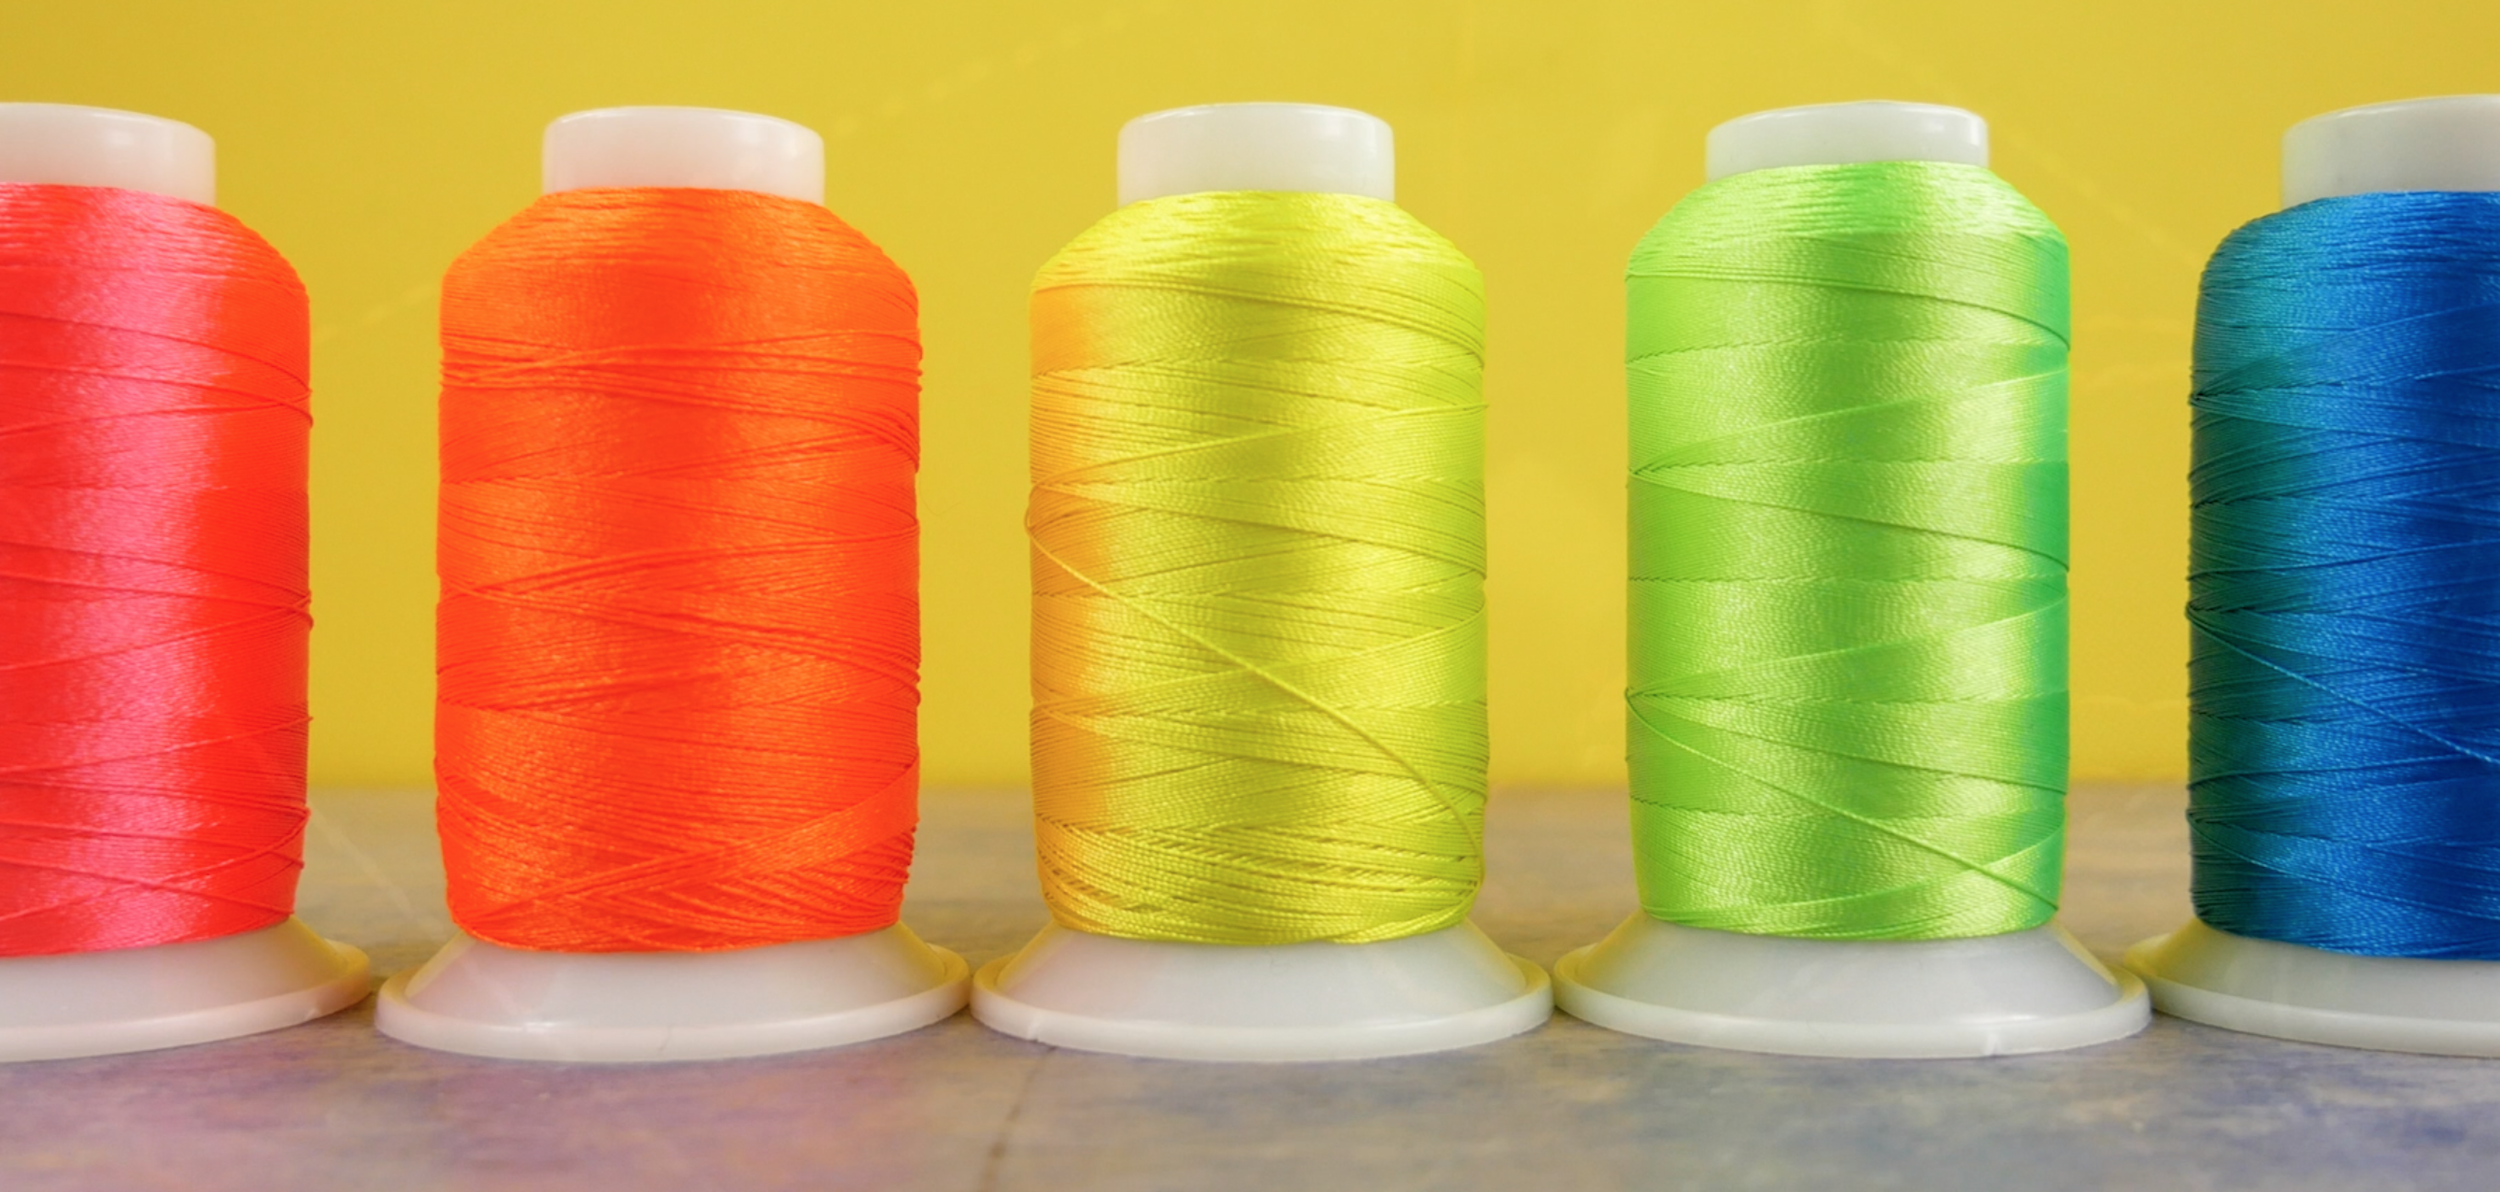
When you want to add something a little extra special to your quilting, FabuLux knows how to bring that shine and color you’ve been looking for. This dazzling 40wt thread is made from trilobal polyester. Most threads are round in shape, but a trilobal polyester thread is actually triangular in shape. This allows the thread to reflect more light off its surface, giving your stitching a soft shine and lustre. It’s one of the many things that makes FabuLux unique.
Not only will this thread stand out more as a result, but it also comes in 5 solid neon colors. Don’t be intimidated, neon actually looks stunning when it’s sewn out, and it’s perfect for making your quilting stand out whether you choose to use it on contrasting fabric, or pair it with like colors for a more subtle look.
FabuLux’s remaining 35 of the total 40 colors are all variegated, with some more subtle tone-on-tone options, and a few others that really want to scream for your attention. Variegated threads are perfect for matching all the colors in your quilt blocks, so you can easily quilt edge to edge without worrying about needing to frequently change your thread colors.
This gorgeous thread is perfect for sewing on longarms, midarms, and regular home sewing machines, and comes in two sizes at 766yds and 3000yd cones. But it isn’t just a favorite for quilting. You can use FabuLux for outlining designs, decorative sewing, and even in the embroidery machine.
One of our favorite things about this thread is that it’s basically lintless. FabuLux has a beautifully clean finish that won’t add a lot of lint build up in your machines. Afterall, there’s no point in spending thousands of dollars on a well-tuned sewing machine, only to gunk it up with lint. And because FabuLux is also extremely strong while also being incredibly soft to the touch, your bed quilts will never have felt, or looked, better.
If you’re inspired to sew with FabuLux, head on over to shopwonderfil.com/shop-local for a list of stores and retailers you can purchase from. You can also sign up to receive weekly sewing tips, free patterns, and tutorials in our newsletter. Register by clicking here! You can unsubscribe at any time by clicking the unsubscribe button on the footer of every email you receive.