You can edit the text in this area, and change where the contact form on the right submits to, by entering edit mode using the modes on the bottom right.
WonderFil brings you the latest news, events, upcoming thread lines and special tips and advice. Follow WonderFil Specialty Threads on our social media: Facebook, Instagram, Twitter, Pinterest, and Youtube.
So you’re on the search for the perfect thread for your next project, You want something that will look, feel and preform perfectly, but where do you start? Double gassed threads offer a luxuriously smooth and beautiful finish because of it’s low lint qualities, let’s talk about why, how it’s done, and why it’s a great idea to start using double gassed cotton threads today!
. Colour theory is a large part of any design process when you’re planning your projects and can elevate your projects a lot when done properly. So, whether you’re creating a fun new quilt, crafting your own garment, or making something small this blog has something for you!
Danish heart ornaments are one of the easiest Christmas ornaments to make yourself. So easy, in fact, that you can get the whole family together to make them!
We collaborated with these 8 designers to bring you 8 thread pack collections with you in mind! You’ll find everything you need for any project with these unique thread collections.
There’s a lot of different kinds of longarm threads out there, so how do you know which one to choose? We’ll go through the best threads for both your machine, and your quilting projects.
For a thread that’s truly out of this world, Starry Night Dazzle is perfect for adding a totally unique texture and colour to your projects. Designed by Kim Rado of Starry Night Hollow, Starry Night Dazzle is a collection of 35 colours from the Dazzle thread line and know how to stand out.
WonderFil’s very own Andrew Ngai appeared on the Quilt Show to talk about a few essential threads that every quilter needs in their tool kit, and we’d like to share this episode with you!
When you’re looking to begin your collection with a new thread line, it’s often worthwhile to shop for packs to get a good assortment of starter colors and a great deal. Whether you’re starting a collection for machine embroidery, hand embellishing, piecing, or quilting, we’ll show you our favorite affordable thread packs that are perfect for picking up all the colors you need to get started with these techniques and more.
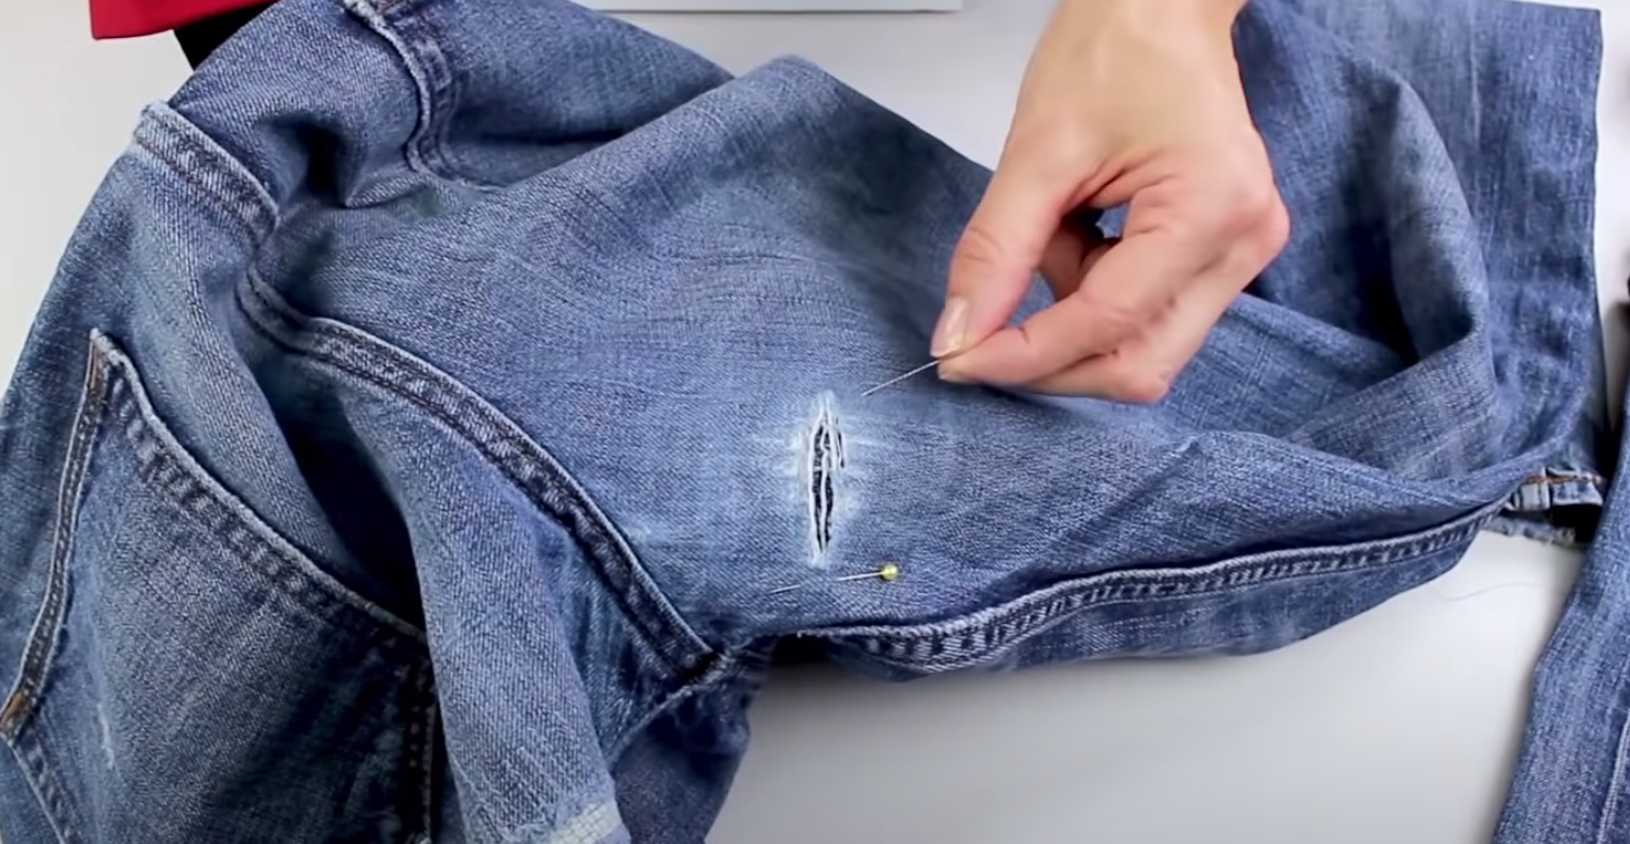
We’re going to demonstrate how to patch a pair of jeans that has a tear on the inner thigh. Anyone who has thighs knows what a pain this problem is, so instead of throwing away an otherwise perfectly good pair of jeans, we’ll show you how to repair them on your sewing machine.
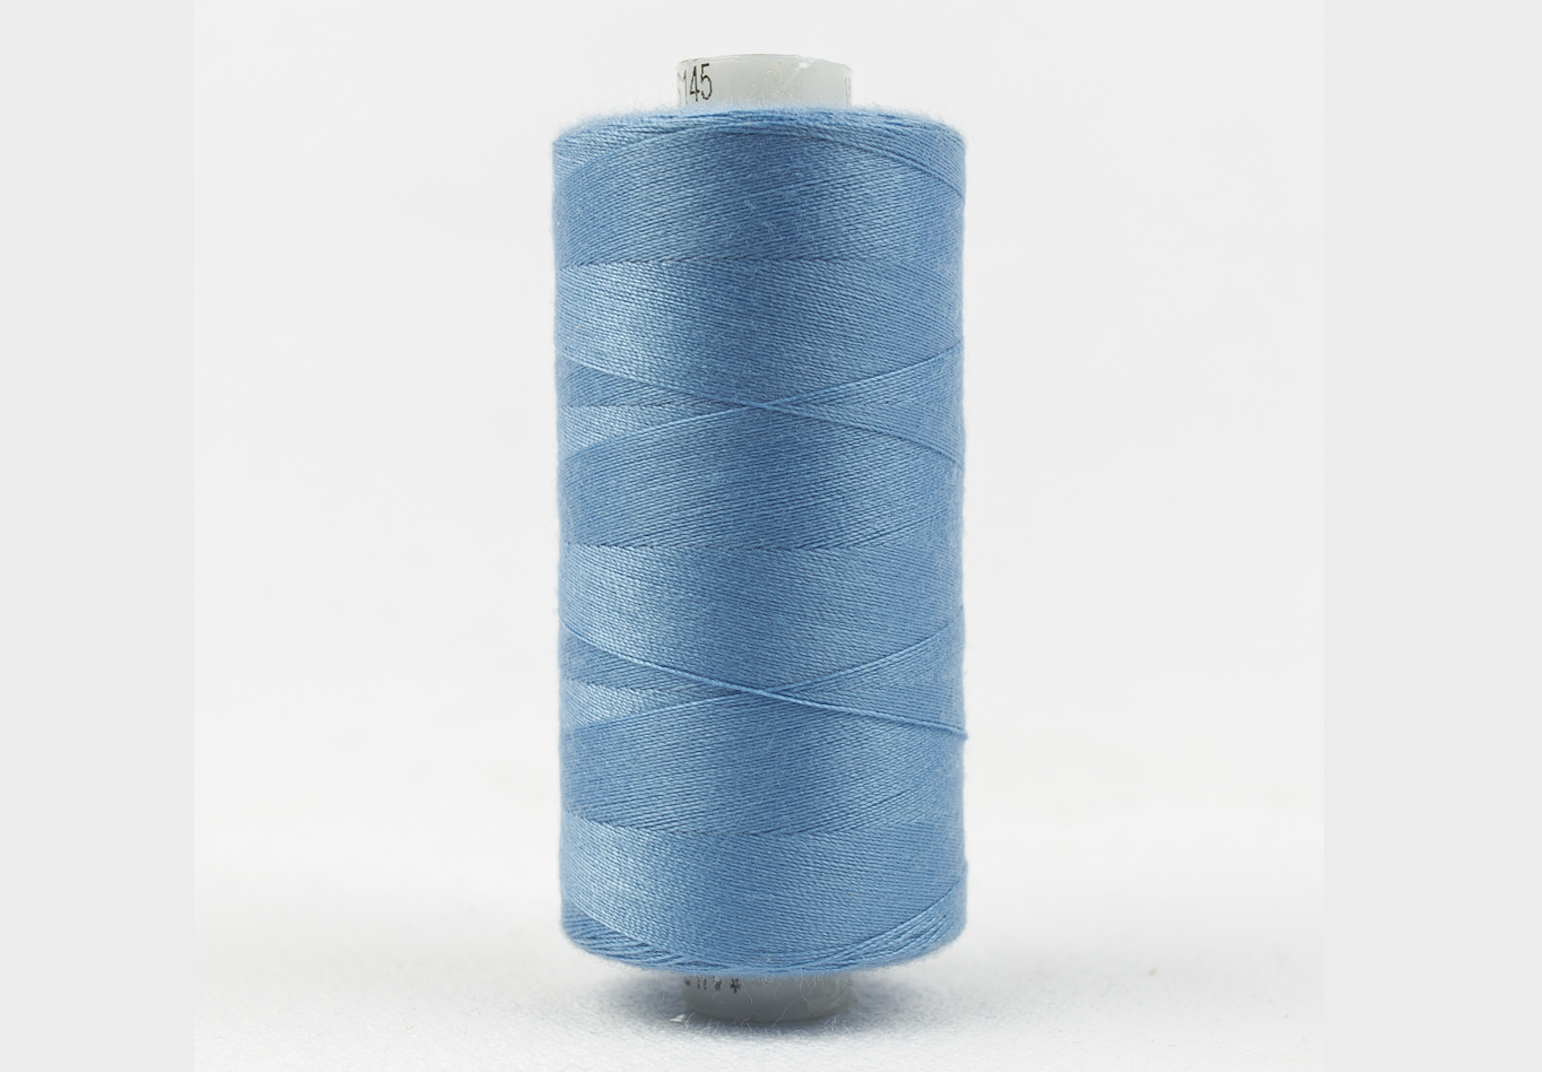
You’ll only need a few basic tools. We’re going to use a soft 40wt polyester thread called Designer, which is great for making repairs on clothing because it’s really strong and flexes with the fabric. Choose a colour that matches your jeans to help it blend in.
We’ll also be using a bobbin prewound with DecoBob, which is a really fine but strong 80wt polyester thread. Since it’s such a fine thread, it will keep the fabric around your patch softer, and since we’ll be going over the area several times, you won’t need to worry about it breaking from wear and tear.
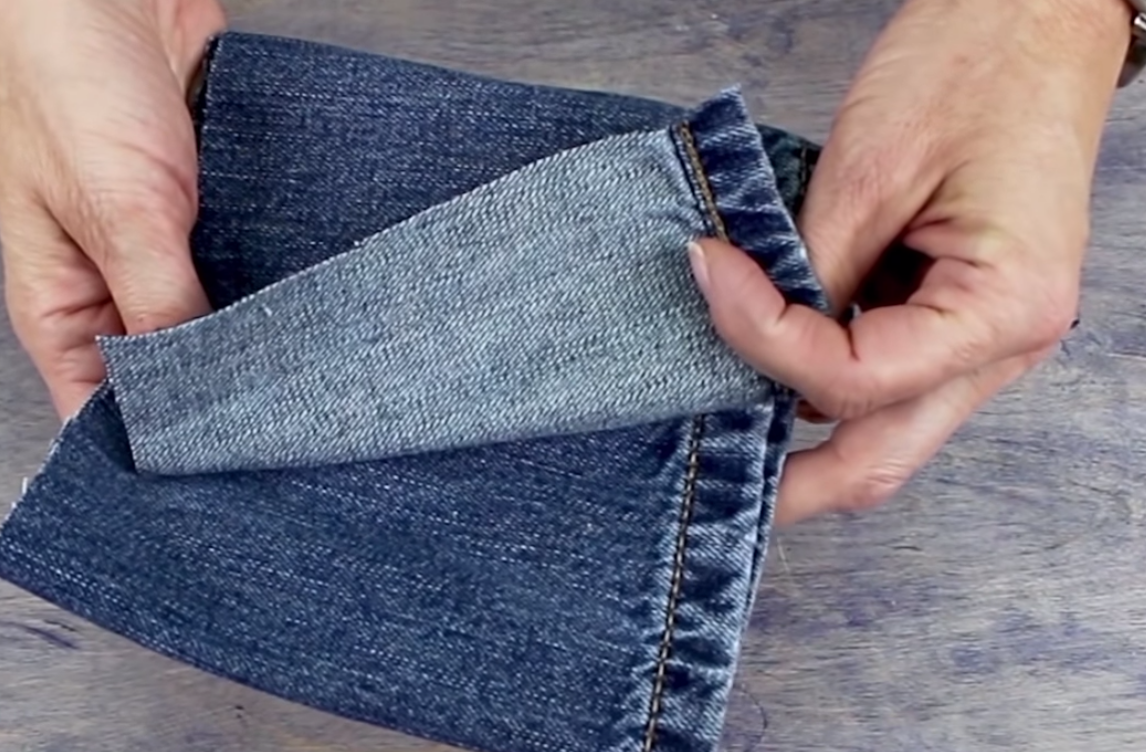
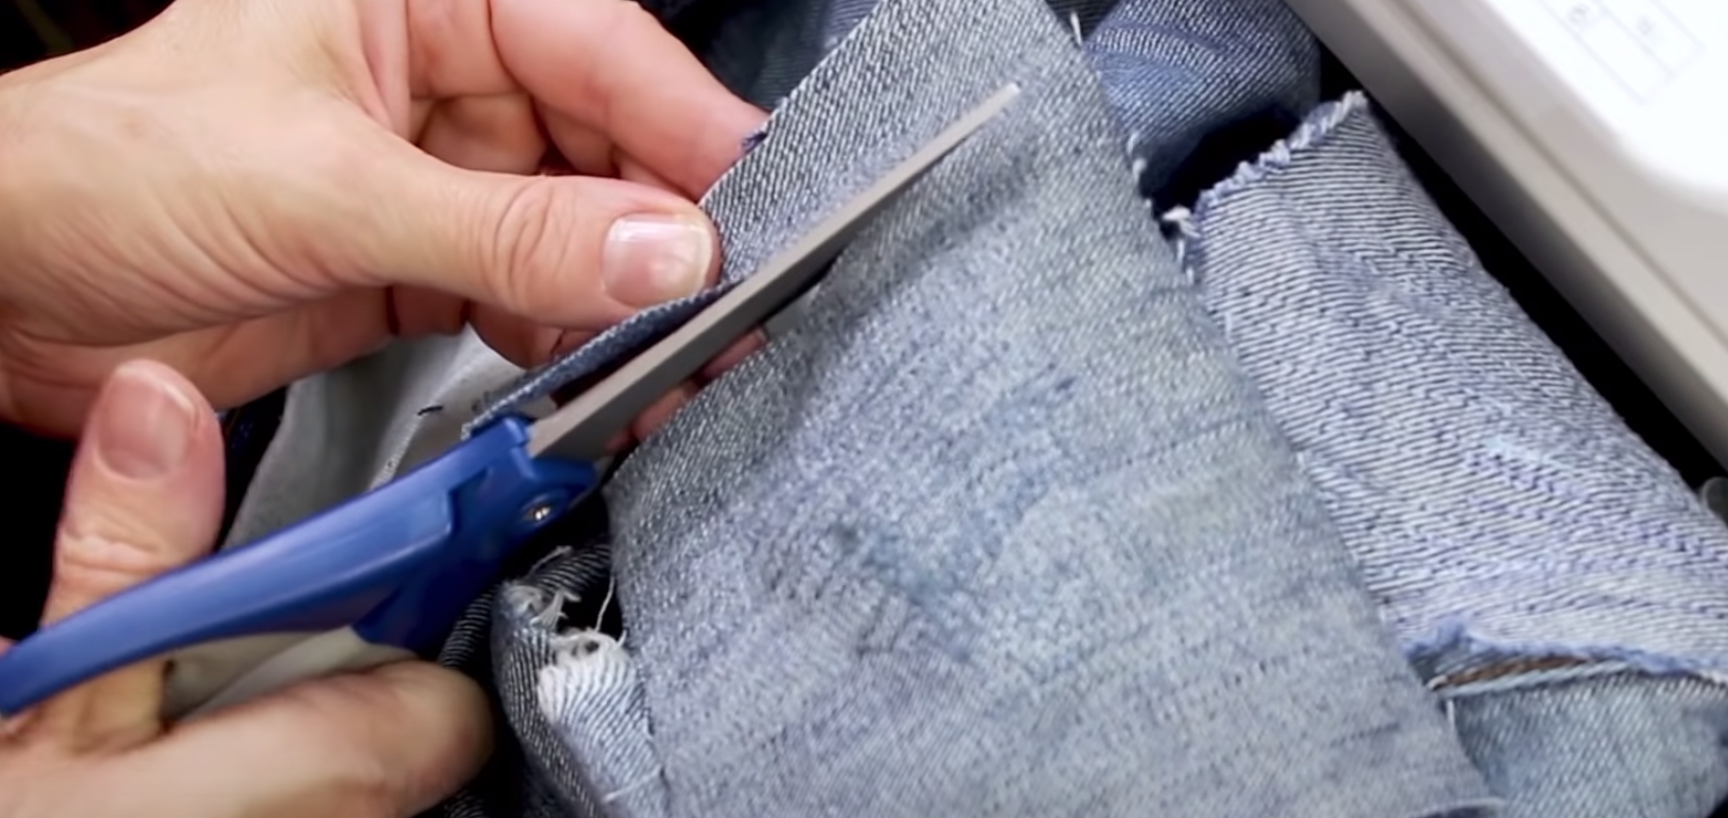
For this project, you’ll need a separate piece of denim or similar thick stretch fabric to patch the hole with. I have a piece cut from another pair of old jeans, and since it will be facing the inside of the hole, it doesn’t matter if the colour doesn’t match. Make sure it’s cut to be about an inch wider than the hole itself. You can always trim it down afterwards.
Tuck the patch centered evenly behind the hole and pin it in place so it doesn’t move. It’s a good idea to position your pins further away from the hole so you have room to stitch over the hole without them getting in the way. Make sure the area around it is flat so you don’t have any ripples. If the hole is in a difficult place to work in, like a knee, you may have to open up a side seam so you can lay the area flat under your machine. Then you can simply close the side seam once your repair is complete. Close up the hole with your patch as much as you can without warping the shape of your fabric.
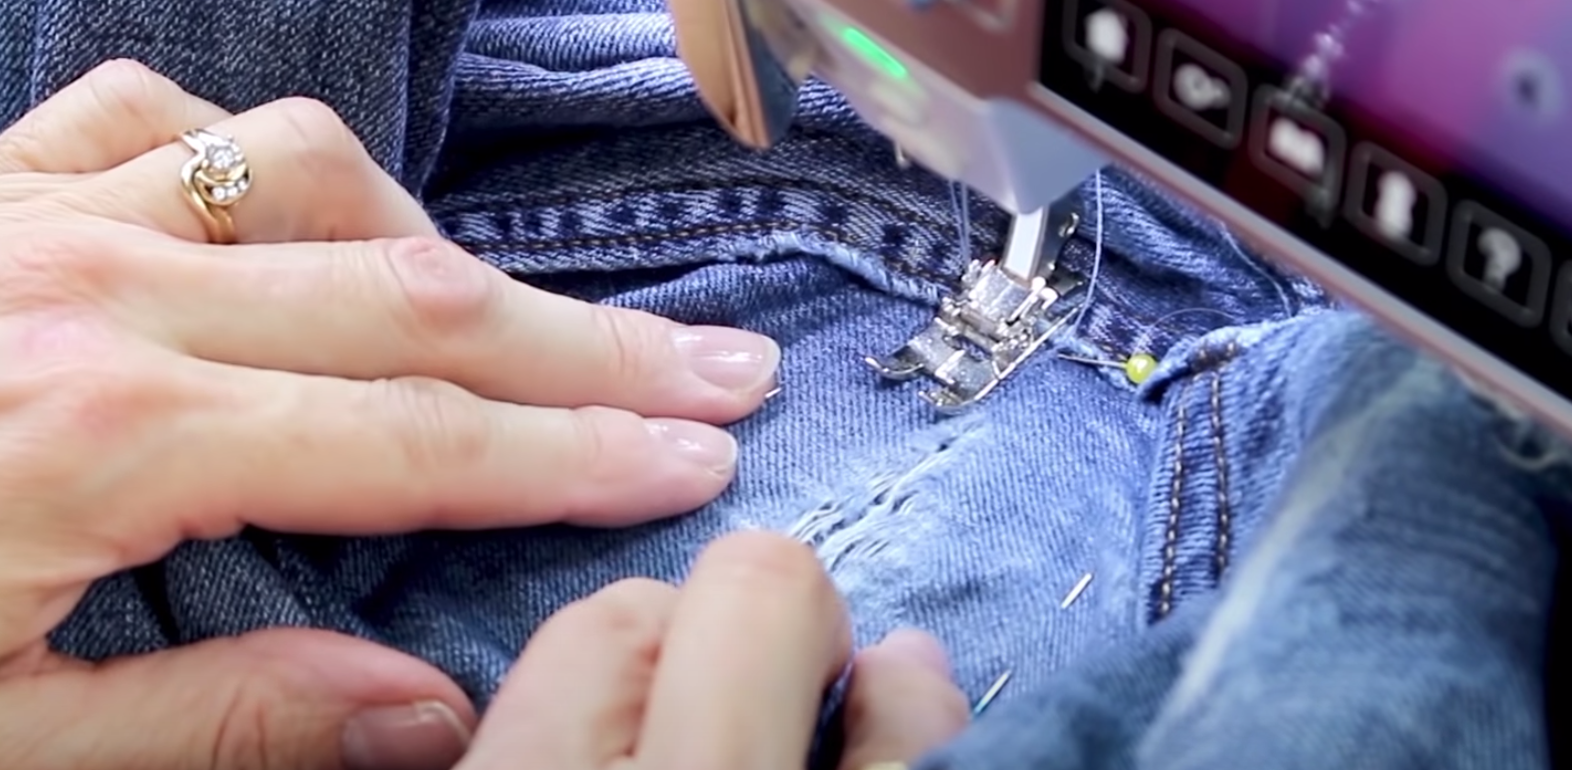
We’re going to use a simple straight stitch on a stitch length of 2.0. If the hole is large, or the area around is very worn and weak, we suggest using a three step zig zag stitch for the repair, as it will better hold down the frayed fabric edges.
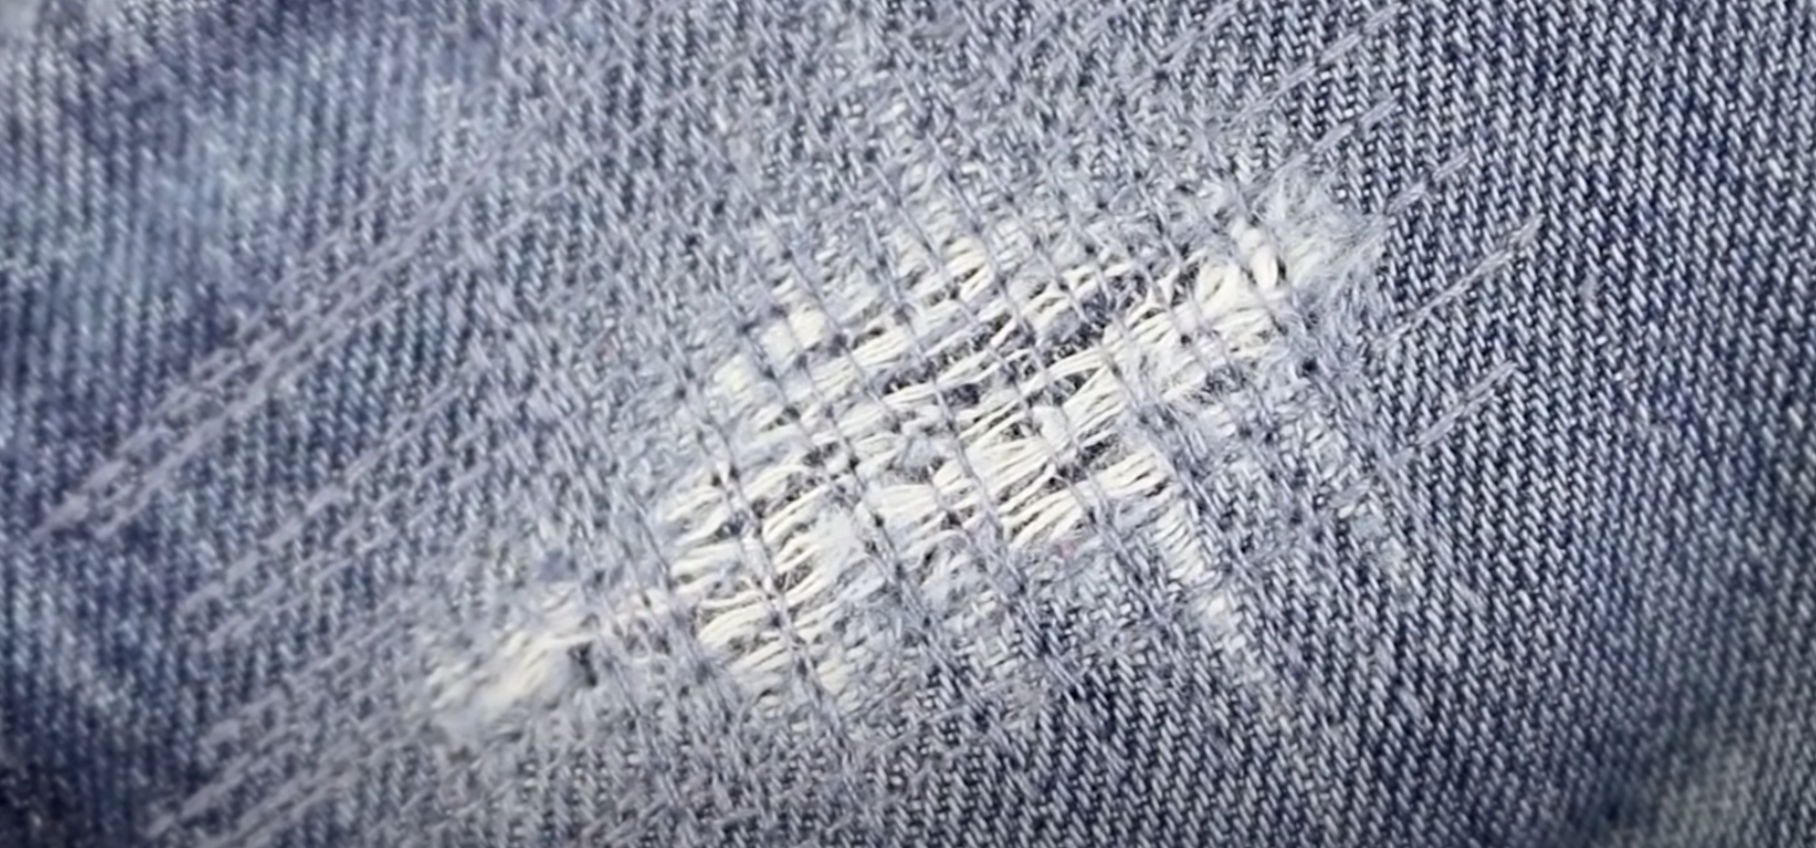
To start, we’re going to sew horizontal lines going back and forth over the hole, using the backstitch button to sew backwards. Once we’ve done that a few times and the hole is more secure, we’ll go over the areas we missed to make sure everything is fully stitched down. Try to catch all the fraying edges to prevent the fabric from fraying further.
To further secure the patch, do a few vertical lines over all the stitching.
Now that we’ve stitched the hole completely closed, we’ll turn the jeans inside out to see how the underside looks. You can trim any excess fabric at this point so it’s more comfortable to wear. The patched area will be a little stiffer, but will soften up after washing and a few wears.
There you have it! When worn, you won’t even be able to see the patch. This super simple technique is a great way to save your jeans and keep your wallet full. If you’re thinking of giving your wardrobe a second life, don’t forget to read about the different ways to re-inspire your old clothing and upcycle them into something fresh!
Inspired to sew with Designer? Find a store in your area that carries WonderFil at http://www.shopwonderfil.ca/shop-local. You can also sign up for our free newsletter to receive more educational sewing tips, tutorials, and free patterns. Register by clicking here! We’ll see you again next time!
French seams are often used on clothing and work best on light weight to medium weight fabrics. In this video, we’ll show you how to make a French seam on both a straight seam and curved seam so you can give your own home sewn clothing a professional look.
To sew the flattest French seams, you’ll need to choose a finer thread. In the top we’ll be using InvisaFil, a 100wt cottonized polyester thread that is incredibly fine. This will ensure the thread doesn’t add any extra bulk in the seams. Choosing a super fine thread like InvisaFil will really help your seams to lay flatter and allow the thread to hide in the fabric so it can’t be seen. This will be especially important when doing French seams with sheer fabric.
InvisaFil 100wt thread.
In the bobbin we’re using DecoBob, an 80wt cottonized polyester thread that is nearly as fine as InvisaFil, but just a little thicker so we can rely on it to hold the seams together well.
Thread your machine and set your stitch length to a shorter 1.8 to accommodate the finer thread.
Sewing Straight French Seams:
To begin, pin your fabric with the wrong sides together. Straight stitch down the length of your seam using a 3/8”, or 1cm, seam allowance. When you’re finished, trim the fabric close to the stitch line to reduce the bulk in your seam.
Now press the seam open to help it lay flatter, then flip it over and press the seam from the other side so you have a nice crisp, flat seam. Fold your fabric so now the right sides are together and push out the seam. Give it another quick press with the iron so it’s lying flat.
We’re now going to sew down the seam at a ¼”, or 5mm, seam allowance. As you can see, the raw edges are tucked away inside this new pocket, and what you have left is a beautiful French seam. You can give it another press with the iron to finish it.
Straight seam on cotton fabric.
Straight seam on sheer fabric.
Sewing Curved French Seams:
To do a curved seam, such as when you would need to insert a sleeve on a shirt, there are a few extra steps. To begin, you’re going to need to help ease in the sleeve cap. You can do this by sewing a line of gathering threads along the sleeve cap.
Change your stitch length to something large like 4. With right sides together, sew along the sleeve cap between the two notches on your pattern with a ½”, or 1.2cm, seam allowance. Don’t backstitch at either end and remember to leave a long tail at both ends.
Pin the sleeve and arm hole together with the wrong sides together, matching the seams and the markings. Then pull the gathering stitches to ease the sleeve cap into the arm hole.
Change your stitch length back to 1.8 and stitch the seam with a 3/8” seam allowance. Check the seam for any tucks and remove them if you find any. Now trim the seam close to the stitch length and press it open so it lays flat.
Fold the fabric so the right sides are facing and sew again at a ¼” or 5mm seam allowance. Once again, check for tucks and remove them if you find any. You can give it a final press so the seam lays nice and crisp, and that’s all there is to it!
Curved seam on cotton fabric.
Curved seam on sheer fabric.
Inspired to sew with InvisaFil and DecoBob? Find a store in your area that carries WonderFil at http://www.shopwonderfil.ca/shop-local. You can also sign up for our free newsletter to receive more educational sewing tips, tutorials, and free patterns. Register by clicking here! We’ll see you again next time!
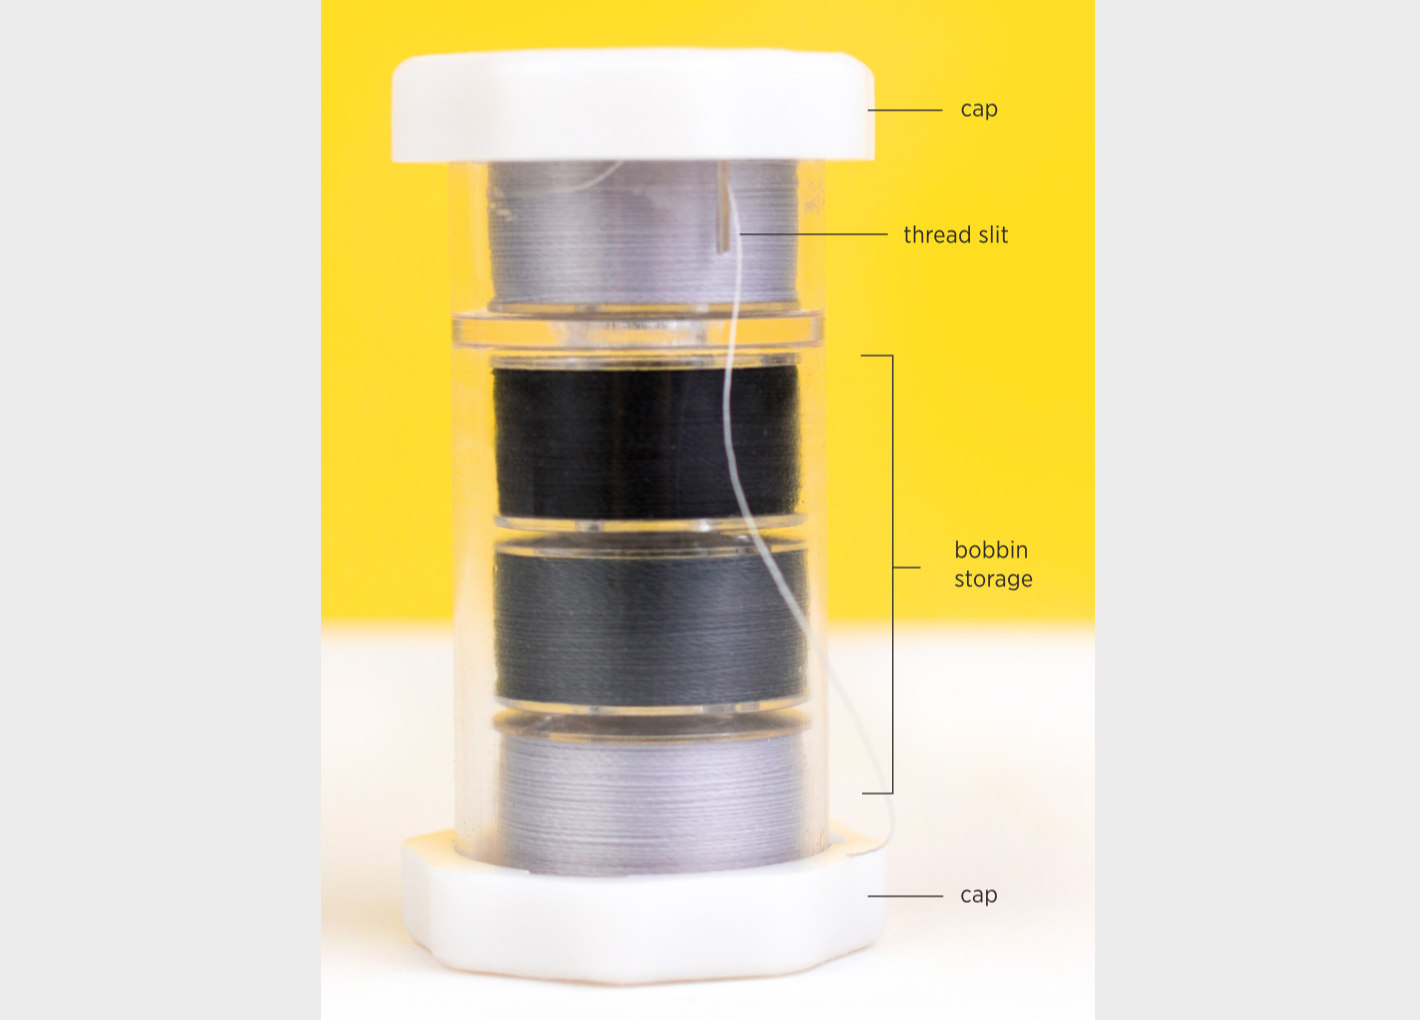
This unique item turns your bobbin into a spool of thread so that there is no need to purchase a separate top thread for small to medium sized projects! The Bobbinator includes a reserve chamber to keep 3 additional bobbins in storage, making it to easily store total of 4 bobbins.
The cap on each end of the device twists off, with one end opening to the storage chamber and the other end opening to the compartment that holds the bobbin you’ll be sewing with as a top thread.
Simply drop a bobbin into the main compartment and draw the thread through the slit. Twist the cap back on and the Bobbinator device and you’re now ready to use the bobbin thread as a top thread on either the horizontal or vertical spool pin. After placing it on your thread pin of choice, simply thread your machine like normal. This handy device lifts the bobbin thread out so that it doesn’t drag against the edge of the bobbin, causing tension changes. This is perfect for bringing a few colours as needed to guild meetings, events, and classes instead of bringing your entire thread box.
But you don’t need to just use it for machine sewing. Each bobbin included with this device is a DecoBob 80wt cottonized poly pre-wound bobbin. This thread makes for an ideal English paper piecing and hand appliqué thread as the super fine thread allows the fabric to sit tighter together and lay flatter, with the thread blending in so it won’t be seen. The Bobbinator makes it easy to keep the thread organized and tidy while you stitch at home or on the go.
DecoBob is also an excellent choice for hand and machine piecing, quilting, machine embroidery and digitized lace designs, button holes, and hidden stitches. Every Bobbinator pack includes 10 DecoBob pre-wound bobbins in your choice of grey or beige colours, as well as 1 Bobbinator device.
It also comes in a special variety made just for Sue Daley exclusively in her signature pink colour and her favourite 10 colours of DecoBob.
Included with every Bobbinator pack are prewound bobbins wound with our super fine 80wt DecoBob™ thread, an excellent bobbin thread that can be paired with any top thread. DecoBob™ is ideal for hand and machine piecing, quilting, machine embroidery and digitized lace designs, button holes, and hidden stitches. Enjoy with your bobbin thread as a top thread!
Want to try a Bobbinator for yourself or as a gift for that special friend? Find a store in your area that carries WonderFil at http://www.shopwonderfil.ca/shop-local. You can also sign up for our free newsletter to receive more educational sewing tips, tutorials, and free patterns. Register by clicking here! We’ll see you again next time!
Crochet is a beautiful way to craft or embellish anything from clothing to housewares, however it can also be a time-consuming technique. Here's an incredible way to replicate the look of crochet by using only your sewing machine and your favourite 12wt thread! It’s easy, fast, and beautiful at half the work involved.
Today we’ve got a pretty cool technique to share with you: using your sewing machine to crochet! While it isn’t real crochet, you can replicate the look of it with any sewing machine that has an overcast stitch, and it’s a lot faster and easier to do than crocheting it yourself by hand.
These are the things you’ll need. We’re going to be using a 12wt rayon and metallic thread called GlaMore™ because we like the soft and shiny material with that little pop of sparkle. This is a beautiful thread that is a fantastic choice for this decorative technique. If you prefer a cotton look, you can also use Spagetti™ or Fruitti™ 12wt cotton threads that come in solid and variegated colours.
You will also need some empty bobbins wound with your thread of choice. How many you’ll need depends on your project, but for reference, if you were machine crocheting all four edges of a standard decorative pillow, you’ll need about 2-3 bobbins if your machine uses Class 15 size bobbins, or 5-6 if your machine uses L size bobbins. But you can always wind more part way through your project if you run out.
We’ll be using a bi-level presser foot which has a raised bottom, making it easier for you to stitch over the heavy thread. An open toe appliqué foot is a good alternative as it will allow you to see very easily where you are stitching.
You may need to loosen your bobbin tension before stitching as you’ll be putting a heavier thread in the bobbin. We always recommend purchasing a second bobbin case for techniques where you will need to adjust the bobbin case tension so as not to accidentally mess up your original factory set casing. For a tutorial on how to do this, check out our other video on how to adjust your bobbin case:
Pin two or three layers of water soluble stabilizer to the edge of the fabric you plan on crocheting. The stabilizer will be the surface you will be stitching over to create your crochet.
Choose an overcast stitch on your machine, preferably one that isn’t too dense.
Choose any side to begin your crochet. If you are stitching all the way around your project, we recommend starting in the middle rather than the corner of your fabric as this will make it easier to line up your crochet when you come back around. Before starting, line up the fabric so that the right side of the needle catches the raw edge of the fabric. Stitch all the way down to the corner and pivot to the next edge.
When you finish stitching around your fabric and return to the beginning, select the zigzag stitch on your machine and shorten the stitch length so that the stitches sit close together (satin stitch). Work your way around your fabric again using the new stitch. This will help hold your crochet together. Make sure to line up your stitch to ensure it fully catches your previous line of stitching.
When you have worked your way around the fabric with the satin stitch and return to the beginning, you can now select the stitch you wish to use to create the crochet design. You can choose any decorative stitch on your machine, however it is better to choose one that doesn't stick out too much on the bottom. Depending on which stitch you choose, the crochet will look different in the end.
Before beginning, ensure the left swing of your needle is on the left side of your satin stitch or you will end up with holes in your crochet. Using the decorative stitch you have chosen, stitch all the way around your fabric once again.
When you have made your way around to the beginning, repeat, using the satin stitch to finish the bottom edge of your stitching, once again working your way around the fabric to the beginning. Repeat these steps of alternating decorative stitch and satin stitch to create several more layers of decorative stitching. The more layers you stitch, the larger the crochet piece you will create. In total, we stitched 4 layers, however you can do more if you want a longer fringe.
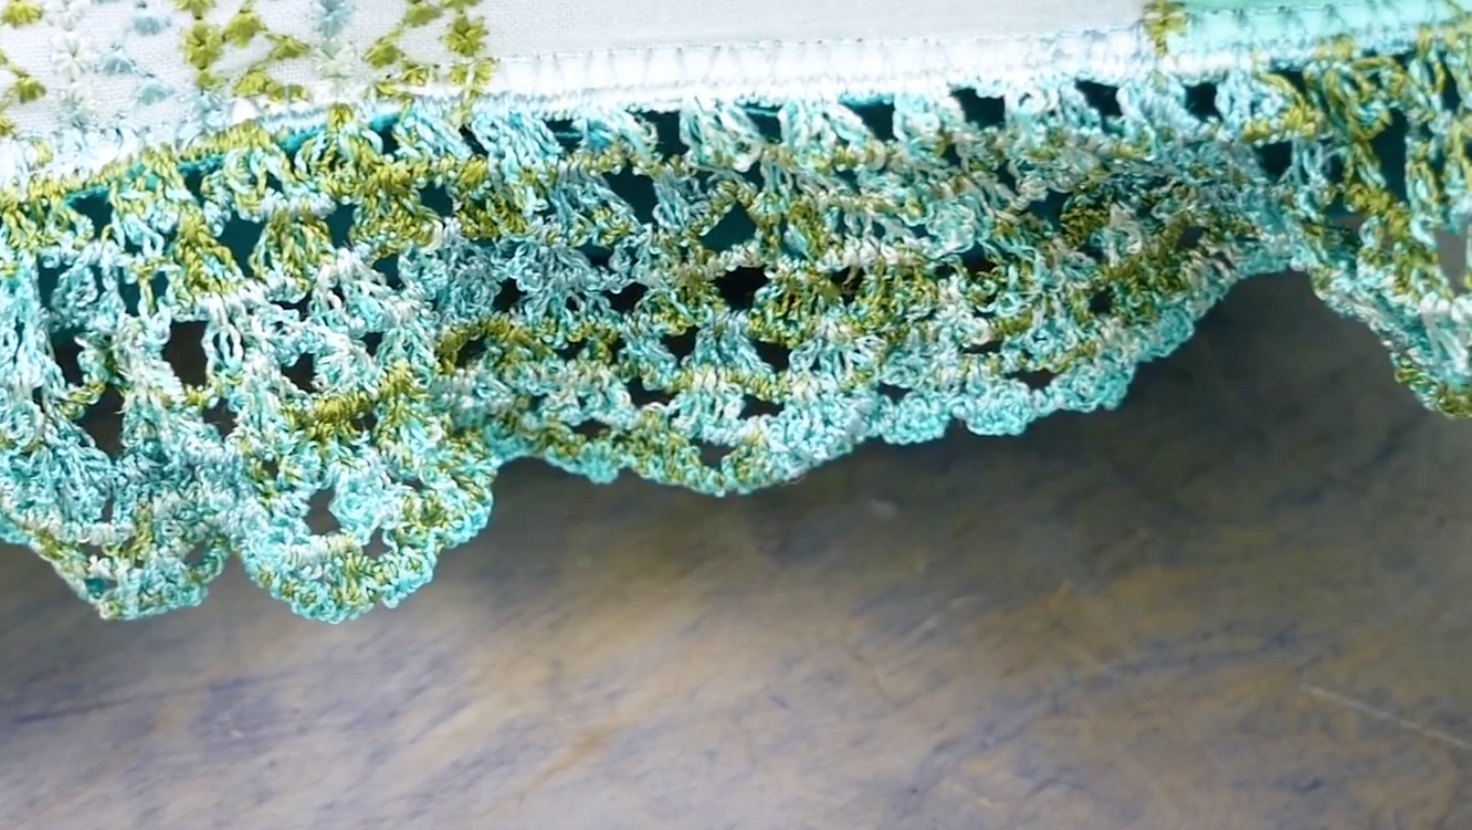
When you have finished stitching your crochet layers, wash your project to remove the stabilizer. Your finished project will have a beautiful crochet edge! This is perfect for adding a beautiful fringe to the bottom of collars, cuffs, or dress. Get creative and show us how you would use this technique in your own projects!
Inspired to sew with WonderFil threads? Find a store in your area that carries WonderFil at www.shopwonderfil.ca/shop-local. You can also sign up for our free newsletter to receive more educational sewing tips, tutorials, and free patterns. Register by clicking here! We’ll see you again next time!